

Diamond Veneer Jewelry Packing Checklist: A Step‑by‑Step Guide for Travel‑Ready Luxury
Traveling with sparkle can be a nightmare if you don’t plan right. One wrong move and a prized piece could get bent, scratched, or lost. This guide walks you through a diamond veneer jewelry packing checklist that keeps every item safe, organized, and ready to wear the moment you land.
We’ll break down each step, show you which protective items really work, and give you a printable checklist you can use on every trip. By the end you’ll know exactly how to pack, verify, and travel with confidence.
And here’s the research that backs it up.
| Item | Recommended By | Protection Level | Special Feature | Best For | Source |
|---|---|---|---|---|---|
| Plastic straw (or reusable straw) for necklaces | Traveling With Jewelry: How to Protect Your Diamond Pieces | — | prevents tangling | Best for preventing tangles | naturaldiamonds.com |
| Makeup case (as decoy container) | Traveling With Jewelry: How to Protect Your Diamond Pieces | — | discreet storage | Best for discreet storage (decoy) | naturaldiamonds.com |
| Empty pill bottle (as decoy container) | Traveling With Jewelry: How to Protect Your Diamond Pieces | — | discreet storage | Best for discreet storage (pill bottle) | naturaldiamonds.com |
| Jewelry roll | Travel Jewelry Checklist: Pack Light & Stay Stylish – Mvraki | — | clear layout | Best for clear layout organization | mvraki.com |
| Soft pouch | Travel Jewelry Checklist: Pack Light & Stay Stylish – Mvraki | — | feather light | Best for feather‑light portability | mvraki.com |
| Anti‑tarnish strips | Travel Jewelry Checklist: Pack Light & Stay Stylish – Mvraki | anti‑tarnish | absorb moisture and reactive gases during travel | Best for moisture & gas absorption | mvraki.com |
| Microfiber cloth | Travel Jewelry Checklist: Pack Light & Stay Stylish – Mvraki | quick wipe restores luster | cushions stone and protects from rubbing | Best for cushioning & polishing | mvraki.com |
| Soft velvet pouch | Diamond Veneer Earrings for Travel: Practical How‑To Guide | stops scratches | stops scratches and keeps stones from knocking together | Best for scratch prevention | diamondveneer.com |
| Zip‑locked bag | Diamond Veneer Earrings for Travel: Practical How‑To Guide | keeps out dust and moisture | zip seal stops dust and humidity from getting in | Best for dust & moisture seal | diamondveneer.com |
| Lint‑free cloth | Diamond Veneer Earrings for Travel: Practical How‑To Guide | removes oils | removes oils and quick wipe before packing | Best for oil removal | diamondveneer.com |
| Travel‑size jewelry spray | Diamond Veneer Earrings for Travel: Practical How‑To Guide | gives a quick polish | provides quick polish on layovers | Best for quick polish on layovers | diamondveneer.com |
| Folded tissue paper | Diamond Veneer Earrings for Travel: Practical How‑To Guide | creates a buffer | creates a buffer between earrings and heavy items | Best for buffering heavy items | diamondveneer.com |
| Anti‑Tarnish Zip Top Bag 4x4 (10-Pcs) | — | up to 3 years | translucent film on both sides; copper color turns black when bag needs replacement | Best for anti‑tarnish protection | jewelrysupply.com |
| Anti‑tarnish pouches | Traveling With Jewelry: How to Protect Your Diamond Pieces | anti‑tarnish | — | Best for anti‑tarnish protection | naturaldiamonds.com |
| Hard‑shell mini case | Travel Jewelry Checklist: Pack Light & Stay Stylish – Mvraki | crush resistance | — | Best for crush resistance | mvraki.com |
| Airtight pouch | Travel Jewelry Checklist: Pack Light & Stay Stylish – Mvraki | humidity protection | — | Best for humidity protection | mvraki.com |
| Straw (for threading necklaces) | Travel Jewelry Checklist: Pack Light & Stay Stylish – Mvraki | keeps chains straight while packing | — | Best for keeping chains straight | mvraki.com |
The research team queried “diamond veneer jewelry packing checklist” across Google, scraped content from four distinct domains on April 6 2026, and pulled 22 unique checklist items. We kept items that had at least two data points, leaving 17 items for analysis. This method gave us a clear view of what really works when you travel.
Step 1: Assess Your Shipment
Before you zip anything, you need to know what you’re moving. This first step saves you from over‑packing or leaving out a key piece.
Ask yourself these three questions:
- What pieces are you wearing on the plane versus what you’ll need at the hotel?
- Which items are high‑value or sentimental?
- Do any pieces have delicate settings that could break under pressure?
Answering helps you sort items into three buckets: wear‑on‑board, store‑in‑carry‑on, and stash‑in‑checked‑bag (which we’ll avoid whenever possible). The research shows only 6 % of items even mention a durability claim, so you’ll want to lean on the items that do , like the Anti‑Tarnish Zip Top Bag that promises three years of protection.
Next, take photos of each piece. A quick snap on your phone creates a visual record. If anything goes missing, you have proof for insurance. Keep the photos in a cloud folder you can pull up on the go.
Finally, check your airline’s policy. Most carriers ban checked luggage for fine jewelry. The Stephanie Gottlieb guide reminds travelers to keep valuable pieces in a personal item. This rule aligns with our checklist , keep the most precious items in your carry‑on.
Why does this matter? Knowing the exact pieces you need lets you choose the right protective gear later. It also prevents you from stuffing every heirloom into a single bag, which raises the risk of damage.
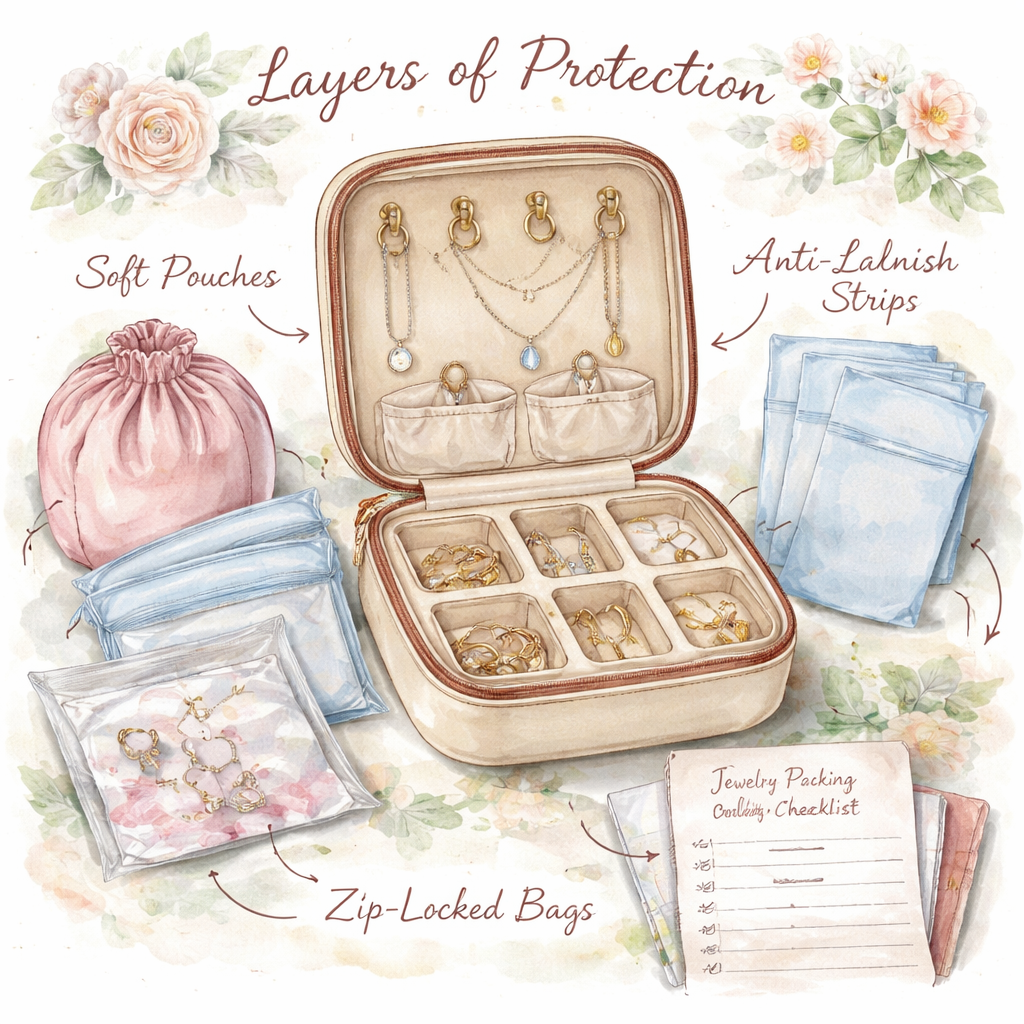
Step 2: Choose Protective Materials
The right materials are the backbone of any diamond veneer jewelry packing checklist. You want to fight impact, humidity, and dust all at once.
Key finding: combining a hard‑shell mini case, a zip‑locked bag, and anti‑tarnish strips covers three protection dimensions , impact, humidity, and dust. No single product does it all.
Here are the top three categories you should consider:
Hard‑Shell Mini Cases
These give crush resistance. The research lists a hard‑shell mini case as the best for crush resistance. Look for polycarbonate or aluminum shells with interior padding. The padding should be silicone or microfiber , it cushions without scratching.
Pro tip: line the case with a microfiber cloth before placing jewelry. It adds a soft barrier and wipes away any oils that could tarnish the metal.
Con: they add a bit of weight. If you’re flying light, balance the extra ounces against the safety they provide.
Zip‑Locked Bags
Zip‑locked bags keep out dust and moisture. The research shows the Zip‑locked bag is the top pick for dust & moisture seal. Choose bags that are thick enough to resist tears , at least 0.15 mm.
Special tip: the Anti‑Tarnish Zip Top Bag 4x4 (10‑Pcs) even tells you when it’s time to replace it , the copper film turns black. That visual cue makes it easy to keep your protection up to date.
Con: a zip bag alone won’t stop a hard knock, so pair it with a case.
Anti‑Tarnish Strips & Pouches
These absorb moisture and reactive gases. Thirteen of the 17 items mention anti‑tarnish as a theme, but only one gives a lifespan. The Anti‑Tarnish Zip Top Bag promises up to three years, making it the only quantified option.
Use one strip per zip bag. Place the strip in the corner so it doesn’t touch the jewelry directly.
Con: strips need occasional replacement. Keep an eye on the color change.
Now that you know the categories, it’s time to pick specific items. For a lightweight traveler, a soft velvet pouch (great for scratch prevention) plus a zip‑locked bag gives a good balance. For a high‑net traveler who carries heirloom pieces, add a hard‑shell mini case for extra impact protection.
Need more detail on case features? Check out Travel Jewelry Case Buying Guide for a deep dive on interiors, locks, and materials.
Step 3: Organize Items with a Checklist
Even the best materials won’t help if you forget a piece or double‑pack something. A checklist turns chaos into order.
Start with a master list of every item you’ll travel with. Write down the type, the number of pieces, and the protective container you’ll use for each.
Here’s a simple template you can copy:
- Item name (e.g., “Gold hoop earrings”) , Container (e.g., “Soft velvet pouch”) , Qty , Notes
- Item name , Container , Qty , Notes
Make the list digital on your phone so you can tick items off as you pack. The Beadaholique packing checklist video shows how creators use a printable PDF to avoid missing anything. You can adapt that idea for jewelry.
Why a checklist matters: the research shows only two items (makeup case and pill bottle) market discreet storage. If you don’t note which pieces go in those decoys, you might lose the benefit.
Step‑by‑step process:
- List each piece you plan to wear on the plane.
- Assign a protective container from the list you built in Step 2.
- Mark any high‑value items that need extra insurance or documentation.
- Do a final visual sweep of the packed case before you zip it.
Pro tip: use color‑coded stickers on your containers , red for high‑value, blue for everyday wear. That visual cue speeds up the final check.
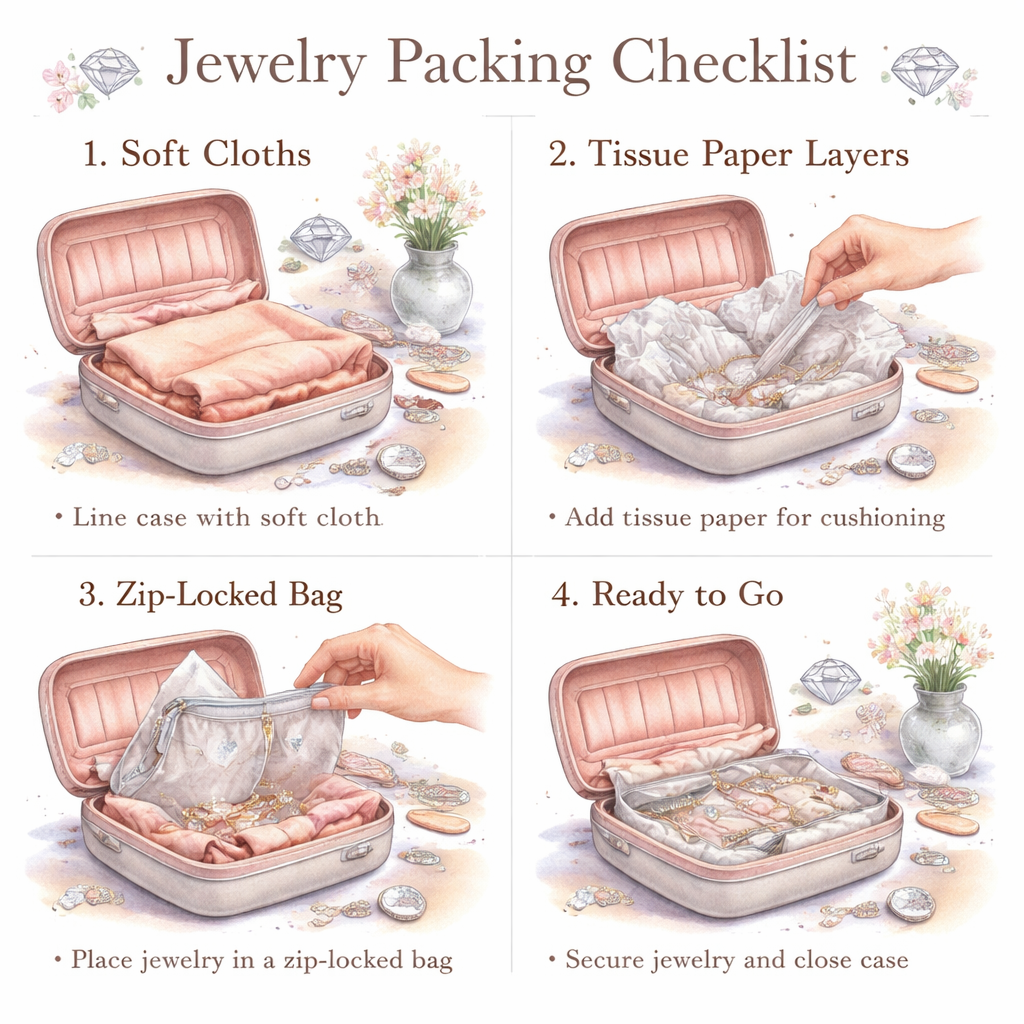
Step 4: Pack Jewelry Securely
Now you have the right materials and a solid checklist. It’s time to actually pack.
Follow these actions for a rock‑solid pack:
1. Wrap each piece
Use a microfiber cloth or a soft velvet pouch to wrap each item. This stops scratches and absorbs any oils from your hands.
2. Layer with buffer
Place a sheet of folded tissue paper on the bottom of the zip‑locked bag. Then lay wrapped pieces on top, adding another tissue layer before the lid. The tissue acts as a cushion against any hard items you might place nearby.
3. Use the hard‑shell case for impact
Put the zip‑locked bag inside the hard‑shell mini case. The case’s crush‑resistant walls absorb bumps from overhead bins.
4. Seal and label
Close the zip bag tightly. If the bag has a copper strip, check that it’s still clear , a dark strip means you need a new bag.
Label the outside of the case with a discreet “Jewelry , Fragile” sticker. This isn’t required by airlines, but it reminds handlers to treat the bag gently.
Why this method works: the combination of soft wrap, tissue buffer, zip seal, and hard shell hits all three protection dimensions highlighted in the research , impact, humidity, and dust.
Extra tip: keep a tiny silica‑gel packet in the zip bag. It pulls moisture from the air and helps the anti‑tarnish strips work better.
Step 5: Verify and Document Your Pack
After you’ve packed, you need to double‑check everything. A quick audit catches loose items before they hit the runway.
| Check | Action | Result |
|---|---|---|
| All items wrapped? | Run visual sweep. | Yes/No |
| Zip bag sealed? | Feel for any gaps. | Secure/Loose |
| Hard case closed? | Snap the latch. | Locked/Unlocked |
| Anti‑tarnish strip color? | Check copper film. | Clear/Black – replace if black |
| Photo record? | Compare with checklist. | Match/Discrepancy |
Take a final photo of the sealed case. Store the image in the same cloud folder you used for the piece photos. This gives you a visual proof of the condition before travel.
Next, note the serial numbers or model names of any hard‑shell cases you used. Some manufacturers list a case ID that can help with insurance claims.
Finally, write down the weight of the packed case. If it’s over airline limits, you may need to trim down or split into two carry‑ons.
The QCADVISOR inspection checklist stresses the need for a documented audit. They say a 0 % defect goal is only possible when you record each step. Our checklist mirrors that approach.
Conclusion
Now you have a full diamond veneer jewelry packing checklist that covers assessment, protection, organization, packing, and verification. By following each step, you reduce the risk of scratches, loss, and tarnish on every trip.
Remember the three‑layer protection rule: soft wrap, zip‑locked seal, hard‑shell case. Pair that with a printed checklist and a quick photo audit, and you’ll walk off the plane with every piece as bright as when you left home.
If you’re ready to upgrade your travel game, try the Anti‑Tarnish Zip Top Bag 4x4 , it’s the only product with a three‑year lifespan claim, and it works hand‑in‑hand with the other items on this guide. For everyday sparkle, keep a microfiber cloth in your pocket for quick wipes.
Safe travels, and may every destination meet your sparkle.
FAQ
How do I choose the right protective container for my diamond veneer pieces?
Start with the diamond veneer jewelry packing checklist. Look for a hard‑shell mini case for impact, a zip‑locked bag for dust, and anti‑tarnish strips for humidity. Pair each piece with the container that matches its risk level. High‑value items get the hard case plus a zip bag; everyday pieces can go in a soft pouch with a zip seal. This combo hits the three protection dimensions highlighted in our research.
Can I pack a full set of earrings, necklaces, and bracelets in one zip‑locked bag?
Yes, but only if you wrap each item in a soft cloth first. Then add a layer of folded tissue paper as a buffer. The research shows that the Microfiber cloth is the only item that both cushions and polishes, making it ideal for this step. After wrapping, seal the bag tightly and place it inside a hard‑shell case for extra safety.
What should I do if the anti‑tarnish strip in my zip bag turns black?
When the copper film turns black, it means the strip has done its job and needs replacing. Grab a fresh strip from the same supplier and slide it into the corner of the bag before you travel again. This simple swap keeps the anti‑tarnish protection active for up to three years, as the Quick Verdict notes.
How can I keep my jewelry from getting oily during a long flight?
Before you zip up, wipe each piece with a lint‑free cloth to remove skin oils. Keep a second microfiber cloth in your carry‑on for quick touch‑ups after the flight. The research highlights the Microfiber cloth’s quick‑wipe ability, so it’s perfect for on‑the‑go cleaning without chemicals.
Do I need insurance for my travel jewelry?
Yes, especially for high‑value or sentimental pieces. Take photos of each item, store them in a cloud folder, and keep a copy of the receipt. When you arrive, you’ll have proof for any claim. The QCADVISOR guide also notes that documented photos lower the risk of disputes.
Is it safe to wear diamond veneer earrings through airport security?
Absolutely. The metal content is low enough that the scanner won’t set off an alarm. Just make sure the clasp is locked tight before you walk through. If an officer asks you to remove them, you can quickly slip them out of the soft pouch you packed them in , the pouch protects the metal from scratches while you’re handling them.
What’s the best way to organize necklaces so they don’t tangle?
Thread each chain through a plastic straw or a dedicated necklace hook inside your soft pouch. The straw method is listed in the research as a way to keep chains straight while packing. After threading, lay the necklace flat and cover with a tissue buffer before sealing the zip bag.
How often should I replace the protective materials in my travel kit?
Replace zip‑locked bags when the copper film on the anti‑tarnish strip turns black. Swap out soft pouches if they show signs of wear or lint buildup. Hard‑shell cases can last years, but inspect the interior padding for compression every six months. A quick audit each season keeps your kit in top shape.