

How to Clean Sterling Silver Jewelry at Home: Your Step‑by‑Step 2026 Guide
Ever notice how that once‑sparkling silver necklace starts to look a bit dull after a long day? If you’re like most travelers who love to keep their style sharp on the go, you’re probably wondering how to clean sterling silver jewelry at home without risking damage.
The good news? You don’t need a fancy salon or a pricey cleaning kit—just a few household items you already have and a gentle technique that keeps that shine alive for years.
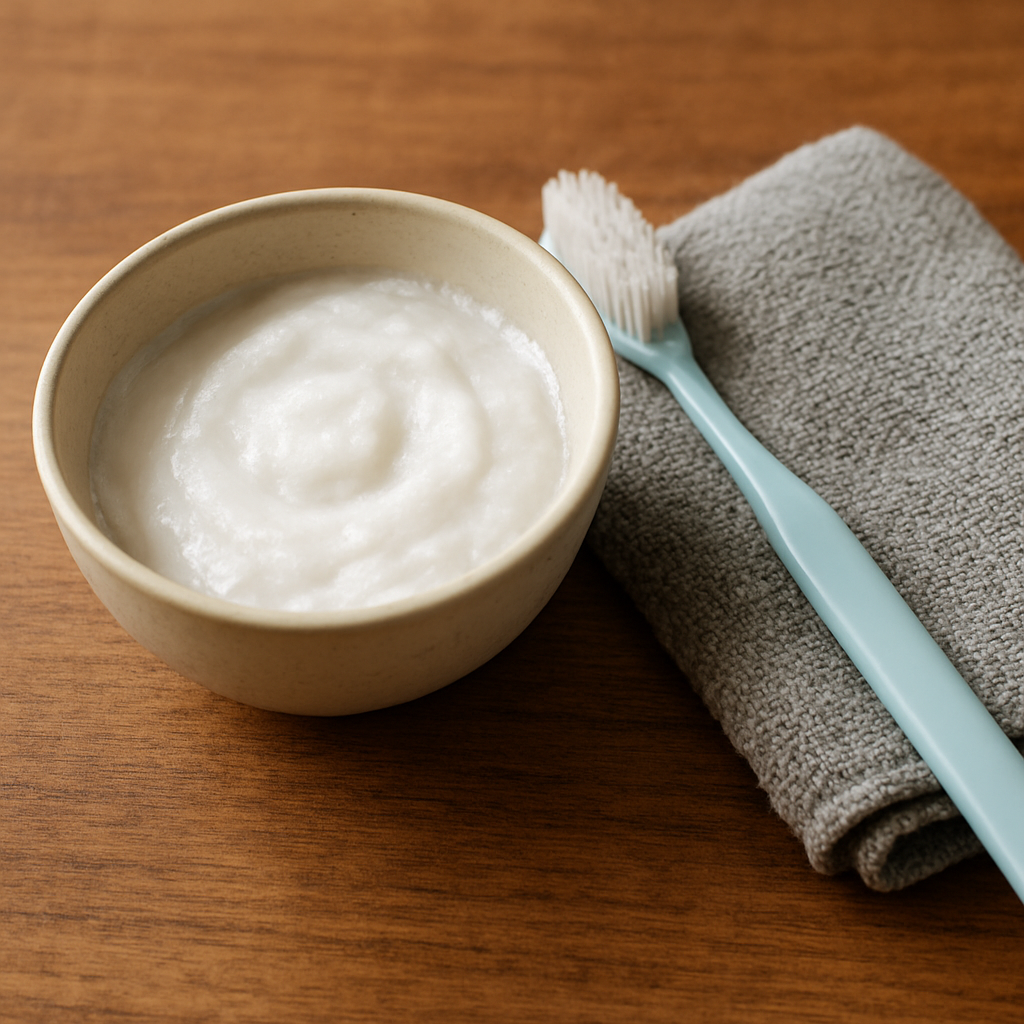
First, start by rinsing the piece in lukewarm water mixed with a drop of mild dish soap. Gently swirl it in a soft‑bristle toothbrush; the bristles get into all the nooks where grime likes to hide.
After a quick rinse, pat it dry with a clean, microfiber cloth—those tiny fibers lift away tarnish instead of scratching the surface.
For a deeper polish, mix equal parts white vinegar and baking soda into a paste, apply a thin layer, let it sit for 30 seconds, then wipe clean. This simple chemical reaction dissolves the oxides that cause dullness without harming the metal.
If you’re carrying a travel‑size bottle for your cleaning solution, a custom Quench bottle can keep your mix fresh and portable. The sealed design prevents leaks, and the sleek look fits right into your travel kit.
And don’t forget that a polished pendant can make your outfit pop—take a look at our 3CT Diamond Veneer Cubic Zirconia Pendant for inspiration on how a little shine can elevate any look.
So next time you pause at a café or airport lounge, grab that small bottle, whip up a quick cleaning mix, and let your silver sparkle like it’s brand new. It’s that simple. And remember, a quick wipe after each use keeps tarnish at bay.
TL;DR
Clean sterling silver at home with dish‑soap rinse, a soft toothbrush for crevices, and a 30‑second vinegar‑baking‑soda paste that dissolves tarnish. Finish with a microfiber wipe after each wear and your pieces shine like new—just like the polished pendant from our travel‑ready collection, turning any outfit into effortless chic today.
Step 1: Gather Your Cleaning Supplies
Before you even touch that gleaming pendant, you need the right tools. Think of it as packing a tiny kit for your jewelry’s daily adventure. You’ll only need a few household items, but putting them together in a smart way saves time and keeps that sparkle alive.
Start with a soft‑bristle toothbrush. It’s the unsung hero that can reach every nudge of a necklace chain or the tight loops of a ring. A regular toothbrush is fine, but a small, old one with gentle bristles is best to avoid scratches. If you’re traveling, a tiny brush that fits in your tote or backpack is a lifesaver.
Next, grab a clean microfiber cloth. These tiny fibers lift tarnish without scratching the metal—contrast that with a rough towel that can leave invisible marks. A fresh cloth per cleaning session keeps residue from building up.
For the cleaning solution, you have two simple options. A drop of mild dish soap in lukewarm water is the quickest fix for everyday grime. Mix a teaspoon of soap into a cup of water, stir until frothy, and you’ve got a gentle rinse that won’t harm the silver.
For a deeper polish, you’ll need white vinegar and baking soda. These common pantry items react to break down tarnish. Mix equal parts into a paste, apply a thin layer, let it sit 30 seconds, then wipe away with the toothbrush and cloth. The paste works like a mini scrub that lifts oxides without harsh chemicals.
Now, think about portability. A travel‑size bottle makes it easy to carry your solution. The Quench Bottle from Quench Bottle is a popular choice—its leak‑proof design keeps your mixture fresh and leak‑free. It’s the perfect companion for the Jet‑setter who’s always on the go.
If you prefer a reusable bottle, check out the compact model from Umbrello. Its sleek shape fits into a handbag or a bike pannier without taking up space. This way, whenever you pause at a café or airport lounge, you can whip up a quick clean without hunting for a sink.
And if you’re planning a bike tour or a road trip, a small pouch of cleaning paste can travel with you. A handy kit from Top Bike Tours Portugal often includes travel‑friendly cleaning supplies, so you can keep your jewelry fresh even when you’re miles from home.
Here’s a quick checklist to keep in mind:
- Soft‑bristle toothbrush
- Microfiber cloth
- Dish soap + lukewarm water
- White vinegar & baking soda paste
- Leak‑proof travel bottle (Quench or Umbrello)
- Optional travel pouch (Bike tours kit)
When you’re ready, you’ll feel confident that every piece you own is set to shine again. Just a few minutes, a couple of simple tools, and you’re back in business—ready to wear your favorite silver on any adventure.
Remember, the goal is to make cleaning feel like a quick stop, not a chore. Once you have your kit ready, the rest of the steps are a breeze—and your silver will stay dazzling, no matter where your travels take you.
Step 2: Prepare a Gentle Cleaning Solution
So now that you’ve got your kit ready, it’s time to make the magic potion that will bring that tarnish back to life.
When it comes to sterling silver, a gentle solution is all you need. Over‑zealous scrubbing or strong acids can dull the metal’s natural luster.
Here’s what you’ll need: a small bowl, lukewarm water, a drop of mild dish soap, a pinch of white vinegar, a teaspoon of baking soda, and a clean microfiber cloth.
First, pour about a cup of lukewarm water into the bowl. Add the dish soap and swirl until it’s sudsy. Then sprinkle the baking soda—just enough to give the mixture a faint fizz, which signals that it’s ready.
Next, stir in half a teaspoon of white vinegar. The acidity lifts the thin oxide layer that’s caused that dull gray look. The result is a creamy paste, not a watery slurry.
Give the paste a quick stir, then dip the microfiber cloth into it. If you prefer a more concentrated solution for stubborn spots, double the baking soda and vinegar; if you’re cleaning a delicate birthstone pendant, keep it lighter.
Try this on a vintage cocktail ring: the paste gently lifts grime from the intricate filigree without scratching the surface. In about 30 seconds you’ll see a noticeable brightening.
Keep the solution in a small, airtight jar. When you’re on a plane, a travel‑size bottle of the paste will fit in your jewelry pouch without leaking.
Do you wonder how to tweak the strength? A “soft” solution—half the baking soda—works wonders for everyday wearables; a “tough” version—double the amounts—handles heavy tarnish on heirloom pieces.
Once you’ve made the paste, test it on an inconspicuous spot. A quick wipe should leave a clean, shiny patch. If any residue lingers, rinse the area with plain water and repeat.
One traveler I know once cleaned her honeymoon necklace at a bustling airport. She had a tiny bottle of the paste in her carry‑on, sprayed a dab, and within minutes the silver looked like new. She even used a fresh piece of microfiber from the airline’s amenity kit—proof that you can clean on the fly.
Remember: never use metal scrubbing pads or harsh cleaners on silver. Those can scratch the metal, creating permanent pits that show up as new tarnish spots.
Keep a small “cleaning kit” in your travel bag: a micro cloth, a tiny jar of the paste, and a quick‑dry towel. After every trip, wipe the silver, let it air‑dry, and store it in a dry pouch.
Now you’re armed with a gentle, effective solution that’s as easy to make as your morning coffee. When that tarnish appears again, you’ll know exactly how to bring back the shine.
For a detailed step‑by‑step recipe, see this Allrecipes homemade jewelry cleaner guide.
A final tip: after using the paste, rinse your jewelry with clean water, dry it with the microfiber, and store it in a dry pouch. This simple routine will keep tarnish at bay for weeks.
Step 3: Clean with Baking Soda Paste
Ever tried scrubbing a silver necklace until your fingers feel like they’re in a soap opera? It’s exhausting and, worst of all, it can scratch the very shine you’re trying to protect. Instead of a harsh polish, let’s go back to a kitchen staple that’s gentle enough for a travel‑size pouch but powerful enough to banish that dull gray.
The secret sauce is a simple paste of baking soda and water. A few teaspoons of baking soda mixed with a splash of room‑temperature water gives you a thick, slightly gritty consistency that lifts tarnish without rubbing the metal. Think of it like a mild exfoliating scrub for your jewelry.
First, grab your soft‑bristle toothbrush and a clean microfiber cloth. Then, mix 1 tablespoon of baking soda with 1 tablespoon of water. Stir until you have a paste that’s thick enough to hold on to the pendant without dripping.
Apply a small amount to the silver surface, then let it sit for about 30 seconds. The paste’s mild abrasives will start to work on the oxidized layer, while the water keeps the particles from settling into the grooves.
Now, use the toothbrush to gently swirl around the piece, especially in those hidden nooks of a chain or behind a tiny setting. You’ll notice a subtle fizz as the baking soda reacts with the tarnish—an indicator that the process is happening.
After the 30‑second window, rinse the piece under lukewarm tap water. Avoid hot water because it can cause the silver to expand and contract, which may lead to micro‑scratches over time.
Dry the jewelry with a fresh microfiber cloth. A quick pat will remove any residual paste and leave a subtle shine. If you’re in a pinch, a clean kitchen towel works too—just make sure it’s lint‑free.
Why baking soda? It’s an alkaline that neutralizes the acidic tarnish that forms on silver. It’s also non‑toxic and eco‑friendly, so you can clean your travel jewelry without worrying about harsh chemicals. According to the ARM & HAMMER guide on polishing silver, this method “works to remove tarnish without scratches or heavy scrubbing” and is a preferred choice for home care source.
We’ve seen travelers swear by this paste. For example, a frequent flyer once dropped her sterling silver locket while boarding a flight. Using a travel‑size bottle of the paste, she applied the mixture to the locket, let it rest for a minute, and then wiped it clean with a microfiber from the airline’s amenity kit. The locket looked like new, and she could skip the airport’s pricey jewelry cleaning service.
For heavier tarnish, double the amount of baking soda—use 2 tablespoons and 1 tablespoon of water. This stronger paste will tackle those stubborn spots on a vintage brooch or a heavily used bracelet. But keep in mind that the more concentrated the paste, the more thorough your rinsing needs to be to avoid leaving a gritty residue.
If you’re cleaning a delicate piece with a stone setting, be extra gentle. The paste may loosen dirt around the setting, but it can also risk smudging the stone if you’re too aggressive. In that case, use a very light hand or switch to a mild dish soap rinse as an alternative.
After the cleanse, store your silver in a dry pouch. A small zip‑lock bag with a silica gel packet keeps humidity out and prevents future tarnish buildup. When you’re back home, a quick wipe with a dry cloth will keep the shine fresh for weeks.
So, next time you need a quick fix for that tarnished travel pendant, remember the humble baking soda paste. It’s inexpensive, eco‑friendly, and surprisingly effective for restoring the sparkle of sterling silver jewelry at home.
Step 4: Polish with a Silver Polish Cloth
So, you’ve cleaned the grit out with a paste and rinsed it all clean, but that dull gray still hangs on like an old friendship that never really left. It’s time for the secret weapon that keeps your sterling silver looking fresh without the fuss of liquids or scrubbing. Enter the silver polish cloth—a tiny, humble tool that packs a surprisingly gentle punch.
Why a cloth? Because silver is a soft metal that loves a light hand. The cloth’s micro‑abrasives lift the thin oxidized layer without digging into the alloy, so you get a bright shine without any scratches. Think of it like a microfiber napkin for your jewelry—soft enough to kiss the surface, tough enough to remove the grime.
Most high‑quality polishing cloths are two‑ply. The inner layer is coated with a fine polishing compound that actually pulls tarnish away; the outer layer is just a clean buffing side to wipe off any residue. When you swipe the inner side across a chain, you’ll see black specks forming on the cloth—those are the tarnish particles leaving the silver, a visual confirmation that the cloth is doing its job.
The outer side comes into play after the inner wipe. It’s a simple, soft buffing cloth that removes leftover polish and leaves a mirror‑like sheen. Because you’re not applying any liquid, there’s no risk of leaving a wet film that could attract more dirt later.
Safety first: the polishing agent embedded in the cloth is not abrasive enough to scratch the metal, even if you’re polishing a delicate pendant. That means you can polish around tiny settings or etched patterns without worrying that you’re erasing the designer’s details. It’s a win‑win for both shine and preservation.
Stone‑friendly? Absolutely. The gentle micro‑abrasive action is controlled enough that gemstones sit comfortably under the cloth. You won’t have to worry about polishing away the sparkle of a diamond or loosening a gemstone’s setting. For travel‑ready pieces that might travel across airports, that’s a real advantage.
Pro‑tip: once you’ve found the right cloth, never wash it. Washing removes the polishing compounds from the inner layer, turning your once‑powerful tool into a dusty, ineffective rag. Keep it in a dry pouch and wipe it dry after each use—your future self will thank you.
Don’t get the idea that polishing cloths are a replacement for cleaning dips. Dips are chemical solutions that can strip the top layer of silver and even damage porous stones. They’re not suitable for everyday maintenance, especially when you’re traveling and can’t afford to risk a damaged piece. A cloth is a safe, mess‑free, and reusable alternative.
We recommend starting with a brand that’s proven to work for 925 sterling silver. Viorette’s collection of silver cleaning cloths is highly regarded, and their guide explains the two‑ply design in detail. Their cloths come pre‑treated, so you can jump right into polishing without any extra prep work. The link below offers a deeper dive into why these cloths are a top choice for at‑home silver care.
Viorette’s guide to the best silver cleaning cloths
So, what’s the quick‑step routine? First, take your polished cloth and gently swipe the inner side over every visible surface of the piece, making sure to cover the edges and the back of any setting. Next, flip the cloth and buff with the outer side to lift any polish residue. Finally, give the jewelry a quick wipe with a clean microfiber to remove any lingering dust. Your silver will look like it just stepped off the showroom floor, ready to be worn again on a weekend trip or a city adventure.
Step 5: Advanced Cleaning with Electrolysis
Ever seen a silver piece that’s so dull it looks like it’s been buried under a rock? That’s the point where a quick vinegar paste stops falling short. Electrolysis lifts the tarnish right out of the silver atoms without scratching the surface, and you can do it at home with just a few kitchen items.
First, let’s demystify the science so you feel in control. In electrolysis, the silver sits as the cathode in a simple battery setup. The anode—usually a piece of inert metal like a stainless‑steel spoon—sends electrons to the silver through an electrolyte solution. The electrons pull the tarnish (silver sulfide) back into the solution, leaving your jewelry spotless.
Sounds a bit high‑tech, but the kit you’ll build is basically a recipe: a container, a power source, a silver piece, an anode, and a saline electrolyte. The good news? All of those parts are already on most kitchen shelves.
What You’ll Need
• A small, non‑reactive container (glass or ceramic works best)
• A clean stainless‑steel spoon or a piece of old piano wire as the anode
• A power source: a 9‑V battery or a USB charger (5 V)
• A homemade electrolyte: 1 tsp baking soda + 1 cup warm water + a splash of white vinegar
• Two all‑silicone or all‑plastic tongs to hold the silver and anode
• A rubber glove, because the solution can be mildly irritating
• A clean, soft cloth for final buffing
• Optional: a small magnet to keep the silver steady
Step‑by‑Step Process
1. Prep the electrolyte. Stir the baking soda, water, and vinegar until the soda dissolves. The vinegar keeps the solution slightly acidic, which helps the reaction.
2. Place the silver in the container, making sure it’s fully submerged but not touching the bottom of the anode. The silver should be the negative electrode (cathode).
3. Secure the anode. Float the spoon or wire on the surface, just above the silver, using a tongs or a small plastic ring. It needs to be connected to the power source, so attach a USB cable to the spoon if you’re using a USB charger, or connect the battery terminals to the spoon with alligator clips.
4. Connect the power. If you’re using a 9‑V battery, attach the positive terminal to the anode and the negative to the silver. For a USB charger, the charger’s positive is the anode, the charger’s negative is the silver.
5. Let it run. Turn on the power and let the reaction go for 15 to 30 minutes. You’ll see a light fizzing and the silver gradually brightens. Stop the power when you notice the silver no longer looks dull.
6. Rinse and dry. Remove the silver and anode, rinse the piece in tap water, then wash with a mild soap to remove any leftover electrolyte. Pat dry with a soft cloth and buff with a clean microfiber.
That’s it—no chemicals that risk scratching or damaging delicate settings. The process is gentle but powerful, especially for pieces that have seen a lot of travel.
One traveler in our community told us that after a long layover, her silver locket was covered in a gray film that made it look like a fossil. She used the DIY electrolysis kit, ran it for just 20 minutes, and came out with a locket that gleamed like brand new. The only trick was to make sure the silver didn’t touch the anode; otherwise, you risk a tiny spark that can damage the metal.
Want to see a quick visual? (No video needed, just the steps.)

When you’re ready for the final polish, you can run a quick swipe with one of our silver cleaning cloths—yes, we have a line of travel‑ready cloths that stay soft and effective even after 50 uses.
Safety & Tips
• Always wear a glove—saline solutions can irritate skin if you have cuts.
• Keep the setup away from children or pets.
• Don’t use a metal anode that reacts with silver (copper or aluminum will corrode).
• If you notice a strong odor or a sudden spark, cut power immediately.
• Test the method on a small, inconspicuous spot first, especially if your piece has gemstones.
If you’re curious how electrolysis has been used for silver coins, The Silver Mountain guide explains a similar approach you can adapt.
When to Skip Electrolysis
• If your jewelry has a high‑value gemstone setting that might be sensitive to moisture.
• If the piece has an antique patina that you want to preserve—electrolysis will strip that finish.
• If you’re short on time and can’t wait 15–30 minutes; a quick vinegar soak or a polishing cloth works fine for light tarnish.
Quick Comparison of Cleaning Options
| Method | Equipment | Time | Best For |
|---|---|---|---|
| Electrolysis | Battery, spoon, electrolyte | 15–30 min | Heavy tarnish, travel‑heavy pieces |
| Vinegar & Baking Soda Paste | Bowl, brush, paste | 5–10 min | Light tarnish, quick touch‑up |
| Silver Cloth | Silk or microfiber cloth | 1–2 min | Daily polish, finish |
So, if you’ve got a piece that’s been through a few flights or a couple of nights out, the electrolysis step is a game‑changer. It’s a bit of a science project, but once you get the hang of it, it’s a quick, reusable tool that keeps your travel‑ready silver looking showroom‑ready without ever stepping into a salon.
Step 6: Protect and Store Your Jewelry
After you’ve wiped the tarnish away, the next big question is, “How do I keep this shine from coming back?” It’s the same dilemma we run into when we pack a new pair of travel‑ready silver pieces for a weekend in the city.
Pick a bag that keeps the air out
Silver is a diva—one splash of humidity and it’s back in the dark. The trick is to give it a dry home. A zip‑lock pouch is fine for short trips, but for the long haul, an anti‑tarnish bag from Intercept Jewelry Care is a game‑changer. Their patented silver saver tabs pull moisture and sulfur out of the air, keeping your pendant or bracelet looking showroom‑ready for months.
Use a silica gel packet for extra protection
Even the best bags can get a little damp if you’re staying in a humid hotel. Slip a small silica gel packet into the pouch or a separate compartment. Those little packets are the same kind you see in camera bags—tiny, but powerful at pulling humidity away.
Keep jewelry separate from “sulfur‑rich” items
It sounds like a myth, but hair spray, deodorant, and even a rubber keychain can all leave sulfur residue on your silver. When you’re traveling, store your pieces in a dedicated pouch, separate from clothes, shoes, and anything that might have chemical fumes. If you’re packing a bag of makeup, keep it in a separate zip‑lock bag.
Avoid plastic bags and cheap tissue paper
Those crinkly plastics and dyed tissue papers are often treated with sulfur‑based dyes. They’ll do more harm than good. Instead, choose a soft, lint‑free cloth or a clean cotton pouch. A simple cotton T‑shirt cuff works wonders for a quick trip.
Make a “last‑on, first‑off” routine
Before you leave the house, slip the silver onto a small stand or a piece of parchment. After you’re home, take it off, wash your hands, and place it in its pouch. Doing this once a week keeps moisture at bay and the tarnish away.
Check your storage spot at home
If you have a bedroom closet, a drawer, or a jewelry box, make sure it’s dry. Add a small anti‑tarnish strip or a couple of silica gel packets. If the room is prone to humidity—think bathrooms or basements—move the jewelry to a drier shelf.
When you’re ready for a quick polish
Keep a small polishing cloth handy. A gentle swipe will remove any fine dust that might accumulate while the piece sits in its pouch.
Tip: Let your jewelry “breathe” before re‑packing
After a shower or a swim, hang the pendant on a hook for 15 minutes. This gives any water droplets a chance to evaporate before you tuck it back into its bag.
In short
Use a quality anti‑tarnish bag, add silica gel, separate from sulfur‑rich items, and give the piece a quick dry before storage. Those few habits keep your silver gleaming, no matter how many flights you take.
For a deeper dive into anti‑tarnish technology, see the Intercept Jewelry Care page. If you need a reliable source for packing accessories, Halstead’s article on avoiding tarnish offers great practical advice.
FAQ
What signs tell me my sterling silver is truly tarnished, not just a natural shine?
First, look for a dull gray film that sits flat on the metal. It’s usually thinner than the polished surface but shows up in shadows, especially on chains or the back of a pendant. Second, try a quick swipe with a microfiber cloth—if the silver still looks like a dull gray, that’s the tell‑tale sign. Finally, smell it: tarnish can give off a faint metallic odor that ordinary dust doesn’t.
Which everyday household items can I safely use to clean my silver?
A good paste of equal parts white vinegar and baking soda works great for most pieces. Just mix a tablespoon of each until you get a thick consistency, apply with a soft brush, let it sit for 30 seconds, then rinse with lukewarm water. Another handy trick is a mild dish soap and warm water rinse after you’ve used the paste—this removes any residue and leaves a bright shine.
How often should I clean my silver, and does that change if I travel a lot?
For everyday wear, a quick wipe with a microfiber cloth after each use is enough. If you’re packing silver for trips, give it a deeper clean with the vinegar‑baking soda paste every two weeks. This schedule keeps the surface free of buildup, and the occasional deeper clean stops tarnish from settling in hard‑to‑reach settings or chain links.
Can I use a silver polishing cloth for my travel pieces, and are there any risks?
Yes, a high‑quality silver polishing cloth is perfect for on‑the‑go touch‑ups. The inner side contains a gentle polishing compound that lifts the thin tarnish layer without scratching the metal. The outer side just buffs away any residue, leaving a mirror‑like finish. Just remember: never wash the cloth, or you’ll lose its polishing power. Keep it dry in your travel pouch and swipe it after showers or a long day.
What should I do if my silver has gemstones or delicate settings?
Gemstones can be sensitive to moisture, so after cleaning the metal, rinse the piece with plain water and pat dry with a clean microfiber. Avoid rubbing around the setting with the paste—use the cloth instead, or a soft toothbrush on a very gentle swipe. If the piece is heavily adorned, a quick wipe with a mild dish soap solution followed by a thorough rinse is safest.
How can I keep my silver looking shiny between cleanings, especially in humid climates?
Store each piece in a dedicated anti‑tarnish pouch or a zip‑lock bag with a silica gel packet. The packet pulls moisture out, and the pouch keeps sulfur‑rich items away. After every use, hang the item for 10–15 minutes to let any sweat or water evaporate before sealing it back. If you’re in a hotel with high humidity, place a small silica packet in the room to keep the air dry.
Conclusion
We’ve walked through the whole cleaning routine, from paste to polish, and now we’re at the finish line.
So, how to clean sterling silver jewelry at home feels less like a chore and more like a quick ritual you’ll look forward to.
First, grab that soft‑bristle brush you keep in your travel kit, dab a touch of the baking soda paste, and let it sit for 30 seconds.
After a gentle rinse and a quick pat with a microfiber, you’ll see the gray ghost lift, revealing that familiar shine.
Remember the anti‑tarnish pouch and a silica gel packet? They’re your backstage crew, keeping moisture out and the silver bright.
Every time you slip your piece into that pouch after a shower, you’re giving it a tiny spa day.
And if you want that extra pop of polish, a quick swipe with a silver cloth does the trick—no mess, no fuss.
So, what’s next? Keep that routine short, keep it simple, and watch your travel‑ready pieces shine like new—every time you pull them out of the pouch.
At Diamond Veneer Travel Jewelry, we’ve seen travelers keep their pieces sparkling with just these simple tricks—no professional polish needed. It saves both time and money, especially when you’re jet‑setting around the globe.