

Ring Stacking Ideas for Small Hands: 12 Creative Ways to Keep Your Fingers Looking Sleek
Ever feel like your rings are a tiny avalanche on a delicate wrist right now? That’s the first thing that pops up when small hands try to carry too many gems.
We’ve seen the struggle in person—hands looking like a miniature circus, yet you still want to sparkle today.
So, what’s the secret sauce? Layering in a way that feels light as air, not a weight on your finger, so each band feels like a whisper. That’s why the right stack can turn a simple set into a statement that dazzles.
Think about it this way: the rings should dance with each other, not compete for attention. When you choose pieces that are slender and balanced, the whole look feels effortless.
Start with a single band that feels like a gentle hug; a slim eternity band with a subtle shine is perfect.
Add a second ring for a pop—thin cabochon or tiny cubic zirconia that glints when you turn.
A third layer adds personality, but keep it minimal with a delicate charm or micro‑cut band.
Remember, the goal isn’t to stack every ring you own. It’s about choosing a rhythm that feels like your own personal music. Your fingers should feel the groove, not the grind, and keep the movement effortless.
Choose lighter designs; sterling silver or lightweight alloys keep the stack buoyant.
Soft colors echo your skin; a pale champagne or rose hue complements without overpowering.
Finally, think about occasions. A minimal stack looks great at work, but you can add a dash of sparkle for evenings. Having a “layer swap” plan keeps you flexible.
So, what’s the next move? Pick your base, add one more with personality, then play with tiny accents. And trust me—your fingers will thank you for the balance, and show off that effortless chic.
TL;DR
If you’re wrestling with wrists and too many rings, this guide shows how to stack subtly, keeping each piece light and balanced—so your fingers stay graceful, not weighed down. Layer an eternity band, a cabochon, or a charm, and craft a look that moves from day to night with confidence.
Choosing the Right Ring Sizes for Small Fingers
When your fingers feel cramped, it’s not just the jewelry that’s getting the short end of the stick. The real game‑changer is picking the right size so that each band feels like a gentle hug rather than a squeeze.
1. Start Small, Think Big
Even the most delicate rings can look clunky if they’re the wrong width. Keep the band between 2‑3 mm for a subtle look. It’s all about balance – too wide and you’ll feel the weight; too narrow and you’ll lose that subtle shine.
2. Measure with Confidence
Use a printable ring sizer or visit a jeweler who can take an exact measurement. A quick trick: wrap a piece of string around the base of the finger, mark it, then compare to a chart. The goal? A snug fit that doesn’t slip but doesn’t feel like a clamp.
3. Opt for Slim Eternity Bands
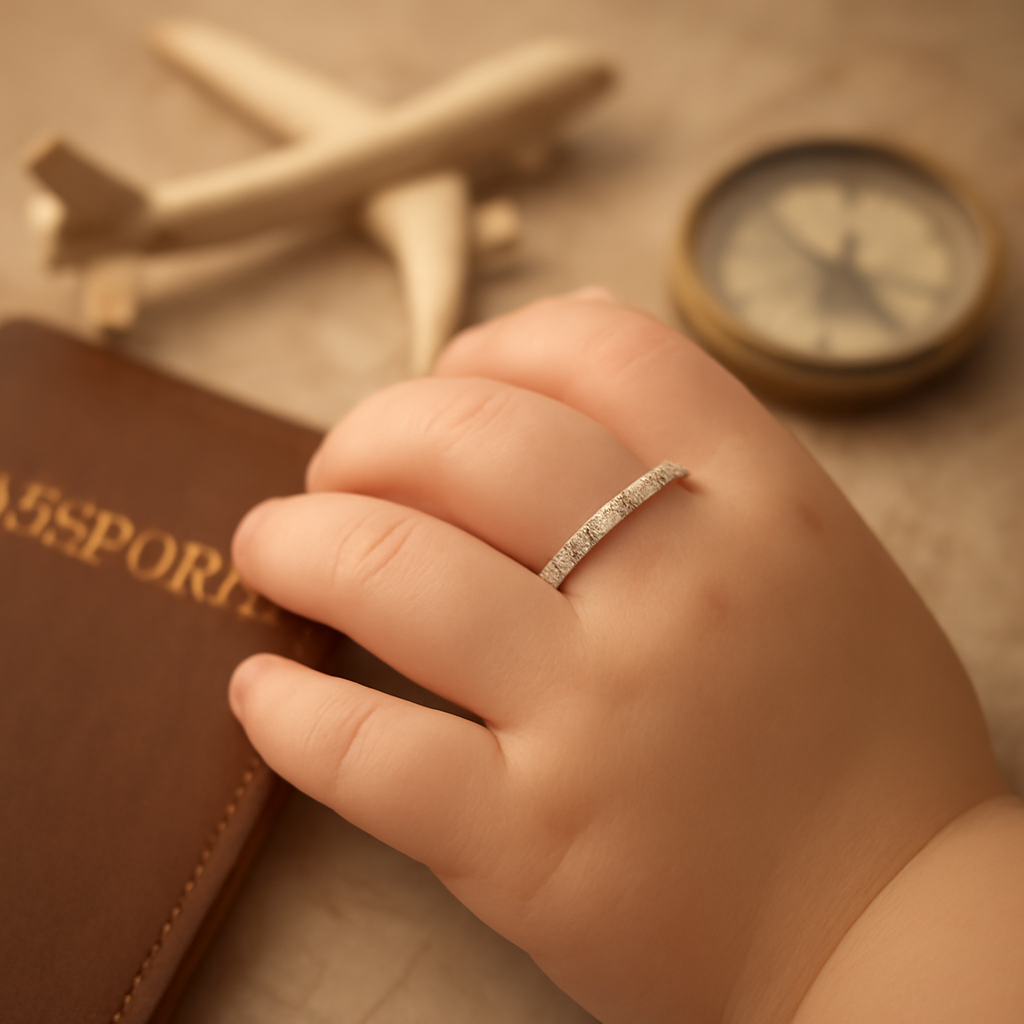
Our favorite go‑to is the cubic zirconia eternity band – the ones from Diamond Veneer Travel Jewelry that let you layer without feeling heavy. Look for the design studio that celebrates travel‑inspired sparkle for a line that feels like a passport stamp on your finger.
4. Layer Light, Layer Right
When stacking, keep the first band as the foundation. Add a cabochon or a tiny charm next, but make sure it’s thinner than the base. This way, each piece adds to the narrative without drowning the other.
Remember: a single ring can feel like a statement if it’s well‑balanced. Multiple rings should feel like a conversation, not a crowd.
5. Watch the Color Play
Light colors like champagne or rose gold reflect the skin tone and give a sense of space. Darker hues can create visual weight, so use them sparingly. Think of it like choosing the right shade for a travel souvenir that won’t outshine the rest of your collection.
6. Test It Out in Motion
Hold a phone, type, and even sip a coffee. If the ring feels like a second skin, you’ve nailed it. If it’s a reminder of a tiny weight, it’s time to resize or swap out the band.
7. Use a “Swap‑Out” Plan
Having a quick change‑out plan keeps your look fresh for day vs. night. A slim white band for office hours, then swap in a sparkling amber one for an evening out. The key is a seamless transition that doesn’t feel like a chore.
8. Check the Material
Sterling silver and lightweight alloys are great for small fingers because they’re sturdy yet feel airy. Avoid heavy gold or bronze unless you’re going for a dramatic, bold look that can handle the extra weight.
9. Keep the Ring Size in Mind for Travel
Since we love traveling, remember that heat and humidity can slightly expand rings. If you’re heading to a tropical spot, consider a slightly smaller size or a ring with a flexible band. It keeps the stack comfortable no matter the climate.
10. Final Checklist
• Band width 2‑3 mm
• Slim, light material
• Color matches skin tone
• Size fits snugly but comfortably
• Easy to swap for different occasions
By following these steps, you’ll keep your small fingers looking elegant, not overwhelmed.
Still unsure how to pick the perfect ring for your hand? Think of each ring as a chapter in a travel diary – it should feel light enough to carry but meaningful enough to cherish.
Mixing Metals: How to Pair Rings for a Polished Look
So, you’ve got a couple of rings and you’re wondering how to make them look like they belong together instead of fighting for attention. It’s a common pit‑fall, especially when you’re juggling a silver band, a gold accent, and maybe a pop of rose‑gold. The trick is to treat each metal as a character in a story—give them a role, a voice, and a place in the lineup.
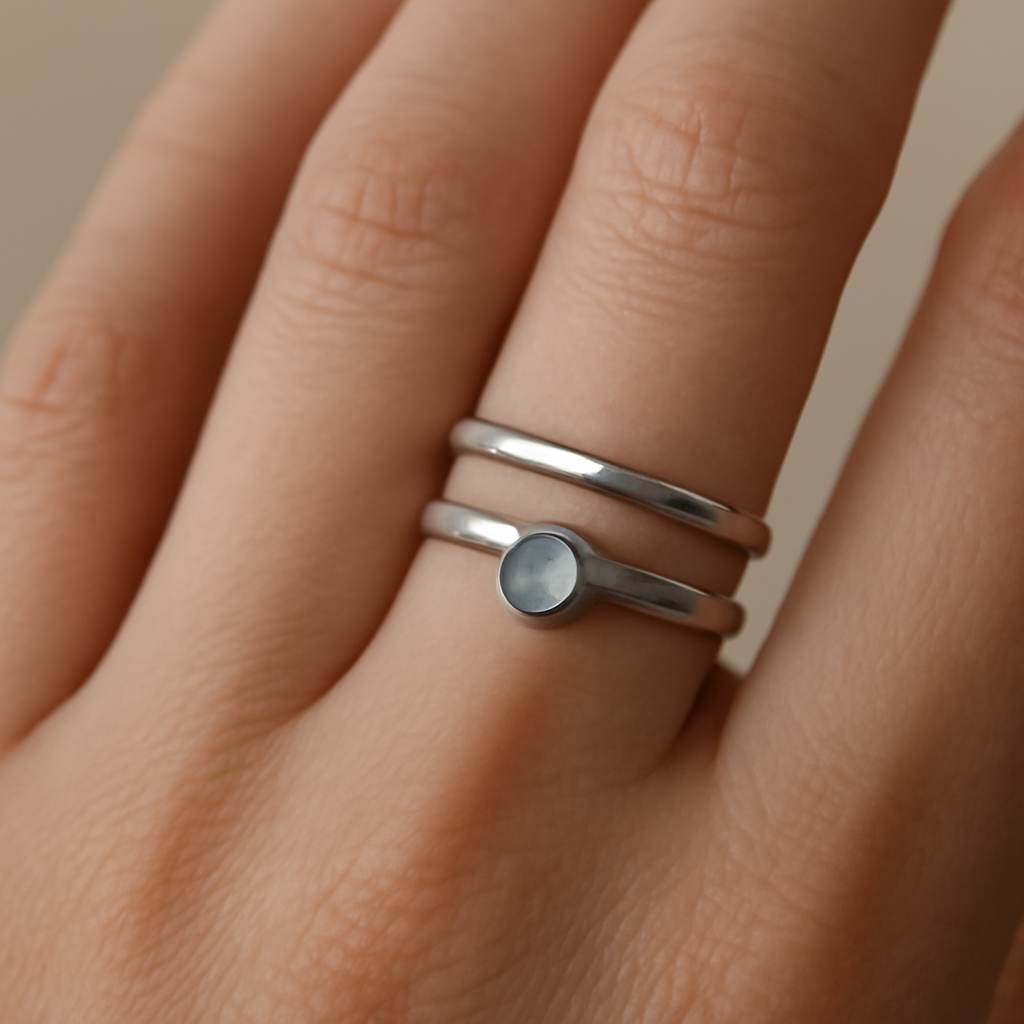
1. Start with a neutral base. Think of a simple sterling silver or white‑gold eternity band as your foundation. It keeps the stack light and gives you a clean canvas. For instance, the Cubic Zirconia Eternity Band Stackable Ring is a great choice because its silver tone balances other colors without overpowering.
2. Add a contrasting metal for pop. Once the base is set, layer a thin gold or rose‑gold band on top. The contrast should be subtle—think a 0.3‑mm band that catches light but doesn’t look like a second stack. A tiny rose‑gold halo ring can bring warmth, especially when you’re dressing for sunset or a cocktail hour.
Have you ever seen a stack where the metals bounce off each other? That’s the sweet spot. The base keeps the look grounded while the upper layer adds a hint of drama. If you’re unsure, test by sliding a gold band over the silver band and feel how they glide.
3. Introduce a third ring that’s metal‑neutral. A cubic zirconia solitaire with a thin bezel in white gold or a clear crystal band works wonders. It’s like the narrator in your story—understated but essential. Many women with small hands find that a third ring in a lighter metal keeps the overall stack from feeling heavy.
In our experience, the lighter the metal, the more the stack feels like a feather. That means you can swap the gold for a white‑gold band that’s 0.5 mm thick and still keep the stack airy.
Now, let’s talk about texture. A brushed finish on one ring juxtaposed with a polished finish on another can create visual intrigue without mixing colors. Think of a matte silver band under a shiny rose‑gold band—your fingers will look like a runway.
When you’re experimenting, keep a “swap sheet.” Write down the metal, finish, and width of each ring. Then, run a quick visual test: place the stack on a mirror and note which combinations look cohesive. This simple habit saves you from endless trial and error.
4. Size matters, but metal matters more. If your silver base is 6.5, make sure the gold layer is the same size or one size smaller to keep the stack from looking uneven.
Do you wonder how to keep a stack travel‑ready? Because you’re on the go, pick rings made from lightweight alloys and avoid chunky stones that can catch on luggage.
5. Finish with a personal touch. Add a small charm or a tiny cabochon in a neutral color on top of the stack. It gives the stack a signature look without tipping the balance.
Remember, the goal is to create a look that feels like a conversation between metals, not a battle. Keep the layers thin, the colors subtle, and the overall width narrow. That way, your small hands can carry a polished look that’s as effortless as a stroll on a sunny patio.
Ready to take your stacking game to the next level? Pair your stack with a light‑weight travel necklace from our collection and you’ll be set for a day on the bike, or a sunset stroll in Portugal. Speaking of the bike, if you’re planning a scenic ride across the Atlantic coast, check out the Top Bike Tours Portugal—they curate experiences that match the adventurous spirit of our jewelry lovers.
And if you love pairing jewelry with art, you’ll find that the Gratitude Studios offers wearable landscapes that echo the delicate geometry of our rings. A ring stack paired with a hand‑painted scarf can turn an ordinary outfit into a statement of style.
Layering Techniques: Stacking Multiple Rings without Bulk
We’ve already chatted about picking the right base band for tiny fingers. Now let’s dive into the fun part: stacking more rings without turning your hand into a jewelry burrito. Think of it like building a tiny tower of friends—each one has to fit snugly, but the whole pile still feels light.
1. Start With a Slim, Strong Anchor
That first band should be the backbone of the stack. A 1‑mm or 2‑mm wide eternity band in sterling silver does the trick. It’s thin enough to keep the stack airy, yet strong enough to hold the extra rings.
2. Keep the Next Rings Subtle
Layer on one or two micro‑cut bands. Think 0.5‑mm thick, a bit wider than the anchor, but still barely noticeable. The key is that the new rings don’t add bulk; they add texture. You can choose a subtle rose‑gold finish to keep the overall look feminine.
3. Add a Single Statement Piece – But Tiny
Instead of a chunky cocktail ring, go for a tiny cabochon or a micro‑diamond set. A 4‑mm stone on the fourth ring will pop without tipping the balance. It’s like the cherry on a layered cookie—visible but not overpowering.
4. Vary the Widths Gradually
Don’t jump from a 1‑mm to a 3‑mm ring abruptly. Instead, create a gentle crescendo: 1‑mm, 1.5‑mm, 2‑mm, 2.5‑mm. The progression feels natural, like a conversation flowing from soft to louder tones.
5. Use Metal‑Neutral Rings for the Middle Layers
Metal‑neutral options, such as a clear crystal bezel or a white‑gold halo, act as transition pieces. They bridge the gap between the base and the statement ring, keeping the stack cohesive.
6. Don’t Forget the Thumb
Many tiny hands love a subtle thumb ring. A slim band on the thumb can anchor the entire look, giving the stack a balanced silhouette. Try a silver ring with a small etched pattern—just a touch of detail.
7. Test the Stack with Movement
Put the stack on and move your hand as you would in everyday life. Does it slide, snag, or feel heavy? If it’s a bit too tight, remove one of the micro‑cut layers. If it feels like a feather, you’ve nailed the lightness.
8. Keep an Eye on the Total Width
Measure the widest point from the nail to the outer edge. Ideally, it should stay under 8 mm for small hands. Anything wider starts to look like a bulk stack. Use a ruler or a tape measure to double‑check.
9. Finish With a Soft Accent
On the topmost ring, add a tiny charm or a cabochon in a neutral color. It gives the stack personality without adding mass. Think of it as the final flourish in a poem.
10. Store It Right
Keep the stack in a small ring box or a soft pouch. When you’re traveling, the lighter metal will glide through security lines, and you’ll avoid the dreaded “ring stuck in luggage” nightmare.
| Feature | Option | Notes |
|---|---|---|
| Base Band Width | 1‑2 mm sterling silver | Provides a lightweight anchor |
| Middle Layer Texture | Micro‑cut or crystal bezel | Transitions between base and statement ring |
| Statement Piece Size | 4‑5 mm cabochon or micro‑diamond | Creates visual interest without bulk |
Want a quick refresher on the stacking rules for small hands? The Golden Planet guide offers a great visual walkthrough that complements these tips.
Ring Shapes and Styles That Flatter Small Hands
We’ve talked about width and finish, so now let’s dive into the shapes that make your fingers look longer and your stack feel airy. Think of it like picking the right shoes for a tiny frame—tiny details matter.
1. Go Slim: 1‑2 mm Bands are Your Best Friend
Anything thicker than 2 mm starts to look like a backpack on your finger. A 1‑mm satin band hugs the finger, giving the illusion of length. That’s why the “Cubic Zirconia Eternity Band Stackable Ring” is a favorite among small‑handed stylists—its ultra‑thin profile lets the rest of your stack breathe.
2. Emphasize Vertical Flow with Oval or Marquise Cuts
Vertical stones draw the eye upward, making your hand appear taller. Try a slim oval micro‑diamond or a marquise‑shaped cabochon on the middle layer. The line of the stone keeps the stack streamlined and keeps the focus on the shape, not the bulk.
3. Texture, Not Mass
Hammered, brushed, or twisted bands add visual interest without adding weight. A lightly hammered 1‑mm ring can feel like a feather, and a twisted band adds a subtle wave that keeps the stack from looking flat.
4. Keep Gemstones Tiny and Tiny‑Sized
Instead of a chunky cocktail ring, pick a 3‑4 mm cabochon or a 0.5‑mm micro‑diamond set. That small pop of sparkle is enough to catch the eye without tipping the balance. The trick is to keep the stone size under the band width so it looks like an accent, not a statement.
5. Stick to One Dominant Metal Tone
When you mix metals, let one color dominate and let the others play side‑kick. For example, a white‑gold base with a touch of rose‑gold accent ring feels cohesive. Mixing too many tones can make the stack feel cluttered, especially on small fingers.
6. Add a Midi Ring for Height
A midi ring sits just above the knuckle and gives a vertical boost. It’s perfect for slim fingers because it creates a visual gap that makes the stack look longer. Pair it with a thin band below and a tiny gemstone above for a three‑tier look that feels effortless.
7. Say No to Wide Bands Over 3 mm
Wide bands can crush the delicate proportions of a small hand. Even a 3‑mm band feels heavy on a 5‑size finger. Keep the width to a maximum of 2 mm and let the next ring add subtle width, not bulk.
8. Layer in a Gentle Crescendo
Start with a 1‑mm band, then a 1.5‑mm textured ring, followed by a 2‑mm gem‑accent. That gradual increase feels natural, like a conversation that builds from a whisper to a statement. Avoid jumping straight to a chunky piece.
To see some real‑world examples, check out Malibu Sunday’s stacking combos for slim fingers. They showcase how a narrow band, a textured middle layer, and a tiny gemstone can create a balanced look.
In practice, here’s a quick checklist you can use right now:
- Choose a 1‑mm base band.
- Pick a 0.5‑mm gem or texture for the second layer.
- Add a 1‑mm midi ring if you want extra height.
- Finish with a 3‑4 mm cabochon on top.
- Make sure the total width stays under 8 mm.
- Check the stack in a mirror to ensure no ring looks heavier than the next.
- Try swapping the metal on the second layer to see if a different tone feels better.
And if you’re curious about how to keep these tiny rings pristine, the Eternz blog has a solid ring stacking guide that covers care, sizing, and styling for all hand sizes.
Now that you’ve got a playbook, grab a ring that’s 1 mm wide, slip on a tiny gem, and see how your hand feels. Remember, the goal is to feel like your fingers are dancing, not carrying a weight.
Fabricating Custom Rings for Small Fingers: A Quick DIY Guide
Ever felt like your fingers are just begging for a custom ring that fits like a second skin? You’re not alone. Small hands want something that looks great and feels light—so let’s dive into a quick, hands‑on guide to making your own custom rings.
1️⃣ Start with a solid foundation
The first thing you need is a band that’s thin enough to stay comfortable but strong enough to hold the rest of your design. A 1‑mm or 1.5‑mm sterling silver or lightweight alloy is a safe bet. In our experience, that width keeps the stack airy while still looking polished.
2️⃣ Measure like a pro
Grab a piece of string, wrap it around the base of your finger, and mark the spot. Measure the string and subtract 1 mm for a snug fit. Don’t forget: the ring sits just above the nail, not on top. This simple trick saves you a trip to the jeweler.
3️⃣ Design your own gem or texture
Want a tiny sparkle? Pick a 3‑mm cabochon or a 0.5‑mm micro‑diamond set. If you’re into textures, a brushed or hammered finish can add depth without bulk. You can even combine both—think a thin brushed band topped with a single gem.
4️⃣ Keep the stack in check
Every new layer should add visual interest but not weight. A good rule: 1‑mm, 1.2‑mm, 1.4‑mm, and so on. If you’re adding a third ring, keep it under 2 mm. That keeps the total width below 8 mm, the sweet spot for most small hands.
5️⃣ Order the right metal
Light alloys like sterling silver or a low‑carat gold are ideal. They won’t cling to your skin or add unnecessary mass. If you love a splash of color, a tiny rose‑gold accent can be a subtle pop. Remember, a single heavy ring can ruin the feel of an otherwise light stack.
6️⃣ Finish with care
After you have your pieces, polish each ring to a mirror finish. A gentle polish removes scratches that can snag on clothing. For a more personal touch, consider adding a hand‑stamped charm or engraving. Just keep it small—no more than a 1‑mm logo.
7️⃣ Test it out before you commit
Put the stack on and walk around the house. Type, cook, or even do a quick stretch test. Does it feel like a feather or a feather that’s lost its fluff? If it feels heavy, swap the tallest ring for a thinner one or move it to a different finger.
8️⃣ Store it right
Keep your custom stack in a soft‑lined pouch or a small ring box. When you’re traveling, a lightweight pouch makes it easy to slip through security. The goal is to protect your rings while keeping them accessible.
9️⃣ Embrace the swap culture
One of the best ways to keep a small hand looking fresh is to swap rings seasonally. Keep a set of mini‑cabochon rings for summer, a micro‑diamond set for evenings, and a simple brushed band for work. That way, you always have something that feels right for the moment.
🔧 DIY Resources That Actually Work
For a deeper dive into ring stacking fundamentals, the Taylor Custom Rings guide explains how to layer engagement rings with wedding bands. It’s a great reference for understanding how different widths and settings interact.
If you’re curious about how to mix metals and textures without it feeling clunky, check out Centime Gift’s stacking tips. Their article walks through everyday scenarios, which is handy when you’re planning a stack that works for both office and weekend.
So, what should you do next? Grab your measuring tape, pick a thin band, and start experimenting. Your small hands deserve a stack that feels as light as a sigh and as stylish as a runway. Happy crafting!
Accessorizing Beyond Rings: Adding Bracelets and Ankle Bands to Complement Stacking
1. Start With a Slim, Travel‑Ready Bracelet
If you’re jet‑setting, the first thing that comes to mind is weight. A thin titanium or lightweight alloy cuff that sits just above your wrist feels like a second skin. It keeps the stack airy and won’t snag on a carry‑on handle.
Try pairing a 1‑mm cuff with your ring stack—think the same width as your base band. That symmetry makes the whole look feel intentional rather than a haphazard grab‑and‑go.
2. Use a Bracelets’ Texture to Break Up Metal Monotony
When your rings mix white‑gold and rose‑gold, the bracelet can serve as a neutral buffer. A matte brushed steel or a subtle hammered finish keeps the stack cohesive without adding bulk.
Imagine a soft‑soldered bracelet with tiny silver studs; it echoes the tiny cabochon on your top ring and creates a rhythm that’s easy on the eyes.
3. Add a Light‑Weight Ankle Band for the Travel Enthusiast
Most people overlook the ankle as a jewelry canvas, but a delicate chain or a thin cuff can be a game changer when you’re on the move. It’s a conversation starter in a hostel, a subtle luxury in a boutique hotel.
Picture a 0.8‑mm chain that’s easy to slip on a morning walk through a cobblestone square. The ankle band adds a second layer of visual interest without compromising comfort.
4. Create a “Stack of Layers” Look with Mixed Materials
Think of each piece—ring, bracelet, ankle band—as a note in a song. Layering a delicate sterling silver bracelet under a bold rose‑gold ring, then topping with a tiny gold chain ankle band, gives the whole look depth without bulk.
When you switch to a travel day, simply swap the heavier ring for a thinner version; the bracelet and ankle band stay the same, keeping the stack balanced.
5. Practical Steps to Build a Travel‑Friendly Ensemble
- Pick a base ring that’s slim and lightweight—ideally 1‑mm in silver or a low‑carat gold alloy.
- Choose a bracelet that matches the ring’s width and feels light; a 1‑mm cuff works best.
- Select an ankle band that’s no thicker than 0.9‑mm; chain or a simple cuff is ideal.
- Keep all pieces in the same color family or use one dominant metal with small accents.
- Store them in a single pouch that can slide through security, so you’re not juggling separate pieces.
6. Real‑World Example: The “City‑Chic Traveler”
Meet Lily, a freelance photographer who spends weeks in different time zones. She layers a 1‑mm brushed silver ring with a matching cuff and a thin gold ankle chain. The ensemble looks effortless on a day at the market in Marrakech and holds up to a late‑night editing session in Berlin.
Lily says the key is “lightness.” If the stack feels heavy, she removes the ankle band for a quick reset and keeps her wrists free for long‑haul flights.
7. Why Bracelets and Ankles Matter for Small Hands
Small hands often get overlooked when it comes to accessories. By extending the stack beyond the ring, you create visual height. The bracelet’s upper edge pushes the eye upward, while the ankle band anchors the look, giving a sense of balance that rings alone can’t provide.
When you add a bracelet, you also give yourself an extra layer to experiment with—switch textures, swap metals, or even change the overall silhouette without having to replace your favorite rings.
8. Quick Checklist Before You Travel
- Verify all pieces are less than 1.5 mm thick.
- Make sure the bracelet and ankle band are made of hypoallergenic metals if you’re prone to irritation.
- Pack the stack in a pouch that’s soft‑lined to avoid scratches.
- Test the stack on a full day of movement—walk, type, and nap to ensure comfort.
- Keep an extra pair of thin bands on hand in case you need a quick swap.
9. Final Thought: Your Stack Is a Story, Not a Statement
Remember, the goal isn’t to flash every piece you own. It’s to craft a look that feels like a conversation—soft, layered, and tailored to your day. With a slim bracelet and an ankle band, your small hands get the extra touch of elegance they deserve, no matter where the world takes you.
Conclusion
First things first: the magic of small‑hand stacking isn’t a secret, it’s a habit you can train. You’ve learned how a thin eternity band sets the foundation, how a micro‑cut layer adds texture, and how a single tiny gem can turn the stack into a story.
Think about the last time you slipped on a stack and felt it drag. That’s usually because the layers jumped in size. The rule we keep in our workshop is simple: keep each successive ring at most 0.5 mm wider than the one before it.
In our experience, a 0.8‑mm chain feels almost invisible, letting your hand breathe. Now, mix in a bracelet or an ankle band—just a subtle addition—and you instantly create a vertical rhythm. It’s like adding a headline to an article; the eye climbs up and stays engaged.
So, what should you do next? Grab a 1‑mm sterling silver base from our collection, layer a 0.4‑mm brushed band, and finish with a 3‑mm cabochon. Test it in the mirror and feel the lightness. If it still feels heavy, swap the top gem for a smaller one.
Remember, the goal is conversation, not a statement. Your stack should read like a friendly chat over coffee—soft, layered, and totally you.
If you’re traveling, tuck the stack into a soft pouch and you’ll glide through security lines without a hitch. It’s that simple, yet so effective.
FAQ
What base bands work best for small hands?
Start with a 1‑mm or 1.5‑mm eternity band. The narrow profile lets each layer breathe and prevents a bulk feel. Think of it as the stage before the drama. A thin silver or rose‑gold base offers a neutral canvas, so your accents shine. It keeps the stack lightweight enough for a day of typing or dancing, but sturdy enough to stay on during a quick trip. When you stack, you’re building a conversation, not a statement in your daily routine.
How do I choose the right ring thickness?
Ring thickness matters more than you think. A 2‑mm band feels like a light scarf; 4‑mm starts to look like a cuff. For small fingers, stay under 3‑mm. Measure the widest point from nail to edge with a ruler; keep it 8‑mm or less overall. Use a lightweight alloy to reduce weight, and test by sliding the stack around your wrist. If it feels like a feather, you’re right; if it drags, trim or swap a thicker layer for your comfort.
Can I mix metals without it looking clunky?
Mixing metals is a dance, not a duel. Start with one dominant tone—white‑gold or sterling silver—and use the second metal as a subtle accent. Keep the accent thin, under 0.5‑mm, so it doesn’t overpower. Swap finishes too: a brushed silver base with a polished rose‑gold band creates visual interest. Test by sliding the accent over the base; if it slides easily, it’s cohesive. This approach turns a potential clash into a layered story that feels effortless for your finger every on your finger.
Is a thin gem better than a chunky stone?
Thin gems beat chunky stones when you want a whisper of sparkle. A 3‑mm cabochon or a 0.5‑mm micro‑diamond set stays proportional to the band width and feels like a breath of light. Chunky stones can crush the illusion of length on a small hand. When you stack, keep the stone smaller than the ring’s width. If the gem looks like a headline, you’ll lose that airy feel; a subtle sparkle keeps the conversation going for your style every time.
How should I store and travel with my stack?
Traveling with a stack is easy if you keep it light and protected. Store each ring in a soft pouch or a slot in a ring box—no bulky holders. When packing, slide the stack into the pouch first, then add a thin chain or bracelet that matches the stack’s width to balance the look. At security, the light weight lets it glide through the scanner; and a single pouch keeps everything together so you can pick it up digging today.