

Stud Earring Size Chart mm: Complete Guide to Finding Your Perfect Fit
Let me be completely honest: picking the right stud earring size can feel like a tiny puzzle you never knew you had.
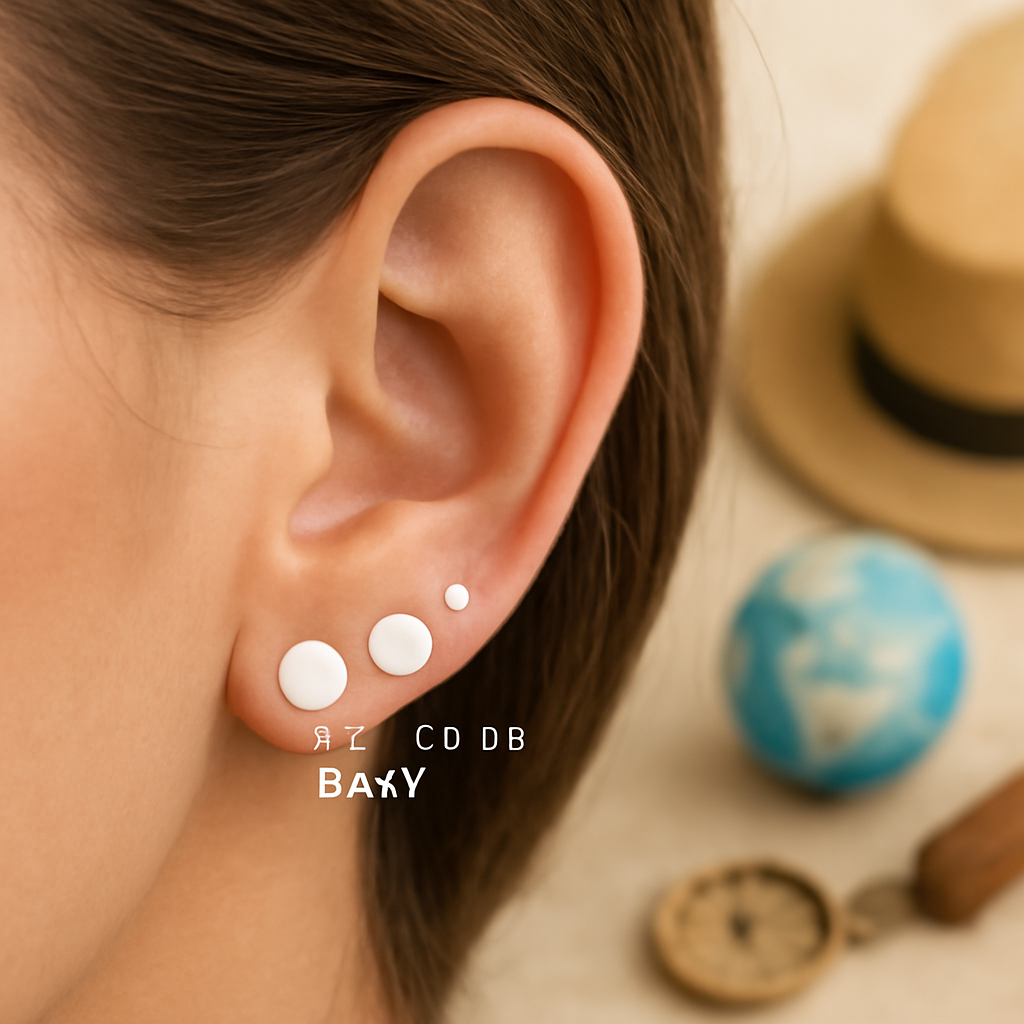
You've probably stood in front of the mirror, held a pair of 4 mm studs in one hand and a 12 mm pair in the other, and thought, "Which one actually looks good on me?"
In our experience at Diamond Veneer Travel Jewelry, we’ve seen that the secret isn’t a one‑size‑fits‑all rule—it’s about matching the millimetre measurement to the shape of your ear, the look you’re after, and even the occasion.
Think about it this way: a 6 mm stud is like the perfect everyday companion—big enough to catch light, small enough to stay comfortable on long flights or a day of sightseeing. A 10 mm or larger stone, on the other hand, behaves more like a statement piece, ideal for dinner dates or when you want that extra sparkle that says "I’ve arrived."
But size isn’t the only factor. The thickness of the post, the type of backing, and even the metal you choose can affect how a stud sits on your lobe. A delicate 14K gold post might feel lighter than a stainless‑steel one, even if the diamond veneer is the same size.
So, how do you translate all that into a simple "stud earring size chart mm"? Start by measuring the distance from the top of your lobe to where the post will sit—most people find that 4–6 mm works for a subtle look, 8–10 mm for a noticeable pop, and 12 mm+ when they’re feeling bold.
Does that answer your question? Maybe, maybe not—because every ear is unique. The best way to be sure is to try a few sizes side by side, or use a printable ruler you can place on your fingertip to compare.
Ready to experiment? Grab a couple of our travel‑friendly studs, line them up on a coffee table, and see which millimetre measurement makes you smile. Let’s dive in and explore the full size chart together.
TL;DR
Choosing the right stud earring size is all about matching millimetre measurements to your ear shape, style, and occasion, so you never feel over‑ or under‑dressed. Use our quick 4‑6 mm subtle, 8‑10 mm pop, and 12 mm+ bold guide, try a few sizes side‑by‑side, and let your lobe decide, and enjoy effortless sparkle all day.
Understanding Stud Earring Sizes
When you first start playing with stud earrings, the biggest question is usually: "How big should the stone actually be?" It sounds simple, but the answer hides a handful of little decisions that can change the whole vibe of your look.
Think of the size as a conversation between your earlobe and the world. A 4 mm stud whispers, "I'm here, but I won’t steal the spotlight." A 10 mm stone shouts, "Notice me!" And a 12 mm+ piece? That’s the bold statement you make when you walk into a room and want every eye to linger a beat longer.
How the millimetre measurement translates to feel
The first thing to notice is weight. A larger stone usually means a heavier post, which can tug on a delicate lobe after a few hours. That’s why many travellers – the kind who hop on a plane with a carry‑on and a quick‑change wardrobe – keep a few 6‑8 mm studs in their day‑to‑day kit. They’re light enough for a long flight, yet still catch enough light to feel a little luxe.
Next up is proportion. If you have a petite lobe, a 12 mm stone can look over‑sized, like trying to wear a coat three sizes too big. On the other hand, if your lobes are naturally fuller, a 6 mm stud might disappear into the crowd. The trick is to line up a couple of sizes side‑by‑side, maybe on a coffee table, and watch which one makes you smile first.
Post thickness and backing – the hidden heroes
Most people focus on the visible stone, but the post is the unsung hero that keeps everything steady. A 0.6 mm post feels almost weightless on a 14K gold backing, while a thicker 0.9 mm stainless‑steel post can add a surprising amount of heft. If you’re a frequent flyer, you might gravitate toward thinner gold posts that won’t tug at your skin during a 12‑hour journey.
Backing types also matter. Screw‑backs give a secure fit for larger stones, whereas push‑backs are perfect for quick‑change moments – think hopping from a business brunch to an evening cocktail without missing a beat.
Practical tip: Create a personal size chart
Grab a ruler, or better yet, print a tiny millimetre ruler you can stick to your fingertip. Measure the distance from the top of your lobe to where the post will sit. Most people find:
- 4‑6 mm = subtle, everyday sparkle
- 8‑10 mm = noticeable pop for dates or meetings
- 12 mm+ = bold, statement look for nights out
Once you have those numbers, jot them down next to the studs you already own. Over time you’ll build a quick‑reference “stud earring size chart mm” that tells you exactly which piece to pull out for any occasion.
And here’s a little habit that works wonders: each time you try a new size, note how it feels after an hour. Does your lobe start to feel tight? Does the stone catch light the way you hoped? Those tiny observations become the data points that guide your future purchases.
When travel meets sparkle
Travel‑savvy women often ask, "Can I bring my favourite studs on a plane without them getting lost?" The answer is yes, as long as you keep them in a soft pouch and choose sizes that won’t snag on clothing. A compact 6 mm pair slides neatly into a travel‑ready jewelry roll, while a single 10 mm piece can be tucked into a zip‑lock bag for extra protection.
So, whether you’re strolling through a European piazza or hopping between airport lounges, the right stud size can be the quiet confidence that ties your whole outfit together.
Take a moment after watching the video to compare the visual guide with the stones you already own. You might discover that the “perfect” size you’ve been chasing is actually the one that feels the most comfortable on your ear.
How to Measure Your Ear for the Perfect Fit
Okay, you’ve got the stud earring size chart mm in front of you and a handful of sparkle‑laden options on the table. The next question is: how do you actually know which millimetre measurement will sit perfectly on your lobe? Let’s walk through a quick, no‑fuss method that you can do on the kitchen counter, in a hotel bathroom, or even at the airport gate.
Gather Your Tools
All you really need is a small ruler (the kind that slides into a passport pocket works fine), a pair of tweezers or the back of a pen, and a piece of paper. If you’ve got a printable ruler from our earlier guide, great—pull it out. If not, any standard metric ruler will do.
And, just in case you’re traveling light, a thin credit‑card‑sized measuring strip works surprisingly well. The trick is to have something that lets you read millimetres without guessing.
Find the Right Spot on Your Lobe
First, locate where the post of the stud will sit. For most first‑piercings, that’s the highest point of the fleshy part of the lobe—right where the skin meets the cartilage.
Hold the earring gently with tweezers and rest the post against the top of the lobe. You’ll feel a tiny gap between the post and the skin; that gap is where the stone will sit once the backing is on.
But don’t just guess the distance. You want a measurement that reflects the actual space the stone will occupy, not just the length of the post.
Take the Measurement
Here’s a step‑by‑step you can follow:
- Place the ruler so the zero mark touches the top of the lobe where the post meets the skin.
- Slide the post (still held with tweezers) up to the point where the backing would sit. The backing adds roughly 0.5 mm, so keep that in mind.
- Read the millimetre line that aligns with the end of the post. That number is your “ear depth” measurement.
Now compare that number to the stud earring size chart mm. If your measurement reads 6 mm, a 6‑mm or 5‑mm stone will sit flush. If it’s 9 mm, you’re looking at the 8‑10 mm range for a comfortable pop.
And if you’re unsure, round down a millimetre. It’s easier to try a slightly larger stone later than to wrestle with a piece that feels too tight.
Double‑Check and Test
Before you commit to a size for a whole trip, try the stone on the spot. Slip a backing on, place the earring on your lobe, and give it a gentle tug. Does it stay put without pulling? Does the stone sit level with the skin or does it tilt?
Take note of how it feels after a few minutes of movement. If it starts to dig or feels loose, adjust one size up or down and repeat.
Finally, pop the chosen stud into your travel pouch, alongside a couple of nearby sizes. That way, if the first day of sightseeing reveals a different comfort level, you have a backup ready.
So, what’s the takeaway? Measure once, compare to the stud earring size chart mm, test, and then pack the winners. It’s a tiny ritual that turns the guesswork into a confident choice, letting you focus on the adventure—not on whether your earrings will stay in place.
Video: Choosing the Right Stud Earring Size
So you’ve just hit play on that quick guide that walks you through measuring your lobe. The video does the heavy lifting, but you still need a game plan to turn those seconds on screen into a comfortable, travel‑ready stud.
Pause, Play, and Pencil‑It In
First thing – don’t binge the whole thing. Pause at the moment the presenter shows the ruler against the ear. Grab a pen and jot down the millimetre reading they point out. It’s the same number you’ll compare to our stud earring size chart mm later.
Why write it down? Because the brain forgets numbers faster than it remembers a visual cue. A quick note makes the measurement stick, and you won’t have to rewind three times on a noisy plane.
Match the Video Measurement to Your Own Lobe
Now that you have a number, replicate the demo on yourself. Use the same kind of ruler – the thin credit‑card‑sized strip works great in a hotel bathroom. Align zero with the top of your lobe, slide the post up, and read the millimetres. Does it line up with the video’s figure? If you’re a millimetre off, note whether you’re bigger or smaller and adjust your size choice up or down accordingly.
And here’s a little trick: the video often shows the backing in place, which adds roughly 0.5 mm. If the presenter didn’t mention that, add the half‑millimetre yourself before you compare to the chart.
Test While You Watch
Keep the video playing in the background while you actually try the stud on. Slip a flat‑back or click‑back onto the post, place the earring, and give it a gentle tug. Does it stay snug? Does the stone sit flush with your skin or does it tilt?
If the stone feels tight, remember the tip from the tutorial: “round down a millimetre” – it’s easier to go bigger later than to wrestle with a piece that digs in.
Build a Mini‑Travel Kit On‑The‑Fly
While the video shows a handful of sizes, you don’t need to bring every option on your trip. Pick the three that felt most comfortable during your test and tuck them into your travel pouch. Add a spare size just a notch larger and another just a notch smaller. That way you’ve covered the sweet spot without overpacking.
If you’re still unsure, the PotomacBeads everyday stud earring tutorial walks through a similar hands‑on process and can give you extra confidence before you close your suitcase.
Quick Checklist Before You Hit “Save” on Your Packing List
- Watch the video once, pause at the measurement point.
- Write down the millimetre reading.
- Measure your own lobe with the same method.
- Adjust for backing thickness (≈0.5 mm).
- Test the stud on‑hand, tug gently.
- Pack three sizes: the one that fit best, one a shade larger, one a shade smaller.
That’s it. By turning a simple video into a step‑by‑step audit, you eliminate guesswork and end up with a stud that feels like it was made just for you – even when you’re hopping from one airport lounge to the next.
Comparative Size Chart: mm Measurements vs Gauge
When you pull out a ruler and see "6 mm" you instantly picture a tiny sparkle, but most people also hear "gauge" and wonder if it’s the same thing. The short answer? They’re two different languages for the same idea – the thickness of the post that holds your stud in place. Knowing both lets you translate a millimetre reading into the gauge you’ll see on a packaging label, and vice‑versa.
Why the conversion matters
Imagine you’re on a layover in Amsterdam and you spot a pair of studs that scream "perfect for tonight’s dinner". The tag says 0.8 mm post, 18‑gauge. You’ve just measured your own lobe at 6 mm using our guide. If you don’t know the conversion, you might dismiss those studs, even though they’d sit like a feather on your ear.
In our experience, the most common post thicknesses for travel‑friendly studs hover between 0.6 mm (14‑gauge) and 1.2 mm (12‑gauge). Anything thicker feels bulkier, especially after a long flight. That’s why we keep a quick reference chart in our travel pouch – it’s the cheat sheet that turns a millimetre number into a gauge you can trust.
Conversion cheat sheet
| Post thickness (mm) | Gauge (American) | Best use scenario |
|---|---|---|
| 0.6 mm | 14‑gauge | Delicate daily studs, ideal for petite lobes or second‑hole placements. |
| 0.8 mm | 18‑gauge | Everyday sparkle that balances weight and durability – our go‑to for travel. |
| 1.0 mm | 16‑gauge | Bold stones (8‑10 mm) where you need extra support without sacrificing comfort. |
| 1.2 mm | 12‑gauge | Heavy‑set or oversized studs (12 mm+) for evening events where you want the stone to stay put. |
Notice the pattern? As the gauge number gets smaller, the post gets thicker. That’s why a 12‑gauge post feels solid – it’s actually 1.2 mm of metal, not a tiny filament.
Real‑world travel examples
Case 1: You’re hopping between Paris cafés, sipping espresso, and you need a stud that won’t tug after a few hours of sitting. A 0.8 mm (18‑gauge) post paired with a 6 mm stone gives you that lightweight feel while still looking polished.
Case 2: Your evening plans involve a rooftop dinner in Barcelona, and you want a 10 mm stone that makes a statement. Upgrade to a 1.0 mm (16‑gauge) post – the extra metal supports the larger stone, preventing it from wobbling when you laugh.
Case 3: You’ve just gotten a second‑hole piercing on a friend’s recommendation. The tiny 1.5 mm “mini‑stud” you want will need a 0.6 mm (14‑gauge) post so it sits flush behind the primary post without crowding the lobe.
Actionable steps to pick the right gauge
- Measure your lobe depth in millimetres (you’ve already done that in the previous sections).
- Match the depth to a stone size from our latest stud collection. If your depth is 6 mm, aim for a 6 mm stone.
- Consult the table above: choose the post thickness that pairs best with your stone’s weight.
- Check the backing type. Flat‑back backs work best with thinner posts; click‑backs add a tiny cushion for thicker gauges.
- Pack three variations: the exact gauge you think fits, one step up, and one step down. Test each on a quick coffee break before you board.
By following this mini‑workflow, you turn a confusing gauge number into a practical decision you can make on the go. No more second‑guessing at the airport duty‑free shop.
Quick tip from our team
We keep a small magnetic strip in our travel pouch. It holds the post after you remove the stone, so you can swap gauges without losing any tiny parts. It’s a game‑changer when you’re juggling 0.6 mm and 1.2 mm posts in a cramped hotel bathroom.
So, the next time you glance at a product label that reads “18‑gauge”, you’ll instantly know it translates to a 0.8 mm post, perfect for a 6‑8 mm stone on a long‑haul flight. The conversion isn’t just trivia – it’s the bridge between the millimetre chart you love and the real‑world studs you’ll actually wear.
Common Size Mistakes and How to Avoid Them
We've all stood in front of the mirror, grabbed a 6 mm stud, and thought, "Is this going to feel weird on my lobe?" Then, after a few hours of travel, the stone starts to tug and you wonder why you didn't catch the mistake sooner.
Mistake #1: Ignoring Post Thickness
Most people look at the stone size on the chart and assume any post will work. In reality, a 0.8 mm (18‑gauge) post feels feather‑light with a 6 mm stone, but the same stone on a 1.2 mm (12‑gauge) post can feel chunky, especially on a petite ear.
We've seen travellers swap a 1.2 mm post for a 0.8 mm one mid‑flight and instantly feel the difference. The rule of thumb? Match a thinner post to a larger stone, and a thicker post to a tiny stud.
Mistake #2: Forgetting Backing Type
Flat‑back backs hug the skin, giving a sleek line, while click‑backs create a tiny gap that can cushion a heavier stone. If you choose a click‑back for a delicate 4 mm stud, the extra half‑millimetre can make the piece feel loose and cause it to spin.
Conversely, using a flat‑back on a 10 mm stone with a thin post might dig into the lobe after a day of sightseeing. The sweet spot is to pair flat‑backs with thinner posts and click‑backs with thicker gauges.
Mistake #3: Relying Solely on Stone Size
The stud earring size chart mm tells you the stone diameter, but it doesn’t account for your ear’s depth. A 6 mm stone looks perfect on a 6 mm ear depth, yet if your lobe measures 8 mm, that same stone will sit too high and feel insecure.
We always recommend measuring your ear depth first, then using the chart to pick a stone that sits flush. If the depth and stone don’t line up, adjust by one size up or down before you pack.
Mistake #4: Over‑Packing the Same Size
It’s tempting to fill your travel pouch with every 6 mm stud you own, thinking more choices equals safety. In practice, that just adds weight and makes it harder to spot the perfect pair when you’re in a rush.
Instead, curate a mini‑wardrobe: one size for day‑time comfort, one for evening sparkle, and a backup gauge. That way you stay light, organized, and ready for any itinerary.
A focused selection also reduces the chance of losing a tiny post in the hotel bathroom.
Quick Checklist to Avoid Slip‑Ups
- Measure ear depth in millimetres.
- Pick a stone that matches the depth range on the chart.
- Choose post thickness: thinner for larger stones, thicker for tiny studs.
- Match backing type to post gauge.
- Pack three variations – exact gauge, one step up, one step down.
- Test each on a coffee break; tug gently to ensure it stays put.
So, what should you do next? Grab your ruler, note the depth, and run through this tiny ritual before you zip up your travel pouch. It only takes a minute, and you’ll avoid the dreaded “ear‑ache” moment halfway through a layover.
Remember, the stud earring size chart mm is a map, not a GPS. By paying attention to post thickness, backing style, and your own ear depth, you turn that map into a reliable route that gets you from the airport gate to the dinner table without a hitch.
FAQ
What does the stud earring size chart mm actually measure?
The chart is a quick reference for the stone’s diameter in millimetres, but it also hints at the depth of your lobe and the post thickness you’ll need. In other words, a 6 mm entry means the sparkle sits about six millimetres away from the skin when the backing is on. Pair that with the right gauge and you get a stud that feels like it was made for your ear.
How do I know which millimetre size fits my ear depth?
Grab a tiny metric ruler – the kind that slides into a passport pocket works great – and line zero up with the top of your lobe where the post will rest. Slide the post up until the backing would sit, then read the millimetre line. Match that number to the chart; if you land on 6 mm, try a 5 mm or 6 mm stone. When in doubt, round down a millimetre so the stone sits comfortably.
Does the chart consider different gauge or post thickness?
Absolutely. The chart’s size ranges assume a post that balances the stone’s weight. For larger stones (8‑10 mm) you’ll want a thinner 0.8 mm (18‑gauge) post, while tiny 4‑5 mm studs feel sturdier on a 1.2 mm (12‑gauge) post. Think of gauge as the “muscle” behind the sparkle – the right thickness keeps the earring from wobbling, especially after a day of sightseeing.
Can I use the chart for multiple piercings or layered studs?
Yes, the same millimetre guide works for first‑hole, second‑hole and even third‑hole placements. For a primary piercings, 5‑7 mm stones give a subtle pop. If you’ve added a second hole, look at the 2‑4 mm mini‑stud range – they sit nicely behind the main post without crowding. The chart simply shifts the recommended depth, so you can layer without guessing.
What backing types work best with the sizes on the chart?
Flat‑back backs hug the skin and are perfect for thinner posts and everyday wear – they keep the stone flush and secure. Click‑backs add a tiny cushion, which can be kinder to sensitive lobes or larger stones that need a bit of wiggle room. When you match the backing to the post thickness, you avoid that “pinch‑and‑pull” feeling that ruins a travel day.
How should I pack my stud earring choices for travel?
Think of your pouch as a mini‑wardrobe. Pick three variations: the exact size you think fits, one step larger, and one step smaller. Test each on a coffee break, give it a gentle tug, and note how it feels after a few minutes of movement. Slip the winners into a small zip‑top bag with a spare backing – that way you’re prepared for any outfit or time‑zone change.
If my ears swell on a long flight, should I adjust the size?
Swelling is common, so it’s wise to carry a slightly smaller stone or a thinner post as a backup. A 5 mm stud on a 0.6 mm post will stay comfortable even if your lobes expand a millimetre or two. After you land, you can swap to a larger size if you feel fine. Having that “just in case” option keeps the sparkle hassle‑free.
Conclusion
We've walked through everything from measuring your lobe to matching post gauge, so you now have a solid roadmap for using the stud earring size chart mm on the go.
Remember, the sweet spot is a stone that sits flush with your skin, a post thin enough to keep the piece light, and a backing that feels secure without pinching.
So, what’s the next step? Grab your ruler, note your ear depth, pick a stone in the 5‑10 mm range that matches that number, and then test two neighboring sizes. Pack the three you like best in a zip‑top pouch – one exact, one a touch larger, and one a shade smaller.
When you land at your destination, you’ll already know which stud will stay comfortable through coffee breaks, museum tours, and dinner dates. No more second‑guessing at the duty‑free counter.
And if you ever notice swelling on a long haul, swap to a slightly smaller stone or a thinner post – the extra wiggle room can make all the difference without sacrificing sparkle.
Finally, keep this cheat sheet handy in your travel kit. A quick glance at the chart and a few seconds of testing will keep your earrings sparkling and your lobes happy, wherever the journey takes you.