

How to Clean Gold Plated Jewelry at Home: Simple, Safe Steps
Gold‑plated jewelry gives any outfit that instant sparkle, but everyday chemicals can dull the shine fast. From salty beach air to sweaty gym sessions, that gold layer can lose its luster before you even notice.
Have you ever pulled out your favorite gold‑plated necklace and found a gray haze where the shine should be? You’re not alone, and there’s a simple at‑home routine that can restore that dazzling glow without any expense.
Picture unpacking a travel suitcase, your gold‑plated cuff bracelet catching the light, only to see a muted sheen. That tiny disappointment reminds us that even the best accessories need a little TLC after a trip.
Start by rinsing pieces in lukewarm, soapy water—just a gentle dish soap is fine. Gently scrub the surface with a soft toothbrush or microfiber cloth, paying attention to tiny crevices where dirt hides. After a thorough rinse, pat dry with a clean towel. This simple ritual removes grime and revives the gold’s shine.
On the move, a piece that stays bright feels like a small luxury. Our twist‑gold pavé CZ bangle bracelet keeps its shine even after a week in jet‑lag mode, thanks to durable construction and careful plating—so you can carry style without extra fuss.
Try the routine on one piece tonight. Keep a soft brush and microfiber cloth in your carry‑on, and treat each item with the same gentle care you’d give a delicate travel bag. Habitually doing this keeps gold‑plated jewels looking fresh wherever you go.
Remember, the key is consistency, not intensity. A quick weekly rinse keeps grime from building up, and a gentle wipe after a swim or shower removes any residue. If you notice a faint tarnish, you can dab a tiny bit of baking soda on a damp cloth and wipe lightly—no harsh chemicals needed. today.
TL;DR
Want a quick fix to bring back that golden sparkle? Warm soapy water, gentle brushing, and a light baking soda wipe restore shine and keep gold‑plated pieces safe for travel, everyday wear, and costly repairs.
Follow our step‑by‑step guide and keep accessories dazzling without breaking the bank and every day.
Step 1: Gather Cleaning Supplies and Safety Precautions
Ready to revive your gold‑plated treasures? Before you dive into scrubbing, let’s gather what you’ll need and make sure you’re safe while doing it.
First, stock up on a few basics. A soft microfiber cloth, a gentle dish soap (any mild hand soap works), a soft‑bristle toothbrush, a bowl, a clean towel, and if you’re feeling fancy, a small bowl of baking soda for the occasional tarnish wipe. If you prefer a more eco‑friendly routine, a splash of vinegar can help break down mineral buildup.
Safety first: wear gloves if you’re sensitive to soaps or want extra protection, especially when using baking soda. Keep the workspace well ventilated and make sure you’re not using harsh cleaners like bleach or ammonia—those are gold‑plating killers.
Also, check the jewelry’s metal base. Some pieces have a base of copper or nickel, so a mild cleaning will keep them bright without stripping the thin gold layer. A quick rinse in warm water before scrubbing removes surface oils.
When you’re ready to start, fill a small bowl with lukewarm water, drop a few drops of dish soap, and submerge the piece. Let it sit for a minute or two—this loosens grime that’s stuck in the tiny grooves. Then grab your soft brush and move in gentle circles, focusing on those tiny crevices that trap everyday sweat and salt. Avoid harsh scrubbing or steel wool; that’s what removes the thin gold layer. After you finish, rinse the piece under cool water, pat dry with a towel, and check for a clean shine. If you see a faint gray spot, a gentle dab of baking soda on a damp cloth will lift it without damaging the plating.
That short demo shows the exact motions—soft circles, gentle pressure, and the right rinse technique. After you’ve watched, you’ll feel ready to tackle a full set.

Now that you have your kit ready and the safety checklist in place, you’re set to keep your travel jewels looking like brand new. Remember, the same careful attention you give to your outfits also protects your jewelry. And if you ever need a fresh pair of lenses to spot those tiny tarnish spots, check out how to choose eyeglass frames for face shape or explore high‑resolution photography ideas at alfapics.com. Give it a quick spin after cleaning for extra polish.
Step 2: The Core Cleaning Process – Video Tutorial
We’re at the heart of the routine – the moment you turn that soft brush into a magic wand. This isn’t just a quick wipe; it’s a carefully choreographed dance that lifts grime while protecting the thin gold layer.
Start with the right mix. Combine ¼ cup baking soda with two tablespoons of warm water. The paste should be thick enough to stick to the bracelet but still spreadable. If you’re dealing with a delicate set of stones, dampen a microfiber cloth first so the paste doesn’t get into the gaps.
Step 1: Gently Scrub
Apply the paste in a light, circular motion. Think of a gentle massage – you don’t need to press hard, just let the bristles do the work. For larger pieces, a soft‑bristle toothbrush is handy; for small details, a clean Q‑tip works wonders. Keep your strokes short to avoid scratching.
Step 2: Rinse, Pat, Repeat
Rinse the piece under lukewarm water, ensuring no residue remains. Pat dry with a lint‑free towel. If you see a stubborn spot, reapply a tiny dab of paste and scrub again. The key is patience; a few gentle passes beat a single hard stroke that can nick the plating.
Step 3: The Final Buff
Once dry, use a clean microfiber cloth to buff the surface in one direction. This draws out any remaining fine grit and leaves the gold shining like fresh‑cut glass. For extra sparkle, lightly mist with a 50/50 mix of distilled water and white vinegar, then wipe with a fresh cloth.
Real‑world check. Picture a traveler's wristwatch that’s seen a day in the desert. After a quick scrub and rinse, that watch gleams enough to catch a passing flight attendant’s eye. It’s the same principle that keeps our Twisted Gold Pavé CZ Bangle looking runway‑ready after a weekend in the city.
Now you’re ready to see the routine in action. The video below walks through each step in slow motion, highlighting the exact pressure you should apply and how to handle intricate settings. Watching it gives a visual cue that the written guide might miss.
Watch the step‑by‑step tutorial here.
Do you wonder if a stronger scrub is necessary? The truth is, over‑scrubbing can thin the plating faster than letting a little grime sit. Keep your routine gentle and your pieces will stay bright for months.
Remember: the core process is simple – paste, scrub, rinse, buff. Follow these steps consistently, and your gold‑plated jewelry will look like new even after a day in the sun. Try it tomorrow for instant results today.
Step 3: Choosing the Right Method for Different Plating Thicknesses
Ever notice how a thin‑plated bracelet looks bright one day and dull the next? The secret is that the gold layer’s thickness is the deciding factor for how aggressively you can clean it.
Gold‑plated pieces usually sit between 0.05 and 0.5 µm. A 0.5‑µm coating is like a light coat of paint; it can take a bit of scrubbing before the layer starts peeling. Anything under 0.1 µm is more fragile—think of it as a whisper of gold that can wear off with a single swipe of a rough brush.
When Less Is More
If your jewelry is 0.05 µm or thinner, keep the cleaning routine as gentle as a feather. A damp microfiber cloth and a tiny dab of mild dish soap are all you need. Skip the baking soda paste; it’s a mild abrasive that can shave off precious gold.
When You Can Push a Little
For 0.2–0.5 µm pieces, you can introduce a light abrasive, like a ¼ cup of baking soda mixed with two tablespoons of water. Apply it in a circular motion, then rinse with warm water. This method lifts grime without eroding the plating—especially handy for cuff bracelets that get caught in pockets.
Thicker Layers, Bigger Confidence
Some of our own Twisted Gold Pavé CZ Bangle bracelets are plated to roughly 1.5–2 µm. Those can withstand a more vigorous scrub with a soft‑bristle brush. Still, avoid abrasive sponges or metal tools that can scratch the gold. Afterward, a quick rinse and a dry microfiber wipe will keep the shine intact.
What’s the takeaway? Match the cleaning intensity to the plating thickness. A good rule of thumb: the thinner, the gentler. If you’re unsure of the layer, start with the mildest approach and see how the piece reacts.
Real‑World Scenario
Picture a traveler who wore a 0.07 µm gold‑plated necklace during a beach vacation. The saltwater and sunscreen left a film on the surface. Using only a damp cloth and a drop of mild soap, the necklace regained most of its luster after a quick wipe. Trying a baking soda paste had no effect but added tiny scratches that were hard to notice.
Contrast that with a 0.4 µm gold‑plated ring used by a fashion influencer. She had to remove a stubborn oil stain after a photo shoot. A short session with the baking soda paste, followed by a rinse and dry, removed the stain cleanly—no trace of wear or dullness.
Quick Decision Table
| Plating Thickness | Recommended Cleaning Method | Notes |
|---|---|---|
| ≤ 0.1 µm | Soft cloth + mild soap | Skip abrasives; keep gentle. |
| 0.2–0.5 µm | Baking soda paste (¼ cup + 2 Tbsp water) | Use lightly, rinse well. |
| 0.6–2 µm | Soft‑bristle brush + mild soap | Can scrub a bit harder; still no abrasive sponges. |
Need a deeper dive into the science of plating thickness and how it affects tarnish? Check out this guide on Statement Collective for a solid rundown.
Want to see how a high‑quality 3‑micron plating behaves under regular wear? Francesca’s article on their gold‑plated guide walks through care tips tailored for thicker layers. Read more here.
Step 4: Rinsing, Drying, and Storage Tips
You just finished the gentle scrub, and the sparkle is back. The next part is all about making sure the water doesn’t linger, and the piece stays safe while you’re not wearing it. Think of it as giving your jewelry a mini‑spa day before the next adventure.
Rinse with Care
Place the item in a small bowl of lukewarm water. Let it sit for a minute—no more than two. The warm water loosens any residual soap or oil without swelling the base metal. Then, using your palm or a soft brush, give it a gentle swirl. This simple step removes the last bit of grime and keeps the plating from re‑accumulating.
Pat Dry, Don’t Rub
Grab a lint‑free microfiber towel and pat the piece dry. If you’re in a hurry, a quick squeeze works, but a full pat keeps the surface free of streaks. Avoid rubbing because pressure can nick the thin gold layer, especially on items with intricate settings.
Buff the Finish
Once dry, take a clean section of the microfiber and rub in one direction. This directional motion pulls any microscopic debris away and gives the gold a bright, even sheen. If you want extra shine, lightly mist a 50/50 mix of distilled water and white vinegar, then wipe with a fresh cloth. Just a few droplets—no more than a whisper—will lift any dull spots.
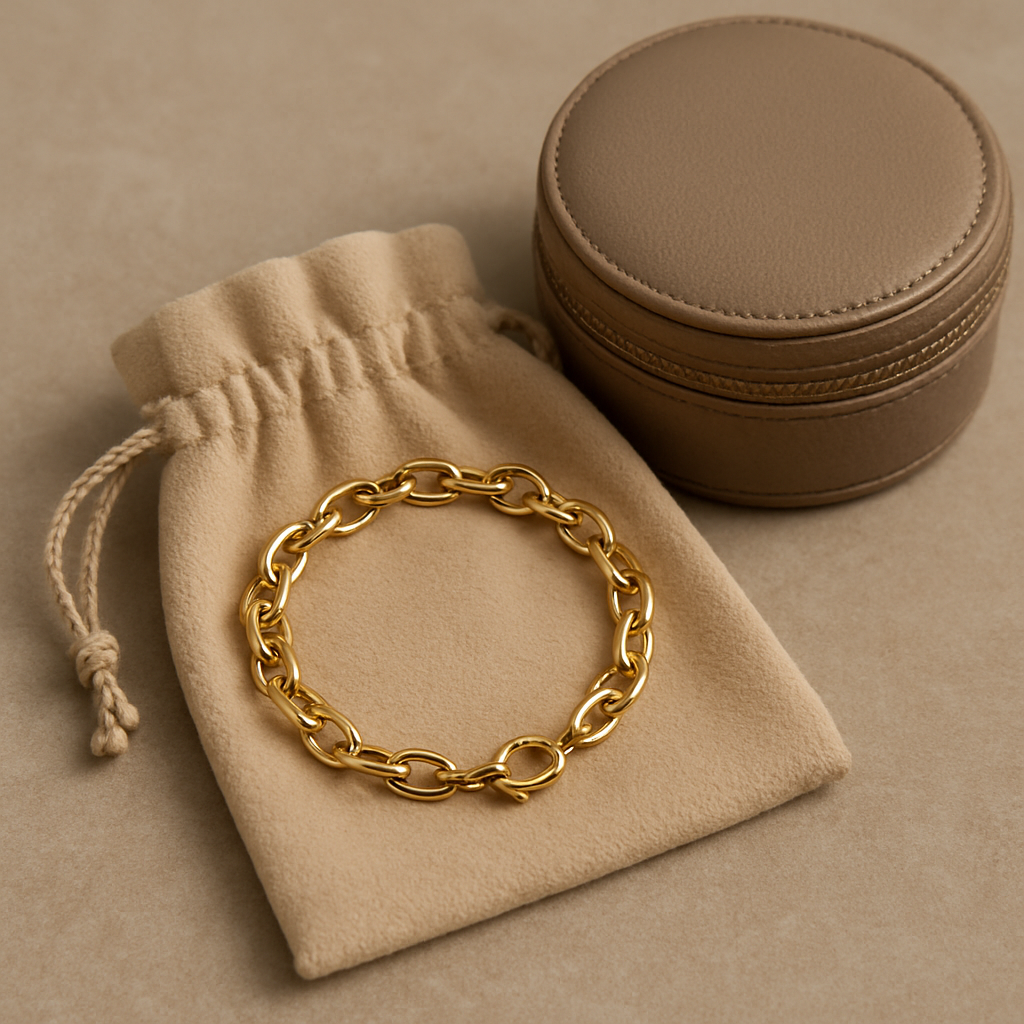
Store Like a Traveler
When you’re not wearing the piece, put it in a soft pouch or a lined jewelry box. Separate items to prevent scratching against each other. For long‑term storage, add a silica‑gel packet or a small anti‑tarnish strip—these absorb moisture that can accelerate corrosion. If you’re packing for a trip, place the pouch inside a dedicated jewelry travel case or a small zip‑lock bag. A little extra padding protects against bumps and knocks.
We often see travelers who forget to dry their bracelets after a swim. That residual moisture can turn into a tiny puddle of tarnish over a week. By following the rinse‑pat‑buff routine, you’re giving your pieces a clean slate each time you put them away.
For a deeper dive into long‑term care, check out this guide on how to keep gold‑plated jewelry from tarnishing. It breaks down the science behind why moisture matters and how to keep your pieces fresh for months: How to Keep Gold Plated Jewelry from Tarnishing.
If you’re planning a weekend getaway or a round‑the‑world adventure, remember that your jewelry needs a bit of love too. A quick rinse after a beach day, a gentle buff before bed, and proper storage means you’ll always have that gleam ready for your next photo‑op.
By treating each piece like a travel companion—clean, dry, protected—you’ll keep the shine alive and the plating intact, no matter where your wanderlust takes you. And if you’re curious about how travelers can keep their accessories in top shape while on the road, this link might pique your interest: Top Bike Tours Portugal.
Step 5: Common Mistakes and How to Avoid Them
First thing: we all love that bright shine, but our enthusiasm can turn into a quick‑fade tarnish if we slip up. Below are the most frequent go‑ofs and how to steer clear.
1. Over‑scrubbing
We’re all tempted to give our bracelet a full‑blow brush after a beach day, thinking more pressure equals cleaner. It’s the opposite. Heavy scrubbing actually wears away the thin gold layer, leaving a dull gray patina. Use a soft cloth or a gentle toothbrush, and keep strokes light. Remember, a little is enough.
2. Using the wrong household items
Toothpaste, lemon juice, vinegar and even baking soda are common DIY hacks. The problem? They’re acidic or abrasive. Toothpaste can scratch, lemon juice can corrode, and vinegar can strip the plating. Fejn’s guide also highlights the dangers of acidic cleaners. Stick to mild dish soap and warm water, or the baking soda paste we use for thicker plating (see Step 3). NicoleHD’s guide lists these exact pitfalls.
3. Ignoring the finish after cleaning
Cleaning is just the first act. If you leave moisture on the plating, it’ll oxidize faster. Pat dry with a lint‑free cloth and give a light buff in one direction. This seals the surface and keeps the shine longer. It’s a tiny extra step that pays off.
4. Forgetting about storage
After every use, slide your pieces into a soft pouch or a lined jewelry box. If you store them in a damp drawer, the humidity will accelerate tarnish. Add a silica‑gel packet for extra protection. In travel mode, zip‑lock bags keep your jewelry safe from bumps.
5. Skipping the rinse after a soak
Skipping the rinse can be misleading. Some people think a quick rinse is enough. However, if you’ve used a paste or soap, a thorough rinse removes any residual film that could cling to the gold. A second rinse in clean water followed by a gentle pat dry is the gold standard.
Real‑world example
My sister, who’s a frequent beachgoer, used a bowl of hot water to rinse her gold‑plated necklace after a swim. The necklace turned out dull. She switched to the warm soapy water routine and noticed the shine return after just one wash. That simple tweak saved her from a costly repair.
Quick checklist
- Use a soft brush, not a stiff one.
- Stick to mild soap, not toothpaste or lemon.
- Rinse twice, pat dry, buff once.
- Store in a dry, low‑humidity spot.
- Review the plating thickness before deciding on the cleaning intensity.
Following these rules means your travel‑ready pieces stay as dazzling as the day you bought them—no more accidental dullness, no more expensive repairs.
Step 6: When to Replace or Replate Your Jewelry
\nWe’ve been polishing, rinsing, and buffing for a while now, so the next question on your mind is: “When do I actually need to replace or replate my piece?” It’s a tough call because gold‑plated jewelry sits on the edge of durability and vanity.
\nFirst, let’s talk about the tell‑tale signs that your gold layer is on its last lap. If you see a subtle gray haze that stays even after a deep clean, that’s the base metal bleeding through. The gold plating may have worn off, or it might be so thin it’s practically invisible.
\nAnother red flag is a sudden increase in scratching or dull spots that look like micro‑abrasions. Imagine you’ve worn that Twisted Gold Pavé CZ Bangle for a week in a high‑traffic airport, and after the flight you notice tiny scratches that were never there before. That’s a clear sign your plating’s been compromised.
\nSo, when is it time to replace? If the layer’s gone, replacement is the only option. But you can often give your piece a new lease on life by re‑plating. Re‑plating is essentially a fresh coat of gold over the old. It restores the look and protects the base metal from further corrosion.
\nHere’s how to decide:
\n- Thickness matters. A 0.05‑µm layer will wear out faster than a 0.5‑µm one. If your piece was on the thinner end, re‑plating might be a good investment. \n
- Wear patterns. Heavy friction zones—like the inner side of a cuff or the front of a necklace—are the first to show wear. Spot‑check these areas after each clean. \n
- Longevity expectations. If you plan to keep the piece for months, a re‑plate can extend its life by a year or two. If you’re on a tight budget, a simple replacement might be cheaper.
Want a quick check before heading to a jeweler? Hold the piece under bright light and look for a silver or gray streak. If it’s visible, you’re likely looking at a loss of plating. That’s the moment you should bring it into the shop.
\nWhat does the re‑plating process look like? Think of it as a tiny makeover. The jeweler will clean the base metal, apply a thin layer of gold using a vacuum or electroplating method, and seal it with a protective coating. The result? A fresh, shiny finish that feels almost new.
\nNow, consider cost vs. value. A re‑plate for a $30 bracelet might cost $50, but the aesthetic boost could justify it if you love the piece. Alternatively, replace with a new piece that’s thicker‑plated—look for 1.5–2 µm layers if you want longevity.
\nFinally, remember that preventive care can save you from the decision point altogether. Keep the jewelry dry, store it in a pouch with a silica‑gel packet, and rinse it after every swim or shower. The more you protect it, the less likely it will hit that gray‑haze threshold.
\nFor a deeper look at how plating thickness influences lifespan, check out BriteCo’s guide on gold‑plated longevity—they break down the numbers and give you a clear timeline.
FAQ
1. How can I tell if my gold‑plated piece needs cleaning before I do it?
Take a quick look in bright light. A silver or gray streak that stays after a rinse usually means the plating has dulled. If the piece feels slightly dull when you hold it in the sun, it’s time for a gentle wash. Just a quick visual check saves you time and keeps the shine intact.
2. What’s the safest way to clean a thin‑plated necklace at home?
Use warm, soapy water and a soft microfiber cloth. Gently wipe the surface, avoiding harsh scrubbing. Pat dry with a lint‑free towel—no rubbing. If you notice stubborn spots, dab a tiny bit of mild dish soap on a damp cloth and repeat. This routine keeps the thin plating from wearing away.
3. Can I use baking soda for cleaning my gold‑plated bracelet?
Only if the plating is thicker, about 0.2–0.5 µm. Mix a quarter cup of baking soda with two tablespoons of water to form a paste. Lightly rub in a circular motion, then rinse thoroughly. For thinner layers, skip baking soda and stick to soap and water—anything abrasive can thin the gold.
4. How often should I clean my travel jewelry to maintain its shine?
A quick rinse after a swim or shower keeps moisture from settling. For daily wearers, a gentle wipe once a week is enough. Store pieces in a dry pouch with a silica‑gel packet to trap humidity. Consistent, light cleaning keeps the plating looking new longer.
5. When is it time to replace a piece instead of cleaning?
If you see a persistent gray haze that doesn’t budge after cleaning, the plating may have fully worn off. Similarly, heavy scratches that appear suddenly often signal a compromised layer. In those cases, replacement or professional re‑plating is the best option to restore both look and protection.
6. Is a vacuum cleaner safe for cleaning gold‑plated jewelry?
No, a vacuum can damage delicate settings and pull dust into tiny crevices. Stick to hand cleaning—soft cloths and mild solutions. If you want to remove dust from tight corners, a soft brush or a toothbrush works better than a vacuum attachment.
7. How does humidity affect gold‑plated jewelry over time?
High humidity speeds up tarnishing because moisture reacts with the thin gold layer. Keeping pieces in a sealed pouch with a silica‑gel packet or in a dry room slows this process. Even a small amount of trapped moisture can make the plating dull faster.
8. Can I use vinegar or lemon juice to clean my gold‑plated items?
These acidic cleaners are too harsh and can strip or scratch the plating. Stick to mild dish soap or a baking soda paste for thicker pieces. Acidic substances may leave residue that darkens the gold over time.
Conclusion
We’ve walked through the whole journey of keeping your gold‑plated pieces looking fresh, and it’s simpler than it feels. The key? A quick rinse after a swim, a gentle wipe after a shower, and a pat dry every time you put them away.
Remember the rule of thumb: thin plating needs a whisper of care, thicker plating can take a mild scrub. If you’re ever unsure, start gentle and observe how the surface reacts.
Think about the last time you slipped your favorite cuff into a travel pouch. Did you remember to dry it? That tiny step stops moisture from turning a bright gold into a dull gray. It’s the difference between a quick vacation and a costly repair.
What’s the next move? Keep a small brush and a soft cloth in your carry‑on, and set a weekly reminder to give each piece a quick wipe. Trust me, the sparkle will thank you—and so will your wallet.
Finally, if the gray haze or scratches persist, it might be time to consider re‑plating or replacing. A fresh layer not only restores shine but also protects the metal from future wear.
In short, caring for gold‑plated jewelry isn’t a chore—it’s a quick habit that keeps your travel looks dazzling. Grab a microfiber cloth, keep a bottle of mild soap handy, and stash a small brush in your tote. Repeat the rinse‑pat‑buff routine every few days, especially after a beach trip or a humid night out. Trust the process, and your pieces will stay radiant longer than the average wearer expects.