

How to Protect Jewelry at the Beach: A Practical Guide for 2026
Ever find yourself walking along a sun‑kissed shore, a string of delicate gold‑plated earrings catching the light, only to return and spot that annoying gray film that feels like a tiny betrayal? It’s a familiar beach‑jewelry horror story for many stylish travelers.
What’s happening here isn’t just a fluke of salt and sweat—saltwater, chlorinated pool water, and the very act of wiping your face with a damp towel all work together to strip away the thin protective layer on your pieces. That layer is what keeps your gold bright and your sparkle intact.
So, what can you do to keep the shine alive without turning your beach day into a cleanup mission? Start by choosing pieces that are designed to survive the seaside, like those with a protective rhodium plating or a high‑quality gold‑plate finish. Then, after any water exposure, rinse the jewelry under lukewarm tap water, pat it dry with a soft microfiber cloth, and store it in a breathable pouch. A quick dry‑down before you head out can prevent tarnish from setting in.
If you’re wearing gold‑plated earrings, you might wonder how to keep them from tarnishing while you soak up the sun. A great resource is how to keep gold plated jewelry from tarnishing—the guide walks you through step‑by‑step cleaning and maintenance that’s safe for even the most delicate finishes.
And while you’re prepping for that beach day, consider protecting your skin too—Sade Skin’s sunscreen keeps your complexion as radiant as your bling: Sade Skin.
Remember, the beach isn’t a death trap for your accessories if you treat them with the right care routine. Keep the water out, rinse and dry, store properly, and use a quick touch‑up before heading back onto the sand. Your jewelry—and your confidence—will thank you.
TL;DR
If you’re heading to the coast, the key to keeping your sparkle is rinses, dry‑downs, and protective coatings that shield against salt and sweat. So, before you hit the waves, remember: rinse immediately, pat dry, store in a pouch, and pair your pieces with our line—because glitter daily travels together.
Step 1: Assess the Threats – Understanding Salt, Sand, and UV Effects on Jewelry
Imagine stepping onto the beach, feeling the sun on your skin and hearing the waves break, but your favorite necklace feels a little heavier each time you look at it. That’s the silent damage salt, sand, and UV rays do to your sparkle. Let’s unpack how these three culprits attack your pieces, so you can protect them before the tide rolls back.
Salt: The silent corrosive. Sea water isn’t just water – it’s brine, a concentrated mix of minerals that can eat away at gold, silver, and even the protective plating on many pieces. Even a brief splash can leave a white film that, if not removed, turns into tarnish over days.
Sand: The abrasive partner. Fine grains cling to jewelry, especially dangling or open settings. When you move, sand slides against metal, scratching surfaces and dulling precious stones. A quick pat after a swim can stop this invisible sanding.
UV rays: The invisible thief. Sunlight isn’t just bright; it can weaken coatings, fade gems, and cause oxidation. Think of the delicate rhodium plating on a pendant – over time, UV can thin it, making the base metal visible again.
So, what’s the real takeaway? It’s simple: treat the beach like a chemical laboratory and protect your jewels with the right steps.
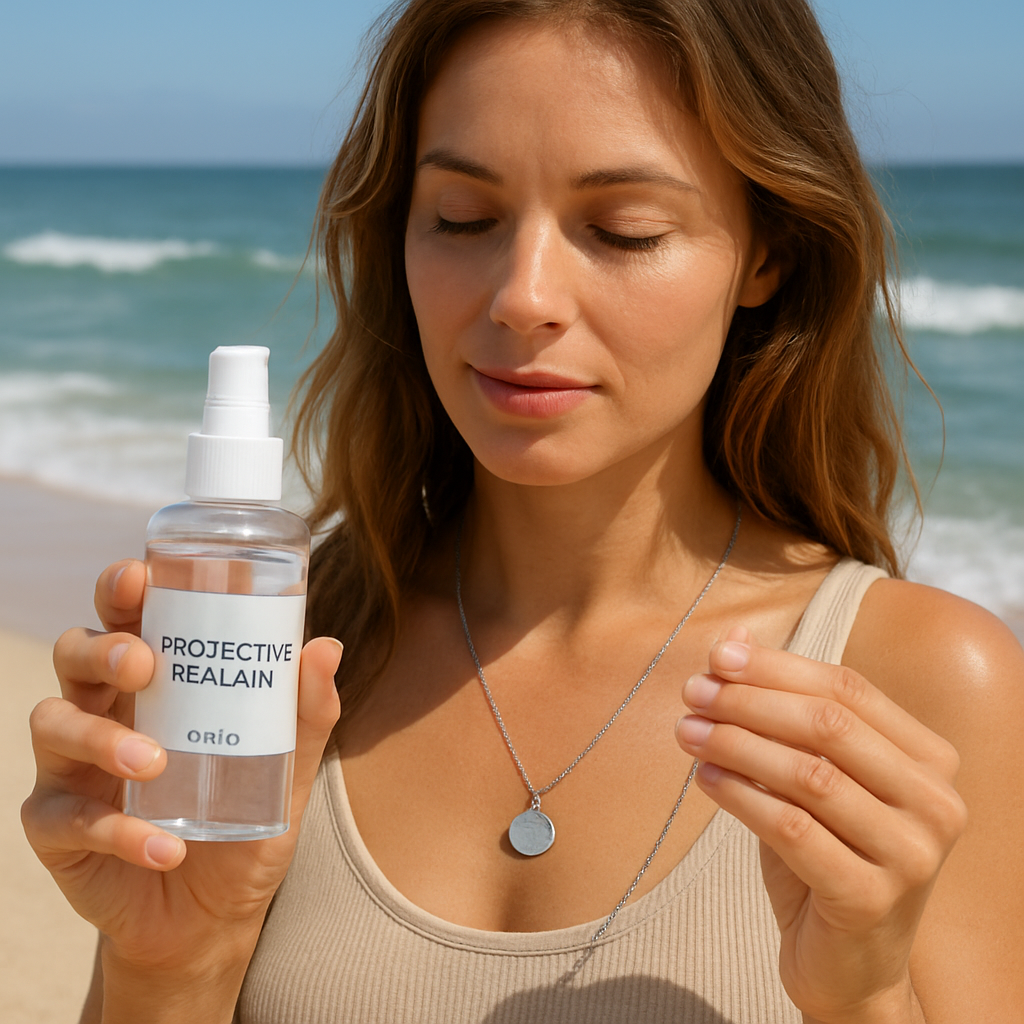
1. Pre‑empt with a coating. Before you even touch a beach, apply a light, clear sealant that blocks salt and UV. It’s like sunscreen for your jewelry.
2. Rinse immediately. After any exposure to salt or chlorinated water, rinse the piece in fresh, lukewarm tap water. Don’t skip this – it’s the quickest fix.
3. Dry with care. Use a soft microfiber cloth or a lint‑free towel. Pat, don’t rub. A gentle dry reduces surface moisture and helps preserve plating.
4. Store properly. Keep items in a breathable pouch, preferably with an interior compartment for delicate pieces. This stops sand from settling and gives your jewelry room to breathe.
While you’re watching, note how the host demonstrates each protective step. These habits become part of your beach routine, making maintenance a breeze.
Step 2: Clean and Inspect Your Pieces Before the Beach
Before you slip your favorite chain into a tote, give each piece a quick love‑check. Think of it like a pre‑flight safety check for a jet—only the jet is your jewelry and the flight is a sun‑soaked stroll.
Quick Pre‑Beach Check Grab your jewelry box, open it, and line everything out. Look for any loose settings, broken clasps, or tiny chips that could get amplified by salty air. If a stud feels a bit wobbly, tighten it right then or replace it before you hit the waves.
Inspect for Tarnish and Salt Buildup Even a polished gold‑plated piece can develop a gray film when it meets seawater. That film is just the first sign of corrosion. A simple spot‑check with a magnifying glass or a clean fingertip can tell you if you need a quick wash. (See the Ocean City vacation guide for how salt attacks metals.)
The Rinse Routine When you’re ready to head out, rinse each piece under lukewarm tap water. Use a soft‑bristle brush or your fingertips to remove any sweat or sunscreen residue. Don’t rush—let the water run for 15‑30 seconds, especially for pendants and chains where water can hide.
After rinsing, pat dry with a microfiber towel. A dry, soft cloth prevents water spots and gives you a clear view of any lingering discoloration.
Protect with a Light Oil Layer Apply a thin coat of mineral oil or a jewelry‑specific oil to gold and silver surfaces. A drop on your fingers, then a light swipe, can lock in moisture and slow oxidation. The trick is to use just enough to feel a sheen—no greasy residue that attracts dust.
Storage Strategy for After‑Beach Rest Place cleaned pieces in a breathable pouch or a soft, fabric‑lined box. The fabric allows air to circulate, preventing the dampness that can cause tarnish. If you’re traveling, a small drawstring bag keeps pendants from tangling while protecting them from sand.
While we’re on safety, a quick reminder: Jewelers Mutual safety tips offer simple insurance ideas if you’re worried about accidental drops or storms.
That short clip walks you through a rinse and oil routine that even the most fashion‑savvy travelers can follow in under a minute. The visual helps reinforce the steps so you don’t forget them on a bright, humid day.
Finally, keep a quick “clean‑up” kit in your beach bag—a small bottle of mineral oil, a microfiber cloth, and a spare pouch. That way, if you splash a bit more or the sunscreen lingers, you can refresh on the spot. The routine may feel a bit extra, but it saves you the cost of a tarnished necklace or a cracked ring when you’re ready to show off that beach‑ready sparkle.
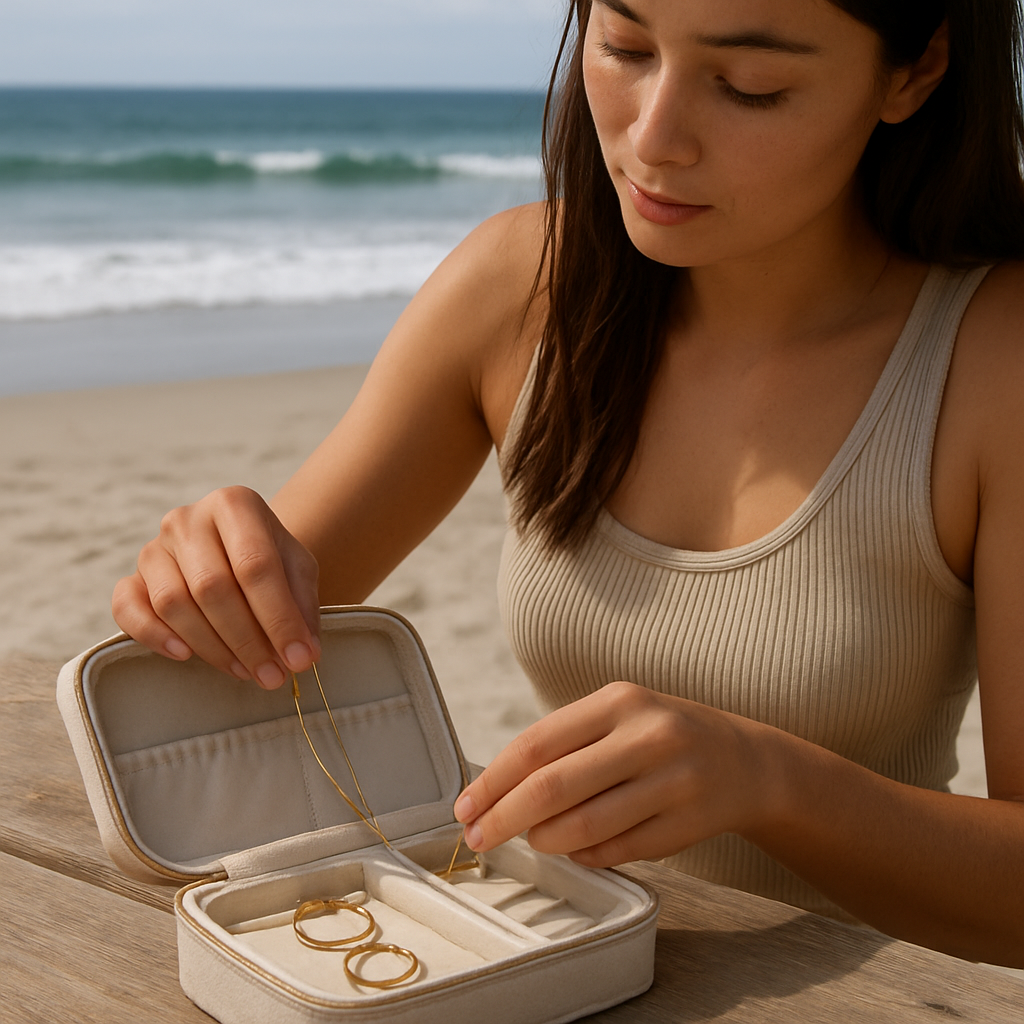
Step 3: Protect with Specialized Jewelry Cases (See Images Below)
Imagine you’re strolling along the shoreline, the ocean breeze lifting the light sheen of your favorite studs. You’ve already rinsed them, but the real villain is still lurking—every jostle and splash can turn that sparkle into a dull gray.
Pick the Right Case
Not all cases are created equal. Look for a pouch with a snug, waterproof lining and individual slots. A hard-shell case with a secure zipper keeps pieces from sliding and protects against accidental drops. The Travel + Leisure guide spotlights several options that balance style and sturdiness, so you can travel with confidence.
Key Features to Spot
• Water‑resistant lining – keeps salt spray from seeping in.
• Separate compartments – prevents necklaces from tangling and rings from scratching.
• Soft interior – a microfiber or velvet lining cushions delicate stones.
Pack Smartly
When you load your case, start with the most fragile items on the bottom. This creates a protective buffer against bumps. Use a small, reusable pouch for high‑value pieces so they’re isolated from heavier items. If you’re packing a statement necklace, loop it through the dedicated hook instead of sliding it into a pocket; the hook keeps it from getting crushed.
After the Beach: A Quick Reset
Even the best case can’t save a piece that’s been soaked. When you return, rinse again with fresh water, pat dry, and wipe the case interior with a clean microfiber cloth. If you have a water‑resistant case, a quick wipe down removes residual salt that could start corrosion.
Know When to Replace
Over time, even a premium case will show wear—cracked zippers, worn latches, or faded fabric. A cracked zipper can let moisture sneak in, which defeats the whole purpose. Replace the case at the first sign of damage. A fresh case feels like a new investment in your jewelry’s longevity.
By choosing the right case, packing it right, and giving your case a quick post‑beach touch‑up, you’ll keep your sparkle intact from the first sun flare to the last tide. It’s a small step that saves you the heartbreak of a tarnished piece.
Step 4: Watch How to Store Jewelry Safely While at the Beach
We’re at the sand, the sun is high, and you’ve got that little gold chain you can’t leave home. The trick isn’t about picking a fancy case— it’s about keeping that chain from turning into a salty puddle of regret.
Wash and dry first
Before anything else, rinse your pieces with lukewarm tap water. A quick 20‑second splash removes sweat and sunscreen. Then pat dry with a microfiber cloth. If you’re a silver lover, you can add a pinch of baking soda and a little salt to a bowl of boiling water— it’s a proven home remedy for brightening tarnish (see this simple trick). The cleaner you start with, the less battle your case has to fight.
Choose the right case
Look for a case with a waterproof lining and individual compartments. The lining keeps salt spray out, and the slots stop necklaces from tangling and rings from scratching. A soft interior— microfiber or velvet— cushions delicate stones and keeps your pieces from bumping against each other. If you travel, a roll‑up pouch with a drawstring is handy; it’s compact and protects against sand.
Pack smartly
Place heavier items on top of lighter ones. Think of it like packing a suitcase: the heavy stuff on the bottom creates a natural barrier. Keep your most valuable pieces— maybe that diamond‑encrusted bracelet— in a small zip‑lock pouch inside the case. If you have a statement necklace, loop it through the dedicated hook instead of sliding it into a pocket; that keeps the chain from getting crushed.
Protect while on the sand
When you’re soaking up the sun, keep a small, waterproof bag in your beach tote. Slip your case in there; the bag adds a second layer of protection against accidental drops or sudden splashes. If you’re wearing multiple pieces, consider a “mini‑case” that sits on your belt— it keeps the jewelry out of reach and off the sand.
Post‑beach reset
Back in town, give your case a quick wipe with a damp microfiber cloth. Then rinse each piece again to catch any salt that sneaked in. Pat dry and stack them back in their compartments. A quick post‑beach reset keeps corrosion at bay and keeps your jewelry looking fresh for the next trip.
Remember, the best protection comes from a mix of pre‑cleaning, the right case, smart packing, and a quick reset. Follow these steps, and you’ll keep your sparkle alive, no matter how many sunny days you spend by the sea.
Step 5: Compare Popular Protective Cases – Which One Fits Your Needs?
When you’re ready to actually bring your sparkle out, the real test comes down to the case you choose. Every traveler, from the jet‑set style icon to the weekend getaway bride, knows that a sturdy, smart case is the last line of defense against the salty spray, sand, and accidental drops. Below we break down the top three options so you can pick the one that feels like it was made for your style.
What to Look for First
Before you even touch a box, ask yourself these three quick questions:
- Does it seal against moisture? (Water‑resistant lining is a must)
- Does it keep pieces separate? (Individual slots or dividers protect against tangles and scratches)
- Is it lightweight enough to slip into a carry‑on without adding bulk?
Answering these gives you a baseline so you can compare the finer details later.
Three Options, One Goal
We pulled insights from trusted guides—the BuzzFeed roundup on best jewelry travel cases and the New York Times Wirecutter review of jewelry boxes and organizers—to curate this shortlist. Each case below balances durability, organization, and style for the modern woman on the move.
| Feature | BuzzFeed‑Featured Case | Wirecutter‑Top Pick | Diamond Veneer Travel Case |
|---|---|---|---|
| Water‑resistant lining | Yes, sealed zipper and silicone base | Yes, full‑seal waterproof interior | Yes, custom silicone seal |
| Individual compartments | Snap‑in dividers for rings, necklaces, bracelets | Dedicated hooks and a mesh pocket | Modular pouch system with magnetic slots |
| Weight & size | Lightweight, fits in any carry‑on | Compact but roomy enough for a week’s jewelry | Ultra‑compact, 3‑inch deep, ideal for brief trips |
| Price range | $20–$40 | $50–$80 | $60–$90 |
Take a quick mental inventory: Are you traveling for a single day or a week? Do you prefer a sleek, minimalist look or a case that feels like a luxury gift? Once you know the answer, the table above will show which case matches that vibe.
Real‑world example: I packed a 14‑inch cruise with my favorite diamond‑plated necklace, a pearl locket, and a handful of stud earrings. I chose the Wirecutter‑Top Pick because the separate hooks kept the necklace from getting tangled with the locket, and the waterproof lining meant I could rinse them on the ship’s pool deck without worry. After the trip, I only had to give the case a quick wipe—no tarnish, no scratches, just like the day I bought it.
If you’re a weekend jet‑setter who values space, the BuzzFeed‑Featured Case offers the perfect blend of size and protection. For luxury travelers who want that extra layer of assurance, the Diamond Veneer Travel Case’s silicone seal and magnetic pouch system keeps even the most delicate pieces safe.
In short, the right case is your silent partner on the beach—quietly guarding against salt, sand, and mishaps so you can focus on the sunset.
Step 6: Wear Minimal Jewelry or Use Beach-Friendly Options
First off, let’s be real: the ocean loves to play a little trickster on your sparkle. The trick? Salt, sweat, and the endless tug‑of‑war between style and survival. The trick is simple, though: keep it minimal and make every piece a beach‑ready champ.
Keep It Light and Loose
Think of your jewelry like a travel itinerary: the lighter the load, the more freedom you have to dance on dunes or chase sunsets. When you’re picking out what to wear, ask yourself, “Does this piece need to be on my wrist for the entire day?” If the answer’s no, tuck it away.
Why Minimal Works
Minimal pieces stay on the surface. They don’t get buried in sand, and they’re easier to rinse after a dip. A sleek pendant with a single stone or a thin bar necklace can look just as glam while keeping the chance of scratches at bay.
If you’re looking to stay on trend, the latest 2026 jewelry trends show that minimal statement necklaces are making a comeback, especially with shell and pearl motifs. See 2026 jewelry trends for inspiration.
Choose Beach‑Friendly Materials
Materials matter. Look for metals like 14‑K gold or titanium that resist corrosion. If you’re going for a pop, consider a stone that can handle a splash—citrine, aquamarine, or a polished pearl. A quick look at the travel‑friendly jewelry guide shows how lightweight, durable pieces stay bright longer.
Use Protective Layers
Even the best metals can wear down with salt. A quick dip in fresh water after each swim and a light pat with a microfiber cloth can erase that gray film. If you’re heading to a pool, slip on a silicone bracelet or a small pouch to keep the chain safe.
Plan a “Beach‑Ready” Kit
Pack a tiny pouch with a soft microfiber cloth, a small bottle of mineral oil, and a strip of wax paper. Before you hit the waves, wipe your gold or silver with oil, then slide the pieces into the pouch. When you come back, a quick wipe and rinse will keep your shine intact.
So, next time you’re packing, think minimal, think durable, and think quick clean‑ups. The result? You’ll glide through a beach day without the worry that your jewelry might turn into a salty souvenir.
FAQ
Q1: What are the most damaging elements of beach water for jewelry?
Salt is the main villain, but chlorine and even the sweat from sunscreen add acids. When they sit on gold or silver, they strip the protective layer in minutes. Even a quick splash can start corrosion. The trick? Treat the metal as if it’s a delicate flower: rinse immediately and dry thoroughly. That simple step stops the gray film before it even starts.
Q2: How often should I rinse my pieces after swimming?
After any swim, dip each piece into fresh water, let it sit for 10‑15 seconds, then pat dry. Doing this right after exposure keeps salt from embedding. If you’re in a rush, a quick splash in a small cup of cool water works wonders. Think of it as a mini spa for your jewelry—every splash is a shield against tarnish.
Q3: Is there a quick on‑the‑go cleaning method that works for all metals?
If you’ve got a travel‑friendly set—think 14‑K gold, titanium, or a rhodium‑plated finish—you can use a thin layer of mineral oil or a dedicated jewelry spray. Just a pea‑sized drop on a clean fingertip, swipe, and it creates a moisture barrier. That’s fast, wipes clean, and works on gold, silver, and even most cubic zirconia. No extra tools required. You’ll notice a subtle shine that keeps your pieces looking fresh, even after a beach day.
Q4: Can I keep my pearls or cubic zirconia wet, and what to do if they get salty?
Pearls and cubic zirconia can handle a splash, but they’re not immune to salt. After swimming, rinse them in cool water, pat dry, then wipe with a soft cloth. If your cubic zirconia feels a bit cloudy, a gentle polish with a microfiber cloth will restore the sparkle. For pearls, a light dab of mineral oil helps keep the surface supple and prevents drying.
Q5: What’s the best way to store jewelry while staying on the beach?
When you’re on the sand, keep a small, breathable pouch next to your towel. Slide the pouch into a lightweight tote so you can reach it without digging through a bag. If you’re wearing a necklace, loop it through a hook or a small zip‑lock compartment to avoid tangles. Remember, a tidy storage spot reduces friction and keeps your gems in top shape.
Q6: Do protective coatings help, and which ones are best for travel pieces?
Protective coatings like rhodium plating, a durable gold‑plate finish, or even a quick spray of jewelry sealant can add a second skin that blocks salt and UV. For travel pieces, a rhodium‑plated finish is a top pick because it’s thin, lightweight, and highly resistant. If you’re a fashionista who loves bold statements, consider a case with a silicone seal that works as an extra shield.
Conclusion
We’ve unpacked the science, the steps, and the little hacks that keep your sparkle alive at the beach. The take‑away? Treat every splash like a quick spa session for your jewels.
First, rinse right after you splash—water, sweat, sunscreen all want to sneak in. A quick 15‑second rinse and a gentle pat with a microfiber cloth can stop salt from building up. Then, give your pieces a light coat of mineral oil; it creates a barrier that keeps the metal and stones shining.
Next, store them in a breathable pouch or a dedicated travel case. The case should seal against moisture and separate each item to prevent tangles. If you’re on a long trip, keep a mini‑case in your tote so you can grab a piece without digging.
Finally, keep a tiny “reset kit” in your beach bag: a small bottle of oil, a soft cloth, and a spare pouch. When you’re back, a quick wipe and rinse will finish the cycle, and your jewelry will look fresh for the next adventure.
So, next when you head to the shore, remember this simple ritual. You’ll protect the shine, investment, and the confidence that comes with wearing your pieces wherever you go.