

how to stack rings without scratching: a practical guide for jewelry lovers
Picture this: you're on a balcony in Milan, sipping espresso, and you notice your newly layered cocktail rings catching each other's edges, leaving a faint line on the band you just bought.
That tiny scratch feels like a betrayal, right? Especially when your rings are meant to tell a story of jet‑setting style, not a cautionary tale about clashing metal.
If you've ever wondered how to stack rings without scratching, you're not alone. Fashion‑forward travelers, busy CEOs, and runway‑ready missies all face the same dilemma: create a seamless stack that looks effortless, yet stays pristine.
The good news? A few simple habits can turn chaos into couture. First, think of each piece as a delicate petal—give it its own little breathing room. A tiny gap of a millimetre between bands prevents metal‑on‑metal friction, the main culprit behind those annoying nicks.
Second, consider the finish. Polished high‑gloss surfaces love to rub, while matte or brushed textures act like a soft cushion. Mixing finishes strategically lets the smoother ring glide over the rougher one, reducing contact points.
Third, the order matters. Heavier, wider rings should anchor the stack at the bottom, allowing lighter, daintier pieces to sit on top where they move less. This hierarchy keeps weight distribution even and limits sliding.
And don’t forget the little hero of any travel‑savvy jewelry lover: a soft pouch or individual compartment in your carry‑on. Even a quick pause to slip rings into a silk pouch before you hop on a flight can save hours of polishing later.
So, what’s the next step? Start by laying out your favorite rings on a flat surface, space them with a fingertip, and notice which pair tries to cling. Adjust, add a soft barrier, or swap the order until the stack feels like a gentle wave rather than a grinding stone.
By treating each ring with the same care you’d give a passport—protecting it, organizing it, and letting it travel with you—you’ll master how to stack rings without scratching and keep your sparkle runway‑ready, wherever the road (or runway) leads.
TL;DR
Want flawless, travel‑ready stacks? Learn how to stack rings without scratching by adding micro‑gaps, mixing finishes, and ordering pieces strategically and using soft pouches on the go.
Apply these simple steps before you jet, and your rings stay pristine, letting you sparkle confidently and effortlessly wherever the runway—or runway‑to‑runway—takes you.
Step 1: Choose the Right Surface and Preparation
First thing’s first – the surface you work on is the silent hero behind a scratch‑free stack. If you’ve ever laid your rings on a cold marble countertop and heard that tiny metallic rasp, you know the pain. We’re talking about the kind of annoyance that makes you pause mid‑flight and wonder why a simple ring feels like it’s grinding against a rock.
Pick a gentle surface
Grab something soft yet stable: a silk travel pouch, a microfiber cloth, or even a suede jewelry mat. These materials absorb micro‑movements and keep metal‑on‑metal contact to a minimum. Think of it like a plush runway for your rings – they glide, they don’t collide.
Pro tip: If you’re staying at a boutique hotel, ask for a spare silk pillowcase. Fold it into a square and you’ve got an instant, on‑the‑go ring‑friendly pad. It’s the kind of low‑effort hack that feels like a little secret you’ve just discovered.
Prep your rings
Before you even think about stacking, give each piece a quick clean. A microfiber cloth removes fingerprints and oils that can act like invisible sandpaper. For stubborn grime, a dab of mild soap and warm water does wonders – just be sure to dry thoroughly, otherwise you’re adding moisture to the mix, which can lead to oxidation over time.
Now, inspect the finishes. Polished high‑gloss rings love to slide over each other, creating friction. Matte or brushed finishes act like a cushion. Pair a glossy band with a matte one and you’ll notice the smoother glide – it’s almost like matching a silk scarf with a leather bag.
In our experience, the tiniest gap – roughly the width of a fingertip’s nail edge – between each band is enough to keep the metal from grinding. Lay your rings out on your chosen surface, space them with a gentle press of your finger, and you’ll see the “micro‑gap” in action.
Wondering where to store them when you’re not wearing them? our guide on storing jewelry without tangling walks you through travel‑ready solutions that keep each piece safe and ready for the next stack.
So, does the surface really matter? Absolutely. A smooth, soft base is the difference between a flawless stack and a scratched one that screams “oops.”
After the video, take a moment to test the surface with a single ring. Move it around gently; if you feel any resistance, swap the material. The goal is a whisper‑quiet glide, not a squeak.
Now that you’ve nailed the prep, think about how the stack will look with your summer wardrobe. Pairing a delicate rose‑gold band with a bright‑colored cocktail ring can become the centerpiece of a breezy beach outfit. Need inspiration? Check out some summer outfit ideas that keep you stylish in any weather – the right ring can turn a simple sundress into runway‑ready magic.
And if your next adventure involves a luxe safari, you’ll want your sparkle to survive dusty game drives and elegant evenings under the stars. Activentures Africa Safaris caters to the same high‑net, travel‑savvy women who appreciate flawless jewelry that endures both the wild and the polished.
Bottom line: choose a soft, stable surface, give each ring a quick clean, respect the finish, and leave a micro‑gap. It’s a tiny ritual that protects your investment and keeps your stack looking runway‑perfect, wherever you go.
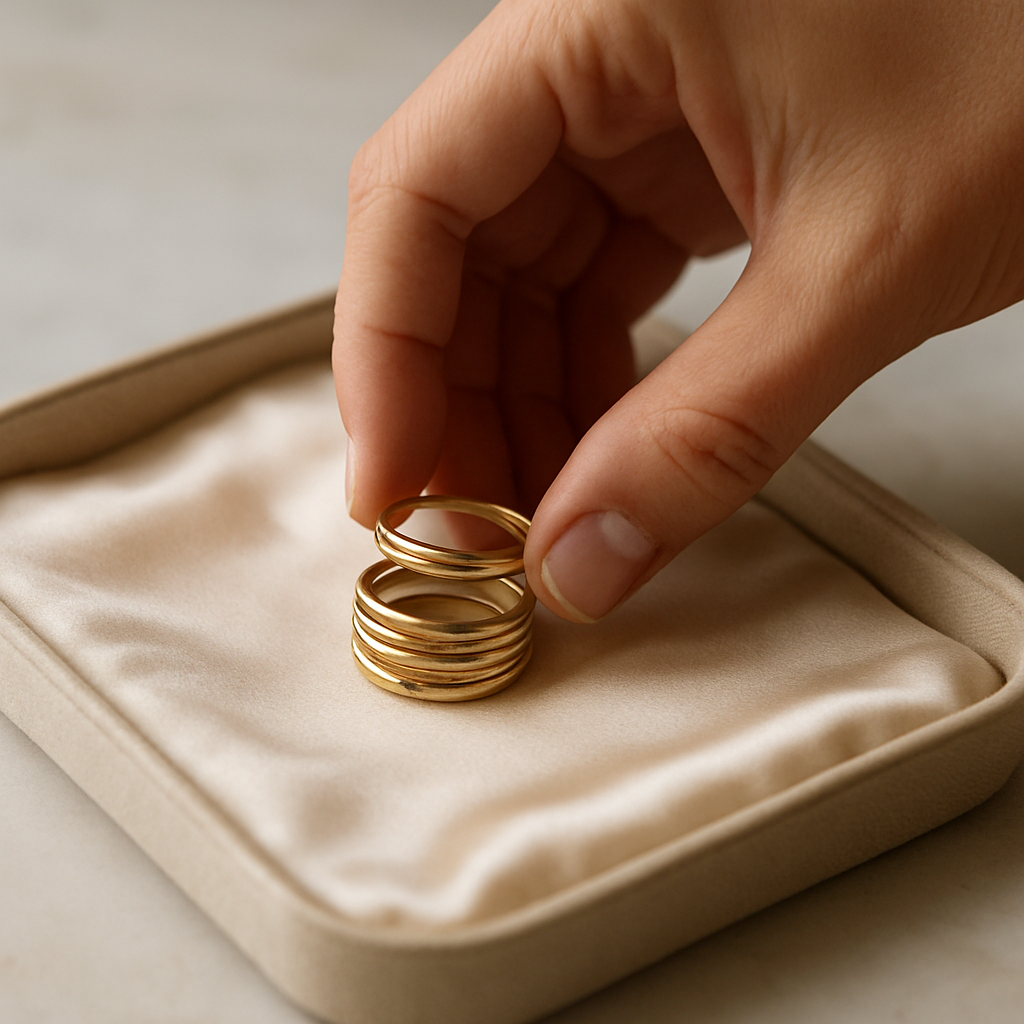
Step 2: Use Protective Barriers and Spacers
Okay, you’ve already cleaned the surface and gave each piece a little breathing room. The next thing most of us overlook is the tiny space‑fillers that keep metal from rubbing against metal. Think of them as the peacekeepers in a diplomatic summit – they step in, keep the tempers down, and make sure nobody gets a scar.
Do you ever pull a stack of rings out of a bag and hear that faint "clink‑clank" that signals a potential scratch? That sound is the metal saying, "Hey, we’re too close for comfort." The cure? A protective barrier or spacer that separates each band just enough to stop the friction, but not so much that the stack looks disjointed.
Here’s the quick‑fire rundown of our favourite barrier options, why they work, and how you can incorporate them into your travel routine.
1️⃣ Soft silk or velvet pouches
Silk and velvet are the plush pillows of the jewelry world. Slip each ring into its own mini‑pouch and you instantly create a soft cushion that absorbs any accidental bumps. The natural fibers also breathe, so you won’t get a sweaty mess in your carry‑on.
Pro tip: roll a 4×4‑inch silk scarf into a tight tube, tuck the ring inside, and you have a pocket‑size protector that fits in any designer handbag.
2️⃣ Silicone ring rolls or individual slots
Silicone is the unsung hero of travel accessories because it’s flexible, non‑abrasive, and resists static cling. A roll with individual slots lets you slide each ring in without any contact between neighbours. When you’re hopping from a Milan boutique to a Tokyo boutique, the roll stays snug in your luggage and keeps everything in place.
Because silicone is transparent, you can see each piece at a glance – perfect for those moments when you’re deciding which cocktail ring to wear for that rooftop soirée.
3️⃣ Leather or suede pockets
For the jet‑setting missy who loves a bit of luxe, a thin leather pocket lined with suede offers a sleek, sturdy barrier. The leather protects against external knocks, while the suede interior cushions the metal.
Just slip your stack into the pocket, zip it up, and you’ve got a ready‑to‑go “ring‑on‑the‑go” kit that looks as chic as your travel outfit.
So, which barrier should you pick?
| Barrier Type | Material | Why It Works |
|---|---|---|
| Silk/Velvet Pouch | Natural fibers | Soft cushion, breathable, easy to pack |
| Silicone Roll | Food‑grade silicone | Flexible, non‑abrasive, static‑free, transparent |
| Leather/Suede Pocket | Premium leather + suede lining | Durable exterior, plush interior, stylish |
Now that you’ve got the right barrier, it’s time to think about spacers – the tiny gaps you deliberately leave between rings. A fingertip‑wide gap (about 2‑3 mm) is enough to stop friction but still lets the stack look intentional.
How do you create that gap on the fly? Grab a small piece of washi tape, cut it into a ½‑inch strip, and tuck it under the lower band of each pair. The tape adds a thin, non‑metallic buffer that you can peel off later without leaving residue.
Another travel‑friendly trick is to use a thin polymer separator, like the kind you find in jewelry‑making kits. They’re basically tiny, transparent wedges that slide between rings and stay put even when you jostle your bag.
Does all this sound like extra hassle? Not really. Think of it as the pre‑flight safety check for your jewellery. You wouldn’t board a plane without buckling your seatbelt, right? The same logic applies to protecting your rings.
Let’s put it all together in a quick, actionable checklist you can run through before you zip your suitcase:
- Choose a barrier that matches your style – silk pouch for softness, silicone roll for practicality, leather pocket for luxe.
- Place each ring in its own compartment or slot.
- Insert a thin spacer (tape, polymer wedge) between any rings that tend to cling.
- Do a fingertip‑wide test: press gently; the rings should move independently, not grind together.
If you’ve ever watched a runway show where models’ jewellery stays immaculate through multiple outfit changes, you know the secret is meticulous preparation. The same principle works for your travel kit.
Ready to see it in action? Check out this short video that walks you through setting up a silicone roll and adding spacers on the go.
Give the video a quick watch, then pause and try the steps with the rings you’re packing for your next adventure. You’ll notice the difference the moment you open your suitcase – no scratches, just a sleek, ready‑to‑wear stack.
And just in case you need a visual reminder, imagine a sleek leather pocket resting on a marble vanity, each ring nestled in its own silk pouch, separated by a thin polymer wedge. That’s the picture‑perfect setup we aim for at Diamond Veneer Travel Jewelry.
Step 3: Apply Gentle Pressure and Proper Alignment
Now that your rings are cushioned and separated, the next trick is to make sure they sit just right when you slip them on. Think of it like arranging a stack of books – you want each one to rest lightly on the one below, not crush it.
Why gentle pressure matters
When you push a ring onto your finger with a hard, jerky motion, the metal can dig into the band next to it. That tiny abrasion is what turns a flawless stack into a scratched mess. By using a soft, steady press, you let the pieces settle into their natural groove.
Do you ever feel a little tug when you close a stack? That’s a sign the pressure is too aggressive. Light‑touch, like you’d place a feather on a pillow, keeps the finish smooth.
Step‑by‑step: applying the right amount of pressure
1. Prep your hand. Warm your fingers with a quick rub of a warm towel or run them under lukewarm water for a few seconds. Warm metal is more pliable, so it slides easier.
2. Position the base ring. Start with the heaviest or widest band at the bottom. Hold it steady with one hand.
3. Slide the next ring up. Using your thumb, nudge the second ring onto the base ring. Keep the motion smooth, no sudden snaps. If you feel resistance, pause and adjust the angle a degree or two.
4. Repeat up the stack. As you add each piece, check the gap with a fingertip. You should still see that 2‑3 mm space we talked about earlier.
5. Give a final, gentle press. Once the stack is complete, press down lightly on the top ring. The pressure should be just enough to lock the rings together without flattening the edges.
Aligning for long‑term safety
Even with perfect pressure, rings can drift if they aren’t aligned. The trick is to line up the natural “groove” of each band – most stackable rings have a subtle curve on the inside that helps them nest.
Here’s a quick visual cue: hold the stack up to the light. You’ll see a faint shadow where the inner curves meet. Align those shadows, and the stack will stay balanced even when you type or sip coffee.
If you notice a ring wobbling, it’s usually because the inner curve isn’t fully engaged. A tiny adjustment – rotate the ring a quarter turn – often solves the issue.
Using spacers for alignment confidence
Sometimes the metal itself is too slick to stay put. That’s where ring spacers become lifesavers. A thin polymer wedge tucked between two bands not only prevents friction, it creates a tiny “stop” that keeps each piece in the right spot.
Pick a spacer that matches the metal tone of your stack – clear silicone works for most, but a gold‑toned brass piece can add a subtle design flourish.
Quick checklist before you zip your suitcase
- Warm your fingers, then start with the heaviest band.
- Slide each new ring on with a smooth, steady motion.
- Check the fingertip‑wide gap after every addition.
- Use a spacer if any two rings feel like they’re slipping together.
- Give a final gentle press on the top ring and make sure the inner curves line up.
Does this feel like a lot? Not really – it’s the same routine you’d use to zip a designer handbag. A few seconds of mindful pressure now saves you hours of polishing later.
Remember, the goal isn’t to lock the stack like a safety‑pin; it’s to let the rings rest together, breathing just enough that they won’t grind. When you open your suitcase in a new city and the stack slides off the tray with a soft sigh, you’ll know you’ve nailed the technique.
So next time you’re about to board a flight, give those rings a gentle press, line up those curves, and let the spacers do the heavy lifting. Your sparkle will thank you.
Step 4: Secure the Stack with Safe Tools
Now that your rings are cushioned and aligned, it’s time to lock the look in place without turning your stack into a prison. Think of it like packing a delicate souvenir – you want it safe, but you also want to pull it out and wear it without a fight.
Choose the right protective barrier
Silicone rolls are the travel‑hero for most of our jet‑setting missies. They’re transparent, flexible, and won’t scratch metal. Slip each piece into its own slot, then snap the roll shut – you’ve got a non‑abrasive vault that slides into any carry‑on.
If you prefer a luxe feel, a thin leather pocket lined with suede does the same job while adding a touch of class. The exterior shields the rings from bumps, the suede interior cushions them. Both options keep your stack from rattling against other jewellery in the bag.
And for the ultra‑minimalist, a handful of silk pouches folded into tiny tubes works wonders. They’re breathable, lightweight, and look gorgeous peeking out of a designer tote.
Use adjustable spacers and guards
Spacers are the unsung side‑kicks that prevent metal‑on‑metal friction. A clear silicone spacer or a custom‑cut polymer wedge slides between any two bands that tend to cling. Because they’re thin, they don’t add bulk, but they create that fingertip‑wide gap we swore by in Step 3.
Ring guards work the same way, but they sit inside the band, subtly tightening the fit. They’re especially handy when temperature changes make your fingers swell or shrink during a long flight. A guard keeps each ring from spinning, which means fewer scratches.
For a real‑world example, Sylvie Jewelry notes that “ring spacers are a practical and effective way to keep wedding rings together, especially if your rings tend to slide or spin on your finger”. The same principle applies to cocktail stacks – a tiny buffer is all you need to keep the shine intact.
Pack a mini tool kit for on‑the‑go adjustments
Even the best‑planned stack can shift once you’ve been hopping from a Milan boutique to a Tokyo sky‑bar. A tiny kit with a pair of soft‑tipped tweezers, a mini ring sizer, and a few strips of washi tape gives you the power to fix gaps in seconds.
Here’s a quick how‑to:
- Lay the silicone roll on a flat surface.
- Use the tweezers to nudge a ring into place if it’s slightly out of line.
- Slide a pre‑cut washi‑tape strip under the lower band to create a micro‑spacer.
- If the stack feels loose, slip a guard inside the outermost band and re‑press gently.
All of this takes less time than waiting for airport security – and the result is a stack that slides off your finger with a sigh, not a scrape.
Quick travel checklist
- Pick a barrier that matches your style – silicone roll for practicality, leather pocket for luxe, silk pouch for feather‑light travel.
- Insert a clear spacer or polymer wedge between any rings that tend to cling.
- Pack a mini tool kit: tweezers, ring sizer, washi tape.
- Do a fingertip‑wide test before you zip the suitcase – the rings should move independently, not grind together.
- When you arrive, give the stack a gentle press to confirm alignment.
By treating your stack the way you’d protect a passport – with dedicated tools, thoughtful barriers, and a quick safety check – you’ll arrive at every destination with your sparkle intact. And remember, the best‑looking stack is the one that feels effortless, not forced.
Step 5: Maintain and Store Your Stacked Rings Safely
So you’ve got the perfect stack, the gaps are just right, and you’re ready to jet off. The last thing you want is to open your suitcase and find a tiny scar on your favourite cocktail ring. Trust me, we’ve all had that moment when the sparkle feels a little… off.
Let’s talk about keeping that stack looking fresh, whether you’re sipping espresso in Milan or heading home after a day of meetings. It’s all about a quick, repeatable routine that fits into the rhythm of a busy, stylish life.
Daily Maintenance Ritual
First thing in the morning, give each band a gentle wipe with a soft, lint‑free cloth. It sounds almost ceremonial, but a quick swipe removes overnight oils that can make metal‑on‑metal friction worse.
Next, run a warm water and mild dish‑soap dip for about 30 seconds. A soft toothbrush gets into those micro‑gaps between rings. Rinse with distilled water, then pat dry – no rough towel, just a plush microfiber.
And here’s a tiny habit that makes a big difference: after you’ve cleaned, slide a thin polymer spacer (a piece of washi tape or a clear silicone wedge) between any rings that tend to cling. It’s a one‑second fix that keeps the stack breathing.
Does this feel like a lot? Not really – it’s the same pause you take before you sip your cappuccino.
Travel‑Ready Storage Kit
When you’re on the go, think of your storage kit as a mini‑security vault for your jewellery. A silicone roll with individual slots is our go‑to – it’s transparent, flexible, and won’t snag metal.
For a touch of luxe, slip each ring into a silk pouch before tucking it into the roll. The silk adds a soft cushion, and the roll keeps everything from sliding around in your carry‑on.
Pro tip: keep a tiny resealable bag of a few pre‑cut washi‑tape strips in your kit. If a ring starts to rub during a long flight, just pop a strip in place – no tools needed.
Imagine yourself at a Parisian airport, pulling out that roll, and everything stays exactly where you left it. No frantic rummaging, no scratched metal.
Because we love making travel effortless, Diamond Veneer Travel Jewelry offers a curated roll that fits perfectly in a designer tote – it’s a subtle nod to the jet‑setting missy who values both style and safety.
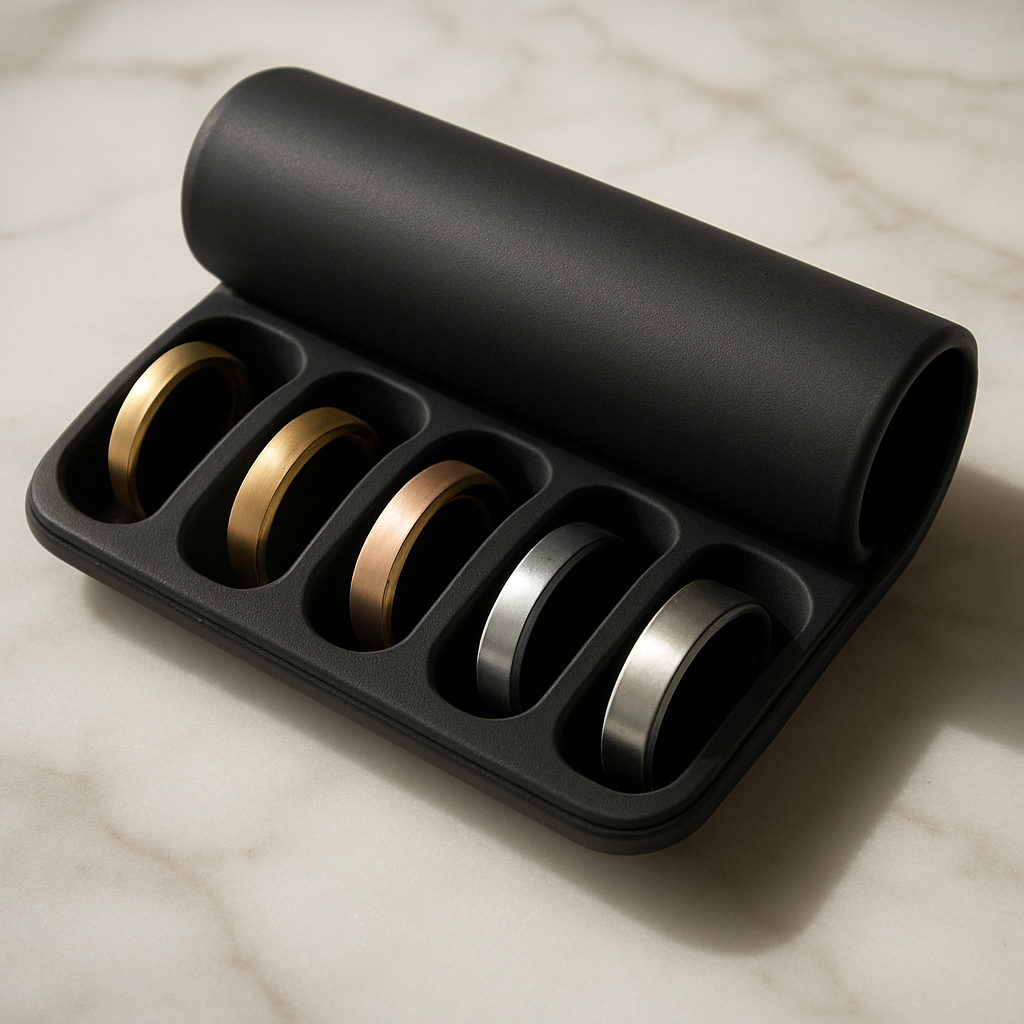
Protecting the Metals and Gemstones
One of the biggest culprits of scratches is mixing metals with very different hardness levels. As Dana Rebecca Designs explains, pairing a hard platinum band next to a softer yellow‑gold ring can create tiny abrasions over time. Matching metals can reduce scratching, so when you build a stack, try to stay within the same metal family or use a protective barrier between contrasting pieces.
Gemstones deserve the same love. Diamonds are tough, but softer stones like sapphire or quartz can get nicked if they rub directly against a high‑polish band. If you love colour, consider spacing a coloured stone with a tiny silicone wedge – it keeps the sparkle safe without compromising style.
Quick End‑of‑Day Checklist
- Give each ring a soft cloth wipe before bed.
- Store the stack in a dedicated silicone roll or individual silk pouches.
- Insert a thin spacer between any rings that feel snug.
- Check that the roll’s slots are clean and free of debris.
- Make sure the roll sits flat in your suitcase so nothing shifts.
When you follow this simple checklist, you’ll notice the difference the moment you slide the stack back on – it feels like a gentle sigh, not a grind.
So, next time you’re packing for a runway event in Milan or a business trip to Tokyo, remember: a little daily care and a smart travel kit keep your stack as flawless as the first day you put it together. Your rings will thank you, and your style will stay runway‑ready, wherever 2026 takes you.
Frequently Asked Questions
How can I stack rings without scratching when I’m traveling?
Think of each ring like a tiny traveler that needs its own seat. Start by giving every piece a micro‑gap—about the width of a fingertip—so they don’t rub directly. Slip each band into a soft silk pouch or a silicone roll before it lands in your carry‑on. A thin piece of washi tape or a clear polymer spacer works wonders as a buffer, and a quick fingertip test before you zip up guarantees the stack stays smooth.
What’s the best material for a protective barrier?
Silicone wins the runway‑ready vote because it’s flexible, non‑abrasive, and won’t cling to metal. It’s also transparent, so you can see each ring at a glance. If you prefer a luxe feel, a silk or velvet pouch gives a plush cushion that breathes. The key is to choose something that won’t create static or hard edges—both of which can turn a gentle glide into a scratch.
Do certain metals or gemstones need extra care?
Yes. Harder metals like platinum can act like a tiny sandpaper against softer gold or rose‑gold bands. Keep them together with a silicone wedge or a thin leather insert. Gemstones such as sapphire or quartz are more delicate than diamonds, so a tiny spacer between a high‑polish band and a colored stone prevents nicking. In short, match metals where you can, and always separate a softer stone with a non‑metal buffer.
How often should I check my stack for movement?
Make it a habit—once in the morning and once before you go to bed. A quick press with your thumb should feel like a gentle sigh, not a grind. If any ring feels stuck, pull it apart, add a spacer, and test again. This two‑check routine only takes a few seconds but catches shifts before they turn into permanent marks, especially after long flights or hotel stays.
Can I use everyday items as spacers?
Absolutely. A half‑inch strip of washi tape, a tiny piece of silicone from a makeup brush cap, or even a sliver of a soft rubber eraser can serve as a temporary wedge. The trick is to choose something thin, non‑adhesive, and residue‑free. Slip the makeshift spacer under the lower band, press gently, and you’ll notice an instant reduction in friction—no fancy tools required.
What’s the quickest way to clean my rings before stacking?
Mix a few drops of mild dish soap with warm water, dip a soft toothbrush for 30 seconds, then rinse with distilled water. Pat dry with a microfiber cloth—no rough towels. A clean surface eliminates grit that acts like sandpaper, so the rings glide over each other more easily. If you’re on the go, a pre‑moistened jewelry wipe does the trick in a pinch.
Is there a preferred way to store stacked rings when I’m not wearing them?
Yes—store them flat, not piled. A silicone roll with individual slots or a silk pouch keeps each band separated, while a dedicated jewelry box with soft compartments prevents accidental contact. If you’re squeezing them into a suitcase, lay the roll flat so gravity doesn’t force rings together. A quick visual check before you close the lid ensures nothing shifts during travel.
Conclusion
We've walked through everything from prepping your vanity to the tiniest polymer wedge, so by now you know exactly how to stack rings without scratching—even when your suitcase is bouncing between continents.
Think about the last time you opened your carry‑on and heard that dreaded clink‑clank. Now picture those same rings sliding off your finger with a gentle sigh, thanks to a fingertip‑wide gap and a soft silicone roll tucked in your bag.
So, what's the next move? Grab a silk pouch or a silicone slot, slip each band in, add a whisper‑thin spacer where the metals meet, and give the stack a light press. Do a quick fingertip test before you zip up – if the rings move independently, you’ve nailed it.
Remember, the routine only takes a minute, but the payoff lasts the whole trip. A clean surface, a breathable barrier, and a tiny gap are the three pillars that keep your sparkle runway‑ready.
Ready to travel light and shine bright? Let your next adventure start with the confidence that your rings will stay flawless, no matter how many airports you conquer.
At Diamond Veneer Travel Jewelry we’ve designed travel‑friendly rolls that embody these principles, giving you a ready‑made, luxe solution that saves you time and protects every precious band.