
How to Travel with Jewelry: Practical Tips for Safe Journeys
Picture this: you’re strolling through the sun‑kissed streets of Positano, the Mediterranean breeze twirling your hair, and you notice a flash of sparkle from your wrist. It’s your favorite necklace, but a sudden jostle in the crowded market makes you worry – will that gorgeous piece survive the journey?
That uneasy feeling is something every fashion‑forward traveler knows all too well. We’ve all been there, clutching a clutch‑size jewelry box, wondering if our precious accessories will make it through airports, hotel safes, and spontaneous beach picnics without losing their luster.
In our experience, the secret isn’t just about buying a pretty case; it’s about creating a simple, repeatable routine that protects each piece before you even zip up your suitcase. Think of it as a pre‑flight checklist, but for your sparkle.
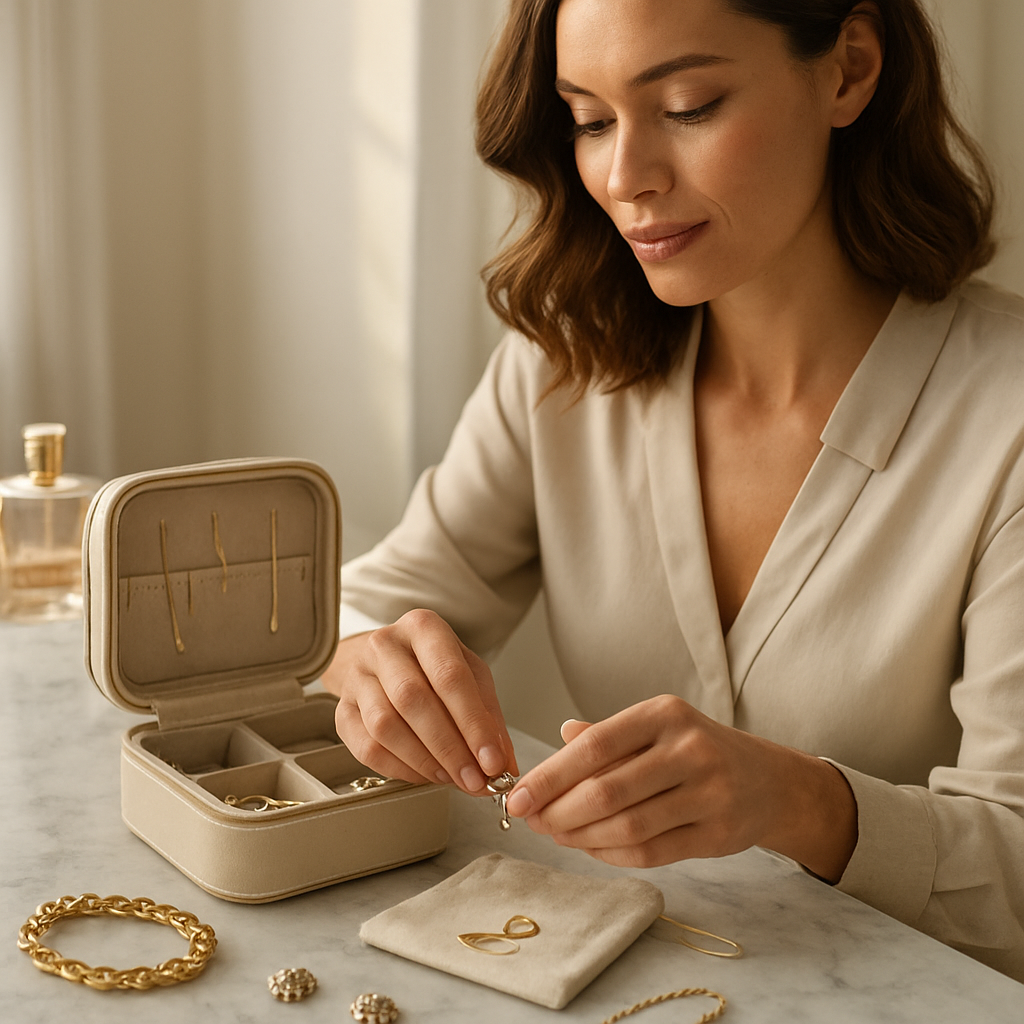
First, sort your jewelry by type – necklaces together, rings in another pouch, and delicate bracelets in a soft‑lined compartment. This prevents tangles and scratches. A practical tip we swear by: roll each necklace around a clean piece of tissue paper before placing it in a zip‑top bag. The paper acts like a cushion and keeps the chain from catching on clasps.
Second, consider the environment. On a humid cruise, a tiny silica‑gel packet tucked inside your case absorbs moisture, keeping copper‑toned pieces from tarnishing. When you’re headed to the beach, a quick rinse with fresh water and a soft cloth removes salt that can dull even the toughest cubic zirconia.
Third, think about security. Many travelers wonder if they can wear jewelry through airport checkpoints. The short answer: you can, but it’s safer to store valuables in a TSA‑approved lockable pouch. That way, you avoid the frantic “did I leave my earrings on the conveyor?” moment.
For a step‑by‑step guide on keeping necklaces tangle‑free, check out our detailed tutorial How to Pack Necklaces for Travel Without Tangling. It walks you through the exact folding technique that saves minutes and saves sparkle.
And because sun and rain can be as unforgiving as a rough baggage handler, pairing your jewelry protection plan with a stylish, high‑quality travel umbrella can make a world of difference. A sleek umbrella not only shields you from the elements but also provides a discreet spot to store your case while you sip coffee at a sidewalk café. Learn more about premium umbrellas that complement a luxe travel wardrobe at Umbrello.
So, are you ready to travel with confidence, knowing every piece of your jewelry arrives as dazzling as the day you packed it? Let’s dive in and make your next adventure sparkle.
TL;DR
Traveling with jewelry doesn’t have to be stressful—by sorting pieces, using a TSA‑approved pouch, and protecting them from salt and humidity, you keep every sparkle intact.
Follow our quick checklist and you’ll arrive at your destination looking effortlessly chic, confident that each gem traveled as truly safely as your passport.
Step 1: Assess the Value and Necessity of Your Jewelry
Before you even think about packing, take a moment to ask yourself: does this piece truly deserve a seat in your suitcase, or is it better left safely at home? That little pause can save you a lot of heartache later.
First, pull out every item you plan to travel with and lay them out on a clean surface. Look at each necklace, ring, and bracelet and consider two things – monetary value and sentimental weight. A high‑end diamond pendant may be worth protecting with a TSA‑approved case, while a costume piece you only wear on Instagram might be fine in a simple pouch.
Ask yourself, "If I lost this, would I feel a pang of regret, or would I shrug it off?" That emotional gauge is often more useful than the price tag. For many of our fashion‑savvy travelers, a heirloom ring carries stories that no insurance policy can replace.
Make a quick value matrix
Grab a piece of paper or a notes app and draw a two‑by‑two grid. On the horizontal axis, label "Monetary Value" low to high. On the vertical, label "Sentimental Value" low to high. Place each piece in the appropriate quadrant. The top‑right corner – high value, high sentiment – is your "must‑protect" zone. The bottom‑left is the "leave‑it‑behind" zone.
Seeing your jewelry laid out like this helps you decide what truly needs a dedicated travel case, what can go in a soft pouch, and what you might simply wear on the plane to avoid packing altogether.
Consider the destination
Where are you heading? If you’re jetting off to a tropical island, salt and humidity will be your biggest foes. A delicate gold chain might tarnish faster than you can say "sun‑kissed". In a bustling city like Paris, the risk is more about theft or accidental snags on crowded metros.
For beach getaways, we often recommend rinsing pieces with fresh water before you travel and tucking a silica‑gel packet inside your case. For urban adventures, a lockable, TSA‑approved pouch is worth the extra step.
Assess the logistics of your trip
Think about how many outfit changes you’ll have and how many accessories you actually need for each. Packing a dozen earrings for a three‑day trip is overkill. Instead, pick versatile studs that pair with multiple looks – that way you reduce bulk and keep your case lighter.
Also, look at your itinerary. If you have a formal dinner on night two, earmark a statement necklace and a pair of elegant earrings. For casual sightseeing days, stick to simple studs or a thin bracelet that won’t catch on a backpack strap.
Remember, every extra piece adds weight, takes up space, and raises the chance of tangles. The less you bring, the easier the whole process becomes.
Protect what matters most
Once you’ve identified your "must‑protect" items, treat them like mini‑travel companions. Wrap each in tissue paper, then place them in a soft‑lined compartment of a dedicated travel jewelry case. If you’re using a pouch, make sure it’s padded and has a zip‑top seal.
For pieces that are both high‑value and high‑sentiment, consider a dual‑layer approach: a hard‑shell outer case for impact protection, and a plush inner sleeve for scratches. This is the kind of detail we see our clientele appreciate – it’s a small extra step that pays off big when you open your suitcase at the destination.
And if you’re ever unsure, ask yourself: would I feel comfortable wearing this through airport security, or would I rather keep it locked away? When in doubt, lock it up.
Now that you’ve sorted out what truly needs protection, you’re ready for the next step – figuring out how to pack those pieces so they survive the journey untouched.
Step 2: Choose the Right Travel Case and Packing Method
Now that you’ve decided which pieces are worth bringing, the next puzzle piece is the container that will keep them safe.
Do you ever open a suitcase and find a tangled mess of chains, or worse, a missing earring? If that sounds familiar, you’re not alone – the right case makes all the difference when you’re learning how to travel with jewelry.
Why the case matters
Travel‑ready cases aren’t just pretty boxes; they’re engineered to protect delicate metal, stones, and clasps from jostles, humidity, and accidental knocks. A recent roundup of the best travel jewelry cases highlighted features like soft microfiber linings, zip‑around closures, and modular compartments that keep each piece in its own little cradle (Travel + Leisure).
Features to look for
- Separate compartments or zip‑top pockets for earrings, rings, necklaces, and bracelets.
- Soft interior (micro‑fleece, suede, or padded fabric) that won’t scratch gold, silver, or gemstones.
- Secure, full‑length zipper or lockable flap – you want confidence that nothing slips out during a security check.
- Lightweight, TSA‑friendly silhouette that fits in a personal item or carry‑on.
- Optional accessories: removable earring cards, ring bars, or elastic straps for necklaces.
When you’re juggling a week‑long itinerary, those little extras turn a chaotic pile into a quick‑grab system.
Packing method that actually works
Start by sorting your jewelry into categories: studs and hoops together, necklaces in one batch, bracelets in another. Slip each group into its dedicated pocket or pouch. For extra peace of mind, wrap delicate chains in a piece of tissue or a soft cloth before placing them in a zip‑lock bag – the bag acts like a mini‑sleeve and prevents the chain from catching on a clasp.
Short‑term hacks can be a lifesaver, too. Thread thin necklaces through drinking straws, then seal the straw ends with a tiny rubber band. It’s the trick many seasoned travelers swear by, and it’s mentioned in a practical guide on carrying jewelry while on the move (Bryn Mawr). Buttons, pill boxes, or even a small fabric swatch work the same way for earring backs.
Once everything is compartmentalised, place the case in the top‑most section of your carry‑on or in the personal item you keep under the seat. That way you can grab it for a quick security inspection without digging through layers of clothes.
Diamond Veneer’s take
At Diamond Veneer Travel Jewelry we design cases that feel like a luxury clutch yet function like a security‑clearance‑approved vault. The soft‑lined interiors keep your pieces from rubbing, while the lockable zippers give you that extra layer of confidence on a bustling train platform or a crowded airport lounge.
Because our customers – the globe‑trotting fashionistas and high‑net travelers – often need to switch looks on the fly, we’ve added removable earring cards and ring bars that snap in and out in seconds. Slip the case into your personal bag, and you’ve turned “how to travel with jewelry” from a nerve‑wracking chore into a smooth, almost invisible step in your packing routine.
Quick‑check checklist
- Pick a case with at least three dedicated compartments.
- Make sure the interior is soft‑lined and the zipper closes all the way around.
- Wrap or bag delicate chains before they go into a pocket.
- Use straw‑or‑button tricks for necklaces and earrings.
- Store the case in a carry‑on or personal item, never checked luggage.
Give yourself five minutes before you zip the suitcase, run through this checklist, and you’ll land at your destination with every sparkle exactly where you left it.
Step 3: Secure Travel Documents and Insurance for Your Jewelry
Imagine you’re breezing through security, your passport and boarding pass already in hand, and suddenly you think, “Did I remember the paperwork for my jewellery?” That little pause is what trips up even the savviest traveller.
First thing’s first – treat your jewellery paperwork like you would your passport. Pull out a slim travel wallet or a zip‑top pouch and tuck the following inside: a printed copy of your insurance policy, the policy number, the insurer’s phone‑line, and a one‑page inventory of every piece you’re taking.
Why a written inventory matters
It sounds boring, but having a list with photos, appraisals, and purchase receipts is pure peace of mind. If a bag gets misplaced or a clasp snaps, you can instantly point to that document and speed up any claim.
Robinson’s Jewelers breaks down the process step‑by‑step – they suggest snapping a quick photo of each item, noting the metal, carat weight, and any hallmarks, then saving the files in a cloud folder that you can pull up on the go.How to document your jewelry collection
Choosing the right insurance
Most standard homeowners policies only cover a few thousand dollars of jewellery – not enough for a designer bracelet or an heirloom ring. That’s where a dedicated jewellery‑insurance rider or a Personal Articles Floater (PAF) comes in.
Travelers offers a clear “jewellery and valuable items” add‑on that can be customized to the exact value of each piece. The coverage typically runs 1‑2% of the item’s worth, so a $5,000 ring might cost you $50‑$100 a year. You can even bundle it with your travel insurance for an extra layer of protection.Travelers jewellery insurance
To get started, follow these three quick steps:
- Make a list of every item you’ll travel with – include photos, appraisals, and purchase dates.
- Contact an agent (or use the online quote tool) and ask for a Personal Articles Floater or Valuable Items Plus endorsement.
- Print the policy declaration page and stash it with your travel wallet.
Keep your documents safe on the road
Don’t rely on a single paper copy. Store a digital version on your phone (encrypted if possible) and a backup on a secure cloud service like Google Drive. If you’re staying at a hotel, slip the paper copy into the hotel safe and keep the digital file on your phone – two copies, two chances.
And a quick tip: label the zip‑pouch with “Jewellery Docs – Do Not Remove” so even a rushed fellow traveller knows it’s important.
Quick‑check before you board
- Inventory sheet printed and saved on your phone.
- Insurance policy number and insurer’s 24‑hr claim line written on a card.
- Travel wallet or pouch sealed and placed in your carry‑on.
- Backup photos stored in cloud, accessible without Wi‑Fi (offline mode).
By treating your jewellery paperwork with the same care you give your passport, you eliminate the “what‑if” anxiety and keep the focus on enjoying the journey.
So, grab that travel wallet, snap those photos, and lock in a policy that covers the sparkle you’re bringing along. You’ll land at your destination knowing every glittering detail is accounted for – and that’s exactly how to travel with jewelry without a hitch.
Step 4: Airport and In‑Transit Security Strategies
Picture this: you’re standing in line for security, your passport ready, but your mind is racing about that delicate gold pendant you just slipped into your travel pouch. That flutter of “Did I remember everything?” is exactly why we treat airport time like a mini‑security drill for our jewelry.
Keep your valuables in sight, never in checked baggage
First rule of travel jewelry? Keep it with you. The TSA explicitly advises that valuable items stay in your carry‑on so you can watch over them. A checked bag can get lost, roughed up, or end up on the other side of the world without a trace. Slip your case into the personal item under the seat – that way you can pull it out for a quick glance before the scanner.
And if you’re travelling with a partner, make a habit of holding onto each other’s jewelry pouches. A gentle “I’ve got your case” at the gate can save you from a panic‑inducing surprise later.
Ask for a private screening if you’re uneasy
Feeling nervous about putting your sparkle in the bin? You can politely request a private screening. TSA officers are trained to handle that, and it lets you keep the pouch in your hands while they scan it. It’s a small step that adds a huge dose of confidence.
Honestly, most travelers never think to ask, but it’s worth it the second you hear the metal detector beep and wonder if a ring will set it off.
Strategic packing for the X‑ray belt
When you place jewelry in the bin, it’s easy to lose a tiny earring or let a chain tangle. Here’s a quick hack: zip each piece (or a pair of earrings) into its own small zip‑top bag before it hits the conveyor. GIA experts recommend this because you can see everything at a glance and the plastic adds a thin layer of protection.
For necklaces, thread each chain through a drinking straw or a piece of plastic wrap – a trick we love from Hauser’s Jewelers’ travel tips that keeps knots at bay. The straw acts like a mini‑sleeve; you’ll thank yourself when you unzip the bag at the gate and find the chain still smooth.
Dress for discretion
Airport crowds are a magnet for opportunistic fingers. If you’re wearing something that screams “high‑net sparkle,” consider a subtle layer – a lightweight scarf over a statement necklace, or a watch tucked under a sleeve. It doesn’t mean you can’t flaunt your style, just that you’re not broadcasting it to every passerby.
Even a simple trick like turning your engagement ring inward can make it less noticeable while still keeping it safe on your finger.
Stay vigilant during the transit hustle
From the boarding gate to the taxi stand, keep your case within arm’s reach. If a fellow traveller offers to hold your bag, smile and say, “Thanks, but I’ve got it.” That’s not rude; it’s a reminder that jewelry theft often happens in the blink of an eye.
When you’re on a connecting flight, repeat the quick‑check: is the pouch still zipped? Are the zip‑top bags sealed? A two‑second glance can prevent a lost earring before you even step off the plane.
Quick‑check checklist for the security line
- Zip each jewelry piece or pair into its own bag.
- Place the bags inside your TSA‑approved travel case.
- Hold the case in your hand or keep it in the personal item under the seat.
- Ask for a private screening if you feel uneasy.
- Keep a discreet eye on your case while walking through the terminal.
Follow that list, and you’ll glide through security with the same calm you feel when you’re sipping espresso at a café, not sweating over a missing stud.
So, next time you’re prepping for take‑off, remember: the right mindset, a few simple hacks, and a trusty travel jewelry case are all you need to make the airport feel less like a minefield and more like another runway for your style.
Step 5: Destination Handling and Local Regulations
You've made it through security, your case is snug in your carry‑on, and now the real adventure begins: the destination. Every city, resort, or border has its own quirks, and a little homework can turn a potential nightmare into a smooth, sparkle‑friendly stop.
Know the customs allowance before you land
In the United States, travelers get an $800 personal exemption for all goods—including jewellery. Anything above that triggers a 6% duty, whether you wear it on the plane or stash it in your suitcase. That rule applies whether the piece is a gold chain, a diamond pendant, or a vintage brooch you picked up in Marrakech.U.S. customs duty guidelines break it down nicely, and the key takeaway is simple: declare everything that pushes you over the $800 limit.
So, what should you do? Before you even book your flight, make a quick inventory of the pieces you plan to bring. Add up the fair market values—use receipts, appraisals, or even a quick online lookup. If the total sits comfortably under $800, you can breeze through customs with a casual “no, thank you” when asked about duty. If you’re over, be ready to fill out the CBP declaration form and pay the modest 6% tax.
Declare, don’t hide – the myth‑busting moment
There’s a persistent rumor that wearing jewellery exempts you from duty. It’s not true. CBP officers assess the value of everything you have on you, worn or packed. Trying to sneak a $5,000 necklace past the line can land you in a polite but firm conversation, and possibly a fine.
Being upfront actually speeds things up. Hand the officer your printed inventory (or a digital copy on your phone) and let them do the math. You’ll walk away feeling confident, and you won’t have to wonder later if a customs officer is eyeing your case.
Local storage tricks that keep your sparkle safe
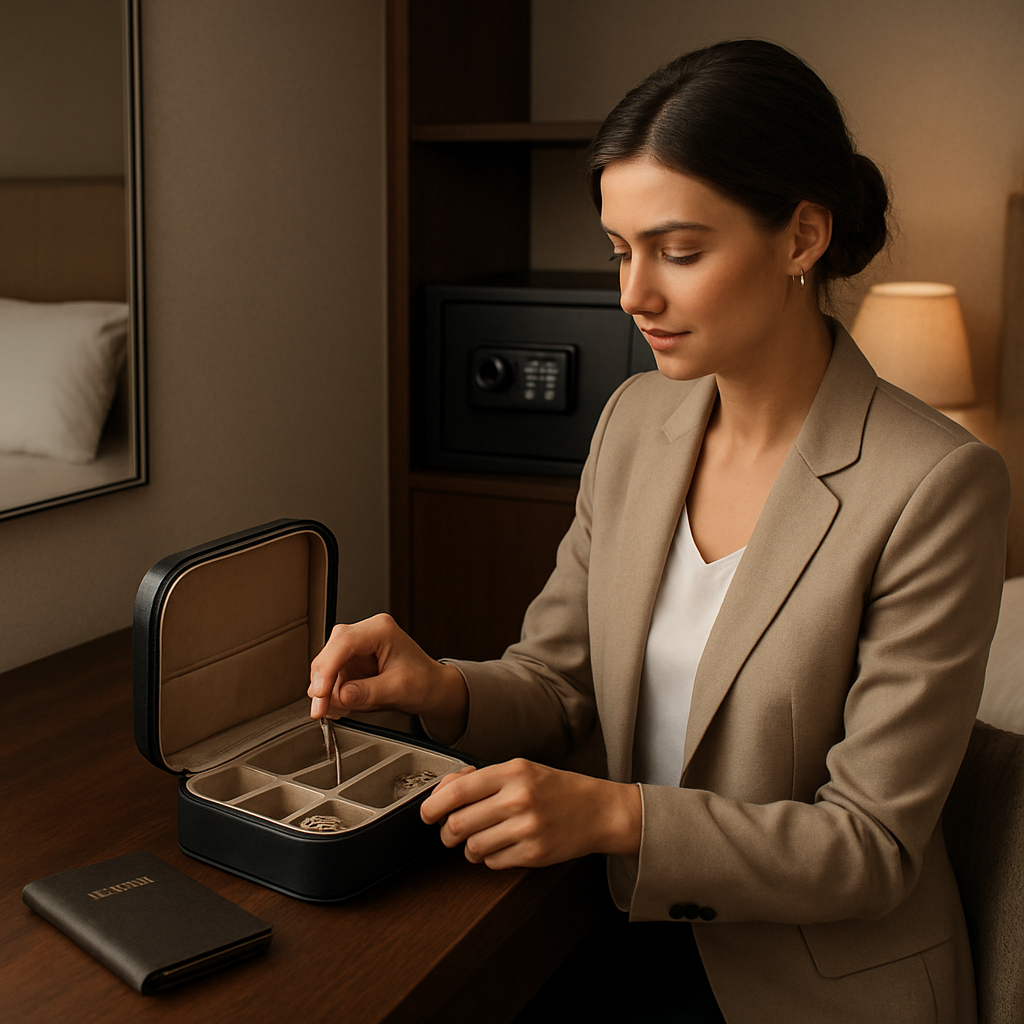
Once you’ve cleared customs, the next challenge is where to keep your jewellery while you explore. Hotels often provide a safe, but the reality is mixed. In many upscale resorts the safe is more of a decorative box than a fortified vault. Here’s a quick routine:
- Test the safe with a cheap item first – a pen or a pair of sunglasses. If the lock feels flimsy, don’t trust it with your heirloom.
- Ask the front desk if there’s a secured deposit box or a manager‑only safe. Some boutique hotels have a “guest vault” that’s rarely advertised.
- If none of the above feels solid, repurpose your travel jewellery case as a portable safe. Slip it into your carry‑on, lock the zipper, and keep it under the seat or in the overhead bin where you can see it.
For beach destinations, think about a waterproof zip‑top pouch inside your case. Salt water and sand love to sneak into tiny gaps, and a simple plastic barrier can stop a nasty corrosion surprise.
And don’t forget local regulations. Some countries, like the United Arab Emirates, require you to declare any jewellery above a certain value even if you’re just a tourist. A quick glance at the embassy’s travel advisory page can save you an awkward stop at the airport on return.
Stay on the safe side with travel‑focused insurance
Even with all the precautions, the unexpected can happen – a misplaced bag, a hotel safe that malfunctions, or a sudden theft. That’s why a travel‑specific jewellery insurance rider is worth the modest premium. Travel jewellery insurance insights stress that worldwide coverage protects you whether you’re strolling the streets of Paris or catching a ferry in Bali.
Keep a digital copy of your policy, your inventory photos, and the insurer’s 24‑hour claim line in the same travel wallet you use for passports. If you ever need to file a claim, you’ll have everything at your fingertips and the process will feel less like a nightmare.
So, what’s the final checklist before you step off the plane?
- Calculate total jewellery value and compare it to the $800 exemption.
- Prepare a concise inventory with photos and receipts.
- Declare honestly at customs – no hidden tricks.
- Test the hotel safe or use your travel case as a portable vault.
- Pack a waterproof zip‑top pouch for beach or humid climates.
- Have travel‑specific insurance details stored digitally and in print.
Follow these steps, and you’ll master how to travel with jewelry without a single sparkle lost to bureaucracy or bad luck.
Step 6: Post‑Trip Care and Storage
Welcome back home. That sigh of relief when you finally unzip your suitcase? It’s also the perfect moment to ask yourself, did any of your sparkle survive the adventure?
We’ve all been there – you pull out a favorite necklace, only to find a dull spot or a tiny dent. The good news? A few mindful steps can turn that post‑trip panic into a quick, painless routine.
1. Do a quick visual audit before you even unpack
Before you toss everything onto the floor, lay each piece on a soft cloth and give it a once‑over. Look for loose stones, bent clasps, or any discoloration. Spot something off? Jot it down – the sooner you notice, the easier the fix.
Why does this matter? Hamilton Jewelers points out that early detection saves you from costly repairs later how to safely store fine jewelry.
2. Clean with the right solution
Gold, silver, and plated pieces each have their own chemistry. A gentle mix of ten parts warm water and two parts dish soap works wonders for gold without stripping its shine. For silver, avoid anything with sulfur – no bleach, no wool‑felt polishing cloths. Rinse thoroughly and pat dry with a lint‑free towel.
If you’ve been to a beach destination, a quick rinse with fresh water removes salt that can cause corrosion. A soft toothbrush can coax out grit from intricate settings without scratching.
3. Choose the right storage home
Now comes the “where do I put it?” question. Here are three options that cover most scenarios:
| Option | Best For | Key Tip |
|---|---|---|
| Travel‑case‑as‑portable‑vault | Frequent flyers, high‑net travelers | Lock the zipper and keep it in your nightstand drawer. |
| Hotel safe (tested) | Short‑term stays in boutique hotels | Place a cheap item first to gauge lock strength. |
| Home jewelry box with silica‑gel | Long‑term storage after a trip | Swap out the gel packet every 6 months. |
Our own Diamond Veneer Travel case doubles as a sleek portable vault. The lockable zip and soft interior keep pieces from rubbing together, and its low‑profile design fits neatly under a mattress or in a bedside drawer.
4. Protect against humidity and odors
Even after you’ve cleaned, lingering moisture can sneak in during a rainy flight or a humid cruise. Slip a silica‑gel packet into each compartment of your case – they’re cheap, reusable, and absorb up to 40 % of their weight in water.
For perfume‑heavy trips, store jewelry away from scented clothing. Fragrances can accelerate tarnish on silver.
5. Document any changes
Take a quick photo of each piece after cleaning and note any repairs needed. This visual record pairs nicely with the inventory you already kept for insurance. If something goes missing on the way home, you’ll have solid proof for a claim.
6. Re‑pack with a fresh mindset
When it’s time to pack for the next adventure, start with a clean slate. Use the same “roll‑and‑bag” method you loved on the road, but add a fresh silica‑gel packet and a new set of soft cloth wraps.
TravelPro reminds us that a dedicated jewelry organizer prevents damage and saves space how to pack jewelry. Treat your post‑trip routine as part of that organizer – it keeps the habit alive.
So, what’s the final checklist?
- Visual audit each piece before unpacking.
- Clean with metal‑appropriate solution.
- Store in a lockable case or tested safe.
- Add silica‑gel packets for moisture control.
- Photo‑document condition for insurance.
- Re‑pack using the same tidy method.
Follow these steps, and you’ll return home with every sparkle exactly where it left it – ready for the next runway, brunch, or sunset sail.
Conclusion
After all the prep, the real magic of how to travel with jewelry is simply showing up feeling confident.
We’ve walked through sorting, case selection, security hacks, customs, and post‑trip care, so you’ve got a complete loop. If any step felt overwhelming, remember it’s okay to start small – a single silica‑gel packet or a quick visual audit can make a world of difference.
Imagine slipping your Diamond Veneer Travel case into the overhead bin, knowing each piece is cushioned, labelled, and ready for the next adventure. That peace of mind lets you focus on the runway, the café terrace, or the sunset sail instead of worrying about a missing earring.
So, what’s the next move? Grab your checklist, give each piece a once‑over before you zip the suitcase, and lock that zipper. Treat the routine like a quick coffee break – brief, rewarding, and something you’ll want to repeat.
When you get home, snap a photo, stash the case where you can see it, and let the habit roll into your next trip. The sparkle stays, the stress fades, and you’ve mastered how to travel with jewelry like a seasoned globetrotter.
Remember, the habit you build today protects not just your gems, but the confidence you carry wherever you roam.
FAQ
What’s the best way to pack delicate earrings for a flight?
Wrap each earring pair in a soft tissue or a piece of lint‑free cloth, then pop them into a tiny zip‑top bag. Slip that bag into the dedicated earring compartment of your Diamond Veneer Travel case, or any TSA‑approved pouch with a zip. The extra layer keeps the backs from scratching the studs and stops them from disappearing in the bin. A quick visual check before you close the bag seals the deal.
Do I need a TSA‑approved case, or can I use any pouch?
You’ll feel better with a case that’s TSA‑friendly, because security agents can see the zip and won’t ask you to open it mid‑screen. That said, any sturdy zippered pouch that’s labelled “jewelry” works in a pinch – just make sure the zipper runs all the way around and the fabric is soft enough not to snag clasps. In our experience, the lockable zipper on the Diamond Veneer Travel case saves a lot of nervous energy at the checkpoint.
How can I protect my jewelry from humidity on a cruise?
Humidity loves metal, especially on a sea‑borne itinerary. Tuck a silica‑gel packet in each compartment of your travel case – they’re cheap, reusable, and soak up up to 40 % of their weight in moisture. If you’re heading to a tropical cruise, seal delicate chains in a zip‑lock bag before they go into the case; the plastic barrier blocks salt spray. A quick rinse with fresh water and a soft cloth once you’re back on shore finishes the job.
Should I declare my jewelry at customs, and how?
Yes – you should always declare jewelry that pushes you over the duty‑free allowance. Grab the inventory sheet you printed for insurance, pull up the total value, and tell the customs officer you have items worth $X. They’ll either stamp the form or ask for a quick photo; having that list ready saves you from hunting through your bag later. Most airports even let you scan the document on a tablet, so keep a digital copy handy.
What’s a quick checklist I can run through before boarding?
Here’s a five‑step quick‑check you can run in the bathroom before you zip the suitcase: 1️⃣ Verify every piece is inside a zip‑top bag or its own pocket. 2️⃣ Make sure the case zipper closes fully and the lock clicks. 3️⃣ Slip a silica‑gel packet into each compartment. 4️⃣ Double‑check your insurance inventory is in the travel wallet. 5️⃣ Give the case one last shake – if nothing rattles, you’re good to go.
Can I wear my valuable pieces during travel, or should I keep them in my bag?
Wearing a favorite piece can be tempting, but remember the security line is a high‑traffic zone. If the item is valuable or heirloom‑grade, keep it in your lockable case under the seat; you can still admire it during the flight by pulling it out for a quick look. For lower‑value accessories, a simple stud or a thin chain can stay on your wrist or ear – just make sure the clasp is secure and the metal won’t set off the detector.
What should I do if a stone loosens or a clasp breaks mid‑trip?
If a stone starts to wiggle or a clasp refuses to close, treat it like a mini‑emergency kit. First, locate a spare earring back or a tiny piece of clear tape in your travel pouch – that’ll keep the stone in place until you can see a jeweler. Next, use a gentle jewelry repair pen (the kind that applies a clear epoxy) to secure the setting for the rest of the trip. Finally, note the issue in your inventory sheet so you can follow up when you’re home.