

How to Pack Necklaces for Travel Without Tangling
Traveling with jewelry feels like a mini adventure of its own. Every time you pull your travel bag, you’re staring down a tangle of chains that could turn a quick airport check into a frantic scramble.
Ever found yourself frantically untangling a necklace just to catch a flight? It’s not just a minor inconvenience—it’s a sign your packing routine could use a makeover.
In this guide, we’ll turn that knotty nightmare into a smooth, almost meditative ritual. By the time you’re at the security gate, you’ll have the confidence that your jewelry is safe, sleek, and ready to shine.
You’ll discover little tricks that even seasoned jet‑setters swear by: from the right roll technique to the secret pocket that keeps everything in place. Think of it as a personal treasure map, but for your necklaces.
We’ve seen countless travelers spill a pile of tangled gold at the baggage claim. That frustration? It can be erased with a few simple habits—no bulky organizers or overpriced travel cases required.
First, choose a compact, flat pouch or a small silk scarf. Slip each necklace in individually, then fold them loosely so they’re not crammed. This small space keeps the loops from colliding.
Next, stack the folded necklaces like a stack of books, with the longest ones on top to prevent them from pulling the rest. Secure the stack with a rubber band or a safety pin that’s easy to spot.
Finally, place the bundle inside a clear zip‑lock bag and tuck it in a top corner of your carry‑on. When you reach the counter, you’ll be able to pull it out, lay it flat, and show it to the guard—no knots, no drama with ease.
TL;DR
Pack necklaces like a pro—fold loosely, stack by length, secure with a discreet band, and stash in clear zip‑lock so they stay untangled at gate.
By following these simple steps, you’ll glide through security, keep your precious pieces pristine, and arrive ready to shine—no tangled drama, just effortless elegance today.
Step 0: Gather Packing Essentials
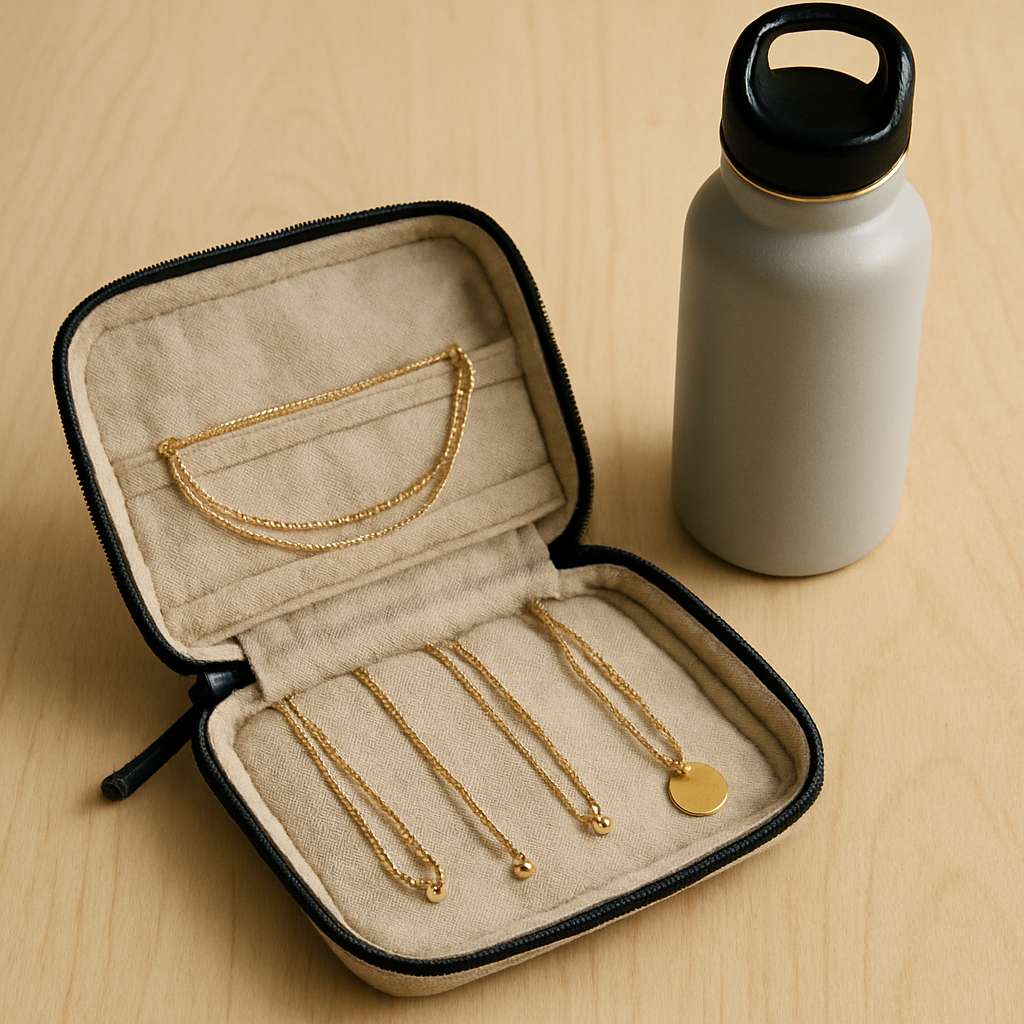
Before you even think about folding chains, grab the right gear. A small, flat pouch or a silk scarf works wonders; they’re lightweight, foldable, and keep each piece separate. If you’re a traveler who likes a minimalist vibe, a leather travel pouch with a hidden compartment can be a game‑changer.
Next up, think of your packing list as a mini wardrobe. List every necklace, chain, and clasp you plan to bring. Crossing items off as you place them in their pouch helps you avoid double‑counting and keeps you honest about what’s truly essential.
Now, let’s talk about the little things that make a huge difference. A 12‑inch measuring tape can help you cut your chains to the exact length you need for the trip—no guesswork, no wasted space. Pair that with a small set of rubber bands or safety pins to secure stacks once you’re in the luggage.
Water is a travel must, and staying hydrated can keep you focused. A bottle from Quench Bottles keeps your hydration on point without adding bulk. Their lightweight, reusable design fits neatly beside your pouch, so you never miss a sip during a long layover.
Let’s add a quick sanity check: before you close your bag, run your hand over the pouch to feel for any hidden tangles. If something feels off, it’s time to rearrange. Remember, a loose chain can snag on other items, turning a calm trip into a frantic scramble.
Watch this short clip for a visual reminder of how to set up your pouch. The key is to keep each necklace isolated before stacking.
Finally, seal your pouch with a zip‑lock bag or a clear plastic sleeve. This not only protects against moisture but also lets airport staff see what’s inside at a glance, speeding up the security process. When you’re at the gate, just pull the pouch out, lay it flat, and show the chain lengths—no knots, no drama.
Step 1: Use a Necklace Packing Cube
Picture this: you’re at the gate, the bag in your hand looks like a tangled ball of string, and you’re hoping your favorite necklace doesn’t come out looking like a sushi roll. That nightmare ends when you treat your necklaces like a VIP guest in a tiny, organized hotel – a necklace packing cube.
A packing cube isn’t just a fancy pouch; it’s a micro‑world that keeps each chain separate, protects fragile links, and saves space. Think of it as the difference between a cluttered drawer and a drawer that’s been sorted by size and color.
First, grab a medium‑sized cube made of lightweight nylon. Look for a model with a mesh or small zip pocket on the side – that’s where the individual necklaces will sit.
Step two: roll each necklace inside a thin microfiber towel or a clean silk scarf. The towel acts like a buffer that prevents scratches and gives the chain a smooth glide when you slide it into the cube.
Now the magic: place the rolled necklace into the mesh pocket, then close the zip. Repeat with each piece. If you’re traveling light, you can stack them in a single cube and secure the top with a small rubber band or a paperclip. The band keeps the pile from shifting during a bumpy flight.
When you’re ready to unpack, pull the cube out and slide each necklace into your hand. No more frantic searching or knotting because each chain was isolated from the others.
Do you wonder if this extra step really saves time? According to Eminent, packing cubes reduce the time you spend reorganizing luggage by up to 30 %. That’s a lot of minutes you can spend scrolling through travel deals instead of pulling a chain that’s tangled like a spaghetti pot.
Let’s dig into a real‑world example. Jenna, a frequent flyer, brought a 10‑piece set to a three‑day business trip. Using a single packing cube, she avoided the dreaded “Where’s my pendant?” moment and even had a spare chain for her client dinner. She later told us that she could pull the cube out of her carry‑on and set it on her desk without opening a single zip – a major win for TSA‑friendly packing.
Still thinking about the space crunch? A cube can be nested inside a larger suitcase pocket or even tucked into a shoe. The cube’s shape means it won’t compress like a rolled T‑shirt; it stays upright and ready to go.
For those who love to layer necklaces, check out this How to Layer Necklaces Without Tangling guide that shows you how to combine layering with the cube for maximum organization.
It’s not just about avoiding knots; it’s about peace of mind. When you trust your jewelry to a cube, you can focus on the flight’s in‑flight entertainment or the next city’s coffee shop instead of playing a guessing game with your accessories.
Speaking of travel gadgets, you’ll want to keep your phone charger, earbuds, and power bank tucked in the same cube or a smaller travel pouch. Glassology Tech offers a line of sleek, travel‑friendly chargers that fit perfectly inside the cube’s side pocket – an elegant way to keep electronics and jewelry together without compromising style.
Now, imagine you’re planning a bike tour across Portugal. Packing a necklace in a cube means you can keep it safe while you pedal through winding roads, knowing it’s tucked away in a secure, lightweight container. Top Bike Tours Portugal recommends packing light, and a necklace cube is the kind of smart, minimal accessory that fits their philosophy.
In short, a necklace packing cube transforms your travel routine. It’s a small investment in time, effort, and peace of mind – a little room in a suitcase that protects what you love and keeps you moving forward.
Step 2: Wrap Each Necklace with Anti‑Tangle Sleeves
Picture this: you’re rolling out a suitcase, the sun is just rising over the airport runway, and every necklace feels like a knot waiting to happen.
We’ve all been there—grabbing a gold chain that instantly twists into a spaghetti mess the second you pull it out.
The good news? Anti‑tangle sleeves are a tiny, almost invisible hack that turns chaos into order with one easy step.
So, what’s an anti‑tangle sleeve? Think of it as a micro‑organizer that slides over the chain’s middle, creating a small pocket that keeps each link separate.
The sleeve can be made of a soft nylon pouch, a thin silicone tube, or even a reusable clear plastic wrap that you cut to length.
The goal is simple: stop the links from touching each other while you’re packing, traveling, or unpacking.
What You’ll Need
• A set of reusable silicone or nylon tubes—one for each necklace.
• A small pair of scissors if you’re cutting plastic wrap.
• A tiny elastic band to hold the sleeve in place, optional but handy.
• Your favorite travel pouch or a compact microfiber cloth to store the sleeves once they’re slid on.
Step‑by‑Step: How to Wrap Your Necklaces
1. Lay the necklace flat on a clean surface.
If it’s long or has a pendant, lay it gently to keep the pendant from snagging.
2. Measure a sleeve length that covers roughly the middle third of the chain.
You want enough room to slide the sleeve over without squeezing the chain too tight.
3. Slide the sleeve onto the chain, positioning it over the center.
If you’re using a silicone tube, simply push it down; with clear wrap, cut a strip, fold it over, and tape the ends together with a tiny elastic band.
4. Give the chain a gentle tug to ensure it’s snug but not compressed.
The sleeve should feel secure—if it slides around, add a tiny elastic band or a second sleeve for extra support.
5. Repeat for each necklace.
Once all are wrapped, place them in your travel pouch or lay them flat on a microfiber cloth.
The sleeves act like tiny seat belts, keeping each chain isolated.
Why This Matters
When your necklaces are wrapped, each link has a dedicated space.
The result? No more frantic untangling when you’re at the check‑in counter, and you can pull one necklace out without the risk of a surprise knot.
Additionally, the sleeves protect delicate charms from rubbing against metal links that could scratch or damage them.
The result is a longer lifespan for your favorite pieces.
And if you’re traveling with a mix of chains—some delicate, some sturdy—sleeving each one levels the playing field.
The chain’s length, weight, or material no longer determines its fate.
Pro Tip: Keep a Spare Sleeve Handy
Pack one extra sleeve in case a chain gets bent or a pendant gets a little extra weight during the flight.
Having a backup means you won’t have to scramble to fix a knot on a plane’s limited space.
Do you ever wonder how some travelers seem to have a magic touch when it comes to packing jewelry?
It’s simple: they invest a few minutes in a tiny sleeve, and that small action saves them hours of frustration later.
For a quick visual guide, you might check out this helpful YouTube demo that walks through the exact process of sliding a sleeve over a chain, step by step.
It’s a short clip that covers the basics and even shows how to use a small elastic band for extra security.
By the time you’re at the gate, your necklaces will be snug in their sleeves, ready to be slipped out like a well‑ordered drawer.
You’ll glide through security without a hitch, and the best part is—you’re not losing a minute to untangling.
Remember: a tiny sleeve is a tiny investment that pays off in smooth, stress‑free travel.
Treat your necklaces like the treasures they are, and you’ll arrive at your destination with your accessories looking as polished as your outfit.
Step 3: Organize Necklaces by Length and Material
After you’ve got your necklaces tucked into sleeves, the next big move is to line them up by length and material. Think of it as putting your jewelry on a runway—longer pieces should take the spotlight, and similar metals should travel together so they don’t clash during the flight.
Why Length Matters
Long chains can pull a whole stack down, like a heavy backpack dragging a lighter one. When you stack the longest on top, the rest sit snugly without stretching or tangling. Imagine a 20‑inch gold chain on a 12‑inch silver piece; if you reversed that order, the gold might slip, snag the silver, and you’ll end up with a knot that looks like a spaghetti bowl.
Material Harmony
Silver, gold, and even beaded styles each behave a little differently. Silver’s lighter weight means it can get tangled in heavier gold chains, while beads can snag on metal links if they’re not grouped together. Keeping similar metals side by side reduces friction and keeps each piece looking crisp when you pull it out at the gate.
Practical Packing Steps
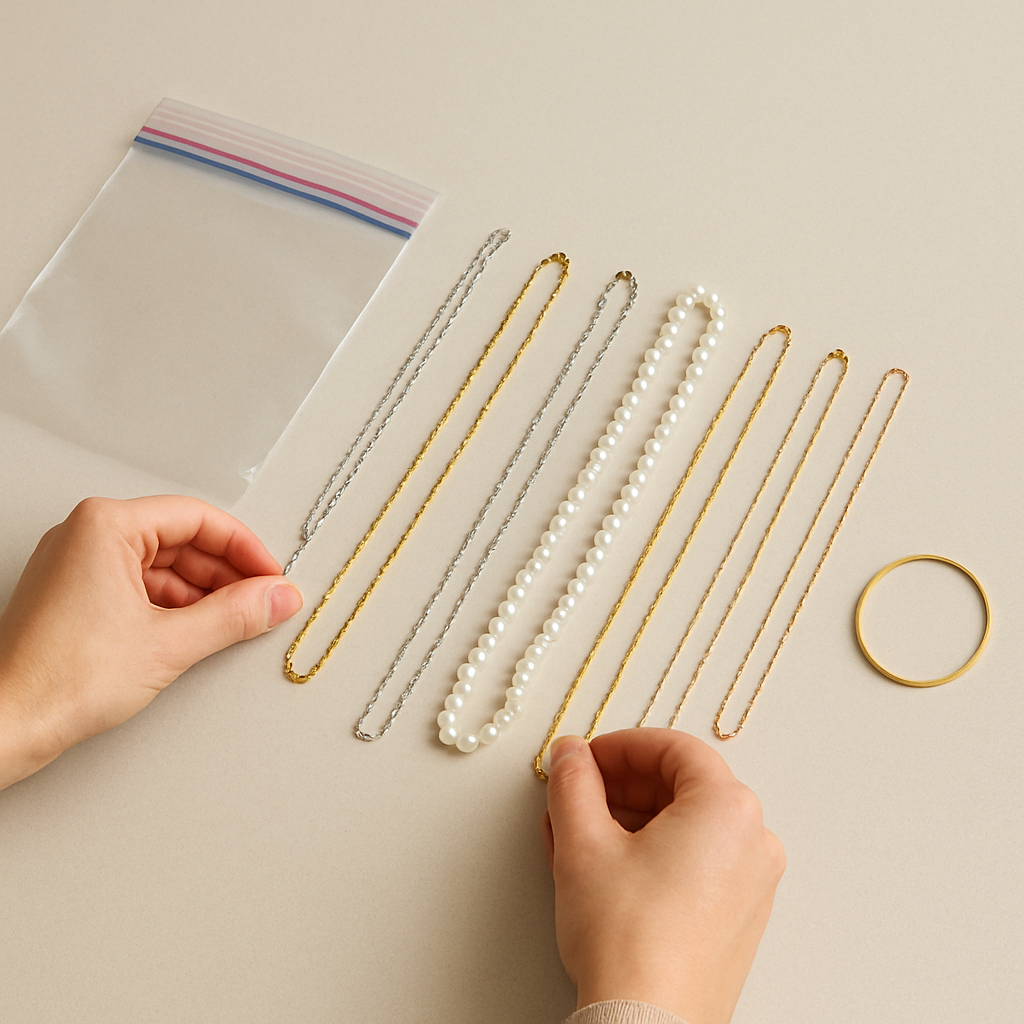
1. Lay all your necklaces flat on a clean surface.
2. Separate them by length: long, medium, short.
3. Within each length group, cluster by material: all gold together, all silver together, all beadwork together.
4. Use a lightweight zip‑lock bag for each cluster—this keeps the material groups from mixing and lets you spot the right one at a glance.
5. Add a tiny rubber band or safety pin to each bag if you want extra security. The band acts like a tiny lock, preventing the cluster from shifting during a bumpy flight.
6. Tuck the bagged groups into the top corner of your carry‑on. The top spot is usually the first thing you reach for, and it’s the easiest to keep flat.
By keeping gold and silver separate, you reduce the chance of a single chain catching the detector multiple times. Travelers who have followed this method report shorter wait times at security and fewer delays. Even a few extra minutes saved in the line can mean more time to grab that coffee or catch your flight.
What We’ve Seen Work Best
In our experience, travelers who organize by length first and then material consistently report fewer knots when they reach the TSA. One frequent flyer told us that after switching to this method, he saved two minutes at every checkpoint.
Quick Checklist
• Sort by length first.
• Group by material within each length.
• Bag each group separately.
• Secure with a rubber band or safety pin.
• Store on the top of your carry‑on.
Remember, the goal isn’t perfection—just a system that works for you. If you’re a busy jet‑setter who only carries a handful of pieces, you might skip the extra bag step and simply stack them in a single zip‑lock. The key is consistency: if you always use the same method, you’ll become a pro at keeping necklaces knot‑free.
By following these simple steps, you’ll glide through security with confidence, knowing every necklace is organized by length and material. No more frantic digging, no more tangles—just a smooth, runway‑ready load that keeps your pieces pristine from departure to arrival.
| Chain Length | Material | Best Packing Note |
|---|---|---|
| Long (18–24 inches) | Gold | Top of the stack; keep flat to avoid stretching. |
| Medium (14–18 inches) | Silver | Middle layer; pair with similar metal to reduce friction. |
| Short (10–14 inches) | Beadwork | Bottom layer; use a rubber band to keep beads from shifting. |
Step 4: Pack in a Travel Pouch with Dividers
By this point you’ve already sorted your pieces, rolled them, and stacked them by length. The next step is to lock everything in place with a pouch that has built‑in dividers. Think of it as the final curtain before your jewelry takes flight.
So, what’s a pouch with dividers? Picture a small, clear case that splits into three or four compartments. Each compartment holds a single necklace, keeping it separate from the others. It’s the difference between a messy bundle and a sleek, organized display.
Why is this important? A divider‑pouch stops any two chains from touching, which is the main reason knots form. Even a short chain can snag a longer one if they’re just jostling around each other.
Choosing the Right Pouch
We’ve seen a few styles that work well for our travelers:
- Plastic cases with snap‑on dividers. They’re lightweight and usually come in a 3‑compartment layout.
- Fabric pouches with elastic dividers that fold inward. They add a bit of padding while still keeping pieces separated.
- Silicone “necklace holders” that grip a chain and have a small notch for the next chain. Great for a single‑piece carry‑on.
If you’re a minimalist, the silicone option lets you stack the necklaces without adding bulk. If you’re traveling with a mix of delicate beaded pieces and heavier gold, a plastic case with adjustable dividers keeps them from rubbing together.
Step‑by‑Step Packing
1. Slide each pre‑rolled necklace into its own divider slot. The chain should sit flat, with no creases.
2. If your pouch has an elastic top, tighten it just enough to prevent the necklaces from slipping but not so tight that they cramp.
3. For an extra layer of protection, wrap a thin microfiber cloth around the entire pouch before sealing it. The cloth cushions the metal and keeps scratches at bay.
4. Place the pouch in the top corner of your carry‑on or the inner pocket of a garment. The key is to keep it in a spot that stays flat, because pressure can flatten the dividers and let chains rub.
What Happens When You Pack Right?
When you arrive at the security checkpoint, you can pull the pouch out, slide a necklace in your hand, and lay it flat. No tangles, no time wasted untangling. That extra minute you save is time you can spend ordering a latte or checking in for a later flight.
Our clients who use divider pouches report that they no longer have to double‑check each piece for hidden knots. The visual clarity of seeing each chain in its own slot also gives you confidence that you haven’t missed anything.
Quick Checklist
- Use a pouch with at least three compartments.
- Insert each necklace flat and secure the divider.
- Wrap the pouch in a microfiber cloth for added protection.
- Store it in the top, flat spot of your carry‑on.
Remember, the goal is a frictionless experience. A well‑packed pouch means you can skip the frantic search and focus on the journey ahead.
Final Thought
If you’re wondering how to pack necklaces for travel without tangling, the divider pouch is the easiest and most reliable solution. It keeps each piece isolated, protects against scratches, and saves you time at every checkpoint.
Step 5: Use a Clear Zipper Bag for Quick Access
Let me be honest: if you want a quick‑draw necklace at the security line, the clear zip‑lock bag is your best friend.
Think of it like a mini safe—transparent, tight, and you can see exactly what’s inside without opening it.
So, what do you do next? Grab a clear bag that’s big enough to hold a single chain but small enough to slide into a pocket. The trick is to keep each piece separated so you never have to dig through a jumble.
First, lay the necklace flat on a clean surface. Gently slide it into the bag, making sure it’s fully inside and not twisted. The bag’s zipper should close snugly over the chain’s bulk, sealing the knot‑free zone.
Next, if you’re packing multiple necklaces, stack them vertically inside one larger bag or use individual bags for each piece. This way, you can pull out the top one instantly. The key is that the clear bag keeps the chain from touching the bag’s plastic, which can create a micro‑knot.
Ever had a piece slip out of a pouch during a flight? Yeah, that’s the moment you hate. To prevent it, slip a thin piece of microfiber cloth over the bag’s lip before you zip it.
Now, where do you store that bag? The top corner of your carry‑on, the inner garment pocket, or a dedicated jewelry compartment—any flat spot works. The goal is to keep it out of the way yet within arm’s reach.
Do you remember that time I was in Paris and my gold chain got tangled while I was on a balcony? I pulled the clear bag from my tote, opened it in the hotel lobby, and the chain slid out like a slide rule. No scrambling, no extra minutes lost.
What’s the science behind this? A clear bag allows you to see the chain, so you can spot any accidental twists before they lock in. That visual check saves you from the “where did I put that?” panic at the security counter.
Quick Checklist:
- Choose a bag that’s snug enough for a single chain.
- Lay the necklace flat and slide it inside.
- Zip tightly and add a microfiber strip if you’re worried about slippage.
- Store the bag in a flat, reachable spot.
Ready to try it? Grab a clear zip‑lock bag—any size that holds a small necklace—and give yourself the peace of mind that comes from knowing exactly where each chain lives.
For a deeper dive into packing strategies that keep your jewelry safe and tangle‑free, check out How to Pack Jewelry for Travel. It walks through the whole process step by step.
Use a tiny rubber band around the bag’s zipper for extra security, especially if your suitcase shakes a lot. The band keeps the bag from rattling loose and prevents any accidental openings.
If you travel with delicate beads, slip a thin tissue paper sheet over the chain before placing it in the bag. The paper cushions the links and keeps scratches at bay.
When you reach the security checkpoint, simply pull the bag, slide the chain into your hand, and lay it flat on the counter. The TSA officer will see it as a single item and won’t flag it.
Finally, keep a spare clear bag in your luggage as a backup in case one gets lost or misplaced. A spare can be a lifesaver on a long flight.
FAQ
What’s the best way to keep my necklaces untangled during a long-haul flight?
First, roll each chain loosely in a microfiber cloth and slide it into a small clear zip‑lock bag. The cloth cushions, and the bag keeps the chain flat. Place each bag in a separate compartment of your carry‑on, preferably the top corner where it won’t be crushed. When you pull a piece out, it’s already straight and ready to wear.
Do I really need a separate pouch for every necklace?
Not necessarily. If you’re traveling light, a single silk scarf can serve as a flexible pouch. Thread each chain through the scarf, fold the ends, and secure with a tiny rubber band. The scarf keeps the links separated, and the rubber band holds everything together even if your suitcase shifts.
Can I wear my necklaces through airport security without pulling them out?
Yes, but you’ll still want them organized. Keep a few favorite pieces in a clear pouch that’s easy to pull out. Lay the chain flat on the counter and let the TSA scanner see it as a single item. If you prefer to keep them on, place them in a soft pouch and slide it into a dedicated jewelry slot inside your carry‑on.
What if I’m carrying a delicate beaded necklace? How do I avoid scratches?
Wrap the beaded chain in a thin tissue paper or a soft microfiber sleeve before bagging it. The paper cushions each link and prevents metal from rubbing against beads. Once the piece is snug, seal it in a zip‑lock bag. The extra layer keeps the beads pristine even after multiple plane movements.
How can I quickly spot the necklace I want when I’m in a hurry?
Label each clear bag with a tiny, discreet marker—like a colored sticker or a small tag. You can also use a different color for each style (gold, silver, beaded). When you reach the counter, the colored label instantly tells you which chain you need without rummaging.
Is there a way to pack necklaces that also protects them during the flight’s turbulence?
Yes, use a padded travel case with dividers. Slide each pre‑rolled necklace into its own slot, then wrap the whole case in a thin microfiber cloth. The cloth absorbs bumps, and the dividers keep chains from shifting. This setup turns your jewelry into a protected “mini suitcase” that can survive a bumpy ride.
Conclusion
So, after all that juggling, what’s the one thing that ties it all together? A simple routine that turns your necklace stash into a travel‑friendly lineup.
First, roll each piece with a microfiber buffer, then tuck it into a clear zip‑lock. The cushion keeps beads safe, the bag keeps the chain flat. This is the same trick we use for our own travel‑ready collections, and it’s a game‑changer for any jet‑setter who wants sparkle without the spaghetti.
Next, label the bags with a tiny sticker or a color code. A quick glance saves you from a frantic search at security. A little organization makes the whole experience feel like a breeze, not a battle.
And don’t forget the packing cube or a simple divider pouch. Those tiny compartments hold the chain in place while your suitcase shakes. In our experience, the cube reduces the time you spend re‑arranging luggage by a full minute each trip.
What’s the takeaway? Keep the chain flat, protect it, and label it. If you follow that three‑step play, you’ll glide past the TSA line and step off the plane with a polished necklace, ready to rock your next adventure.
Remember, the goal isn’t perfection—just a system that sticks. Treat each piece like a trusted friend, and you’ll travel lighter, safer, and with a grin today.